
A cheerful mix of plush texture, geometric shaping, and colorful ornaments makes this Merry Mod Crochet Christmas Tree Pillow Pattern a standout holiday accent. The finished pillow is built from layered tree motifs, stuffed tree pockets, a sunny star, and multicolored lights. It is a fun seasonal project for crocheters who enjoy shaping and assembling three-dimensional designs, and it makes a festive gift or cozy addition to a sofa, reading nook, or holiday display. For another small seasonal project, pair it with this crochet bear ornament pattern.
Why You’ll Love This Crochet Project
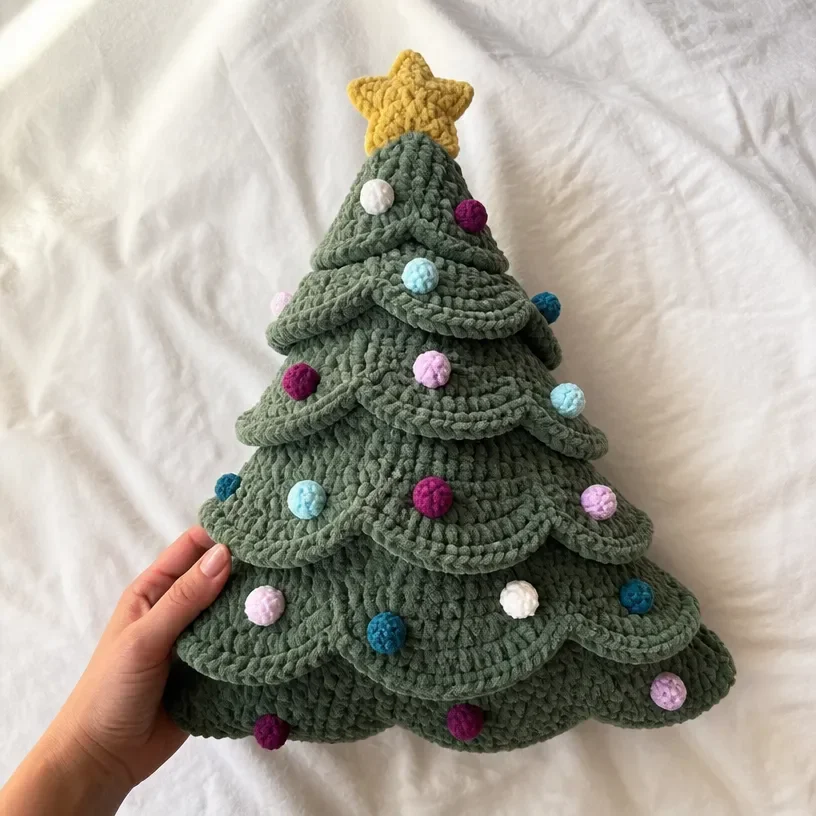
- It creates a dimensional design. Six tree motifs become three double-layer pieces, which are then joined to form six stuffed tree pockets.
- The colors feel festive and playful. Smoky green forms the tree, while Soft Sunshine, Snowy White, Bleached Aqua, Every After Pink, Velveteal, Burgundy Plum, and Smokey Blue create a cheerful ornament palette.
- It builds useful crochet skills. You will practice single crochet, increases, decreases, foundation single crochet, joining, whipstitching, backstitching, and working in back loops.
- It makes a memorable handmade gift. The pillow suits holiday decorating, seasonal birthdays, winter housewarmings, and cozy Christmas gift baskets.
- It has strong display appeal. The raised tree shape and plush Bernat Blanket texture give it visual interest even when placed among simple decorations.
Crochet Mimi Tip: Keep the six tree motifs together as you work so you can compare their shaping and identify any row-count differences before assembly. You may also find Day Of The Dead Crochet Pillow Pattern useful.
Pattern Overview
This project includes six Smoky Green tree motifs, two matching stars, and 18 small lights three in each of six contrast colors. The tree motifs are paired into three double-layer pieces. Those pieces are stitched through the middle to create six tree pockets, lightly stuffed, and closed along the bottom edges.
The larger hook is used with Bernat® Blanket™ for the tree base, while the smaller hook is used with Bernat® Velvet Minis™ for the star and lights. The pattern uses US crochet terminology.
The supplied gauges are:
- 8 sc and 9 rows = 4″ [10 cm] with the larger hook and Bernat® Blanket™
- 13 sc and 14 rows = 4″ [10 cm] with the smaller hook and Bernat® Velvet Minis™
Helpful abbreviations include sc for single crochet, sc2tog for single crochet two stitches together, sl st for slip stitch, ch for chain, fsc for foundation single crochet, RS for right side, rem for remaining, sp for space, and tog for together.
Materials and Tools
- Bernat® Blanket™ (10.5 oz/300 g; 220 yds/201 m), Main Color (MC): Smoky Green (10855) 3 balls or 660 yds/603 m
- Bernat® Velvet Minis™ Kit includes 20 balls (1.2 oz/35 g each; 25 oz/700 g total), yardage 41 yds/38 m each; 820 yds/750 m total, Classic (68001) 1 Kit
- Contrast A: Soft Sunshine 1 ball or 41 yds/38 m
- Contrast B: Snowy White, Bleached Aqua, Every After Pink, Velveteal, Burgundy Plum, Smokey Blue 1 ball or 21 yds/19 m each color
- Susan Bates® Silvalume® crochet hooks, U.S. H/8 (5 mm) and U.S. K/10½ (6.5 mm), or sizes needed to obtain gauge
- Susan Bates® jumbo yarn needle
- Stuffing
The larger hook and Bernat® Blanket™ create the substantial tree base. The smaller hook shapes the smaller velvet ornaments, while the stuffing gives the tree pockets and star their dimensional appearance.
Step-by-Step Crochet Instructions
Gauge and Technical Notes
Use the gauges listed in the overview to check tension before beginning. For the ornaments, join all rounds with a slip stitch to the first sc or stitch.
For the star sewing, work with the right side facing and Contrast A, working into back loops only. Sew the stars together using whipstitch, stuffing lightly as you work.
Stuff each light lightly with a strand of the same yarn used for that light. During tree finishing, use backstitching and the chain-1 spaces as a guide. Keep the openings along the bottom edge while the pockets are being stuffed, then close the seam openings afterward.
Tree Base
Tree Motif Make 6
See the diagram on page 4.
With MC and the larger hook, ch 36.
Tree Motif Rows
1st row: 1 sc in 2nd ch from hook. 1 sc in each of next 16 ch. Ch 1. Skip next ch. 1 sc in each of last 17 ch. Turn. 34 sc and 1 ch-1 sp.
2nd row: Ch 1. 2 sc in first sc. 1 sc in each sc to next ch-1 sp. Ch 1. Skip next ch-1 sp. 1 sc in next sc. 1 sc in each sc to last sc. 2 sc in last sc. Turn. 36 sc and 1 ch-1 sp.
3rd row: Ch 1. 1 sc in each sc to next ch-1 sp. Ch 1. Skip next ch-1 sp. 1 sc in each sc to end of row. Turn.
4th and 5th rows: Rep 2nd and 3rd rows once more. 38 sc and 1 ch-1 sp after 4th row.
6th row: As 2nd row. 40 sc and 1 ch-1 sp.
7th to 16th rows: Ch 1. Skip first st. 1 sc in each sc to next ch-1 sp. Ch 1. Skip next ch-1 sp. 1 sc in each sc to last 2 sc. Sc2tog. Turn. 20 sts and 1 ch-1 sp at end of 15th row.
17th row: Ch 7. 1 sc in 2nd ch from hook. 1 sc in each of next 5 ch. 1 sc in each of next 10 sts to next ch-1 sp. Ch 1. Skip next ch-1 sp. 1 sc in each of next 10 sts. Pull up a loop in top of last st one row below (16th row). Yoh and pull through 1 loop on hook (ch made). Yoh and pull through 2 loops on hook first fsc made. 5 fsc. Turn. 32 sc (6 added at both beg and end of row) and 1 ch-1 sp.
18th to 22nd rows: As 7th row. 22 sts and 1 ch-1 sp at end of last row.
23rd row: As 3rd row.
24th to 28th rows: As 7th row. 12 sts and 1 ch-1 sp at end of last row.
29th row: Ch 6. 1 sc in 2nd ch from hook. 1 sc in each of next 4 ch. 1 sc in each of next 6 sts to next ch-1 sp. Ch 1. Skip next ch-1 sp. 1 sc in each of next 6 sts. Pull up a loop in top of last st one row below (28th row). Yoh and pull through 1 loop on hook (ch made). Yoh and pull through 2 loops on hook first fsc made. 4 fsc. Turn. 22 sts (5 added at both beg and end of row) and 1 ch-1 sp.
30th to 34th rows: As 7th row. 12 sts and 1 ch-1 sp at end of last row.
35th row: As 3rd row.
36th to 38th rows: As 7th row. 6 sts and 1 ch-1 sp at end of last row.
39th row: Ch 1. Skip first sc. 1 sc in next sc. Ch 1. Skip next ch-1 sp. 1 sc in next sc. Sc2tog. Turn. 4 sc and 1 ch-1 sp.
40th row: Ch 1. Skip first sc. 1 sc in next sc. Ch 1. Skip next ch-1 sp. Sc2tog. Fasten off.
Finishing the Tree Base
Joining Motifs
Align 2 motifs, one on top of the other.
With the larger hook, join MC with sl st to the lower right corner of the motif. Working through both thicknesses, work sc evenly around 2 side edges of the tree motif, leaving the bottom of the tree motif open. Fasten off.
Rep for the rem motifs to create a total of 3 double-layer tree motifs.
Assembly
Align the 3 double-layer tree motifs, one on top of the other.
With a 76″ [193 cm] strand of MC and a yarn needle, working through all layers, backstitch the 3 pieces together using the ch-1 sps as a guide to stitch up the middle 6 Tree Pockets formed with openings along bottom edge of Pillow.
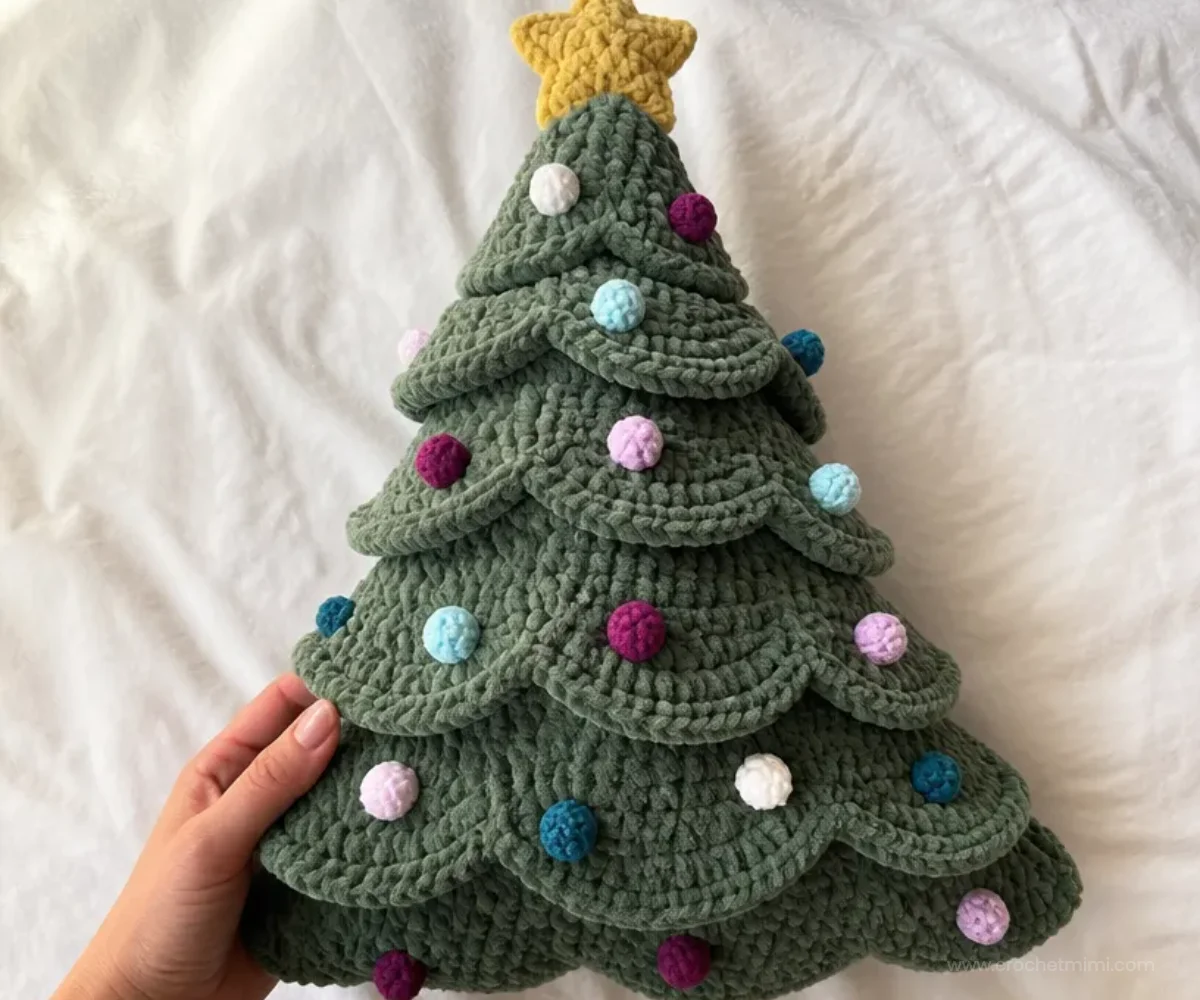
Stuff each pocket with stuffing until the desired look is achieved, as shown in the photo.
With the larger hook, join MC with sl st to the bottom corner of the double-layer motif. Working through both thicknesses, work sc evenly across the bottom of the double-layer tree motif, to the seam opening. Fasten off.
Rep for the rem double-layer motifs until all bottom seams are closed.
Ornaments
Star Make 2 Alike
With A, ch 2.
1st rnd: 10 sc in 2nd ch from hook. Join. 10 sc.
2nd rnd: Ch 1. (1 sc. Ch 2. 1 sc) in same sp as sl st. 1 sc in next sc. [(1 sc. Ch 2. 1 sc) in next sc. 1 sc in next sc] 4 times. Join.
3rd rnd: Ch 1. 1 sc in same sp as sl st. (2 sc. Ch 2. 2 sc) in next ch-2 sp. [1 sc in each of next 3 sc. (2 sc. Ch 2. 2 sc) in next ch-2 sp] 4 times. 1 sc in each of last 2 sc. Fasten off.
With RS facing and A, working into back loops only, sew the stars together using whipstitch, stuffing lightly as you work.
Lights Make 3 in Each Contrast B Color
Make 3 lights in each of Snowy White, Bleached Aqua, Every After Pink, Velveteal, Burgundy Plum, and Smokey Blue.
With A and the smaller hook, ch 2, leaving a long tail.
1st rnd: 6 sc in 2nd ch from hook. Join. 6 sc.
2nd rnd: Ch 1. 2 sc in each sc around. Join. 12 sc.
3rd and 4th rnds: Ch 1. 1 sc in each sc around. Join.
5th rnd: Ch 1. (1 sc in next sc. Sc2tog) 4 times. Join. 8 sts.
6th rnd: Ch 1. 1 sc in each st around. Join.
Stuff lightly with a strand of the same yarn used.
7th rnd: Ch 1. (Sc2tog) 4 times. Join. 4 sts.
8th rnd: Ch 1. 1 sc in each st around. Join.
Fasten off, leaving a tail. Weave the tail through the top of the rem 4 sts, pull tight, and fasten off to form the tip of the light.
Assembly Lights and Star
With the tail, sew the lights to the tips of the tree branches.
With A, sew the star to the top of the tree, as shown in the photo.
Ways to Display Your Finished Crochet
- Place the pillow on a sofa, accent chair, or bench as part of a Christmas decorating scheme.
- Use it as a festive focal point among wrapped gifts or under a decorated tree.
- Add it to a winter-themed reading nook with coordinating blankets and cushions.
- Give it as a handmade holiday gift to someone who enjoys colorful, playful décor.
- Display it with other seasonal crochet pieces; a spooky tree design such as this crochet Halloween tree pattern can create a fun contrast when decorating for different holidays.
Caring for Your Crochet Project
The stuffed tree pockets and sewn-on ornaments should be handled gently. Dust the pillow with a soft brush or use a vacuum cleaner on a low setting with a clean upholstery attachment held slightly above the surface.
For small marks, spot-clean carefully with a barely damp cloth and mild detergent, testing an inconspicuous area first. Avoid soaking the pillow unless the yarn manufacturer’s care instructions specifically support that method. Press moisture away rather than rubbing the plush texture.
Allow the pillow to dry completely away from direct heat. Reshape the tree pockets and star gently while damp, without pulling the seams. Store the finished pillow in a dry space where the lights and star will not be crushed by heavier decorations.
Helpful Crochet Tips
- Check the center chain-1 spaces. They are essential landmarks throughout the tree motif and help keep the shaping aligned.
- Count after increase rows. Confirm 34 sc after row 1, 36 sc after row 2, 38 sc after row 4, and 40 sc after row 6.
- Mark the first stitch if needed. This is especially useful when working the small joined rounds for the star and lights.
- Keep the right side consistent. The star is sewn with RS facing and worked into back loops only, so check placement before stitching.
- Stuff lightly. Overstuffing can distort the tree pockets, star points, or small lights.
- Use long tails carefully. The light tails are needed for sewing, so avoid weaving them in before the lights are attached.
- Secure the middle seam firmly. Use the ch-1 spaces as the backstitch guide so the six pockets remain evenly arranged.
- Close bottom openings last. Stuff every pocket before working the final sc seams across the bottoms.
For a different plush seasonal cushion project, the crochet dahlia pillow pattern offers another example of how bold shaping can become a decorative accent.
Color and Styling Variations
The approved pattern uses Smoky Green for the tree and a bright assortment of contrast colors for the lights. Optional changes can personalize the finished pillow without altering the construction:
- Use a traditional palette of red, white, and green by selecting the closest available contrast shades.
- Create a pastel tree with soft pink, aqua, white, and pale blue lights.
- Choose jewel tones such as burgundy, deep blue, and rich green for a more sophisticated holiday display.
- Keep all lights in one color for a cleaner, more graphic appearance.
- Use a metallic-looking or bright contrast shade for the star while retaining the colorful lights.
- Coordinate the pillow with other handmade cushions, such as a floral petal pillow design, for a playful collection of shaped pillows.
Changing yarn brands, yarn weights, or hook sizes is optional, but it can affect gauge, texture, dimensions, stuffing requirements, and the final structure. Make a gauge swatch and expect to adjust yarn quantities if you substitute materials.
Frequently Asked Questions
Is this pattern suitable for a newer crocheter?
It can be manageable for a newer crocheter who is comfortable with single crochet, increases, decreases, joined rounds, and sewing pieces together. The tree motif includes shaping and foundation single crochet, so careful counting is important.
How many tree motifs are required?
Make 6 tree motifs. Pair them to create 3 double-layer tree motifs, then assemble those three pieces into the six-pocket tree base.
How many lights does the finished project use?
Make 3 lights in each of six Contrast B colors: Snowy White, Bleached Aqua, Every After Pink, Velveteal, Burgundy Plum, and Smokey Blue. That creates 18 lights total.
Can the ornament colors be changed?
Yes. Color changes are an optional styling choice. Keep the component quantities and construction the same unless you intentionally want a different design.
Which hook is used for the tree?
Use the Susan Bates® Silvalume® U.S. K/10½ (6.5 mm) hook, or the size needed to obtain gauge, with Bernat® Blanket™ for the tree motifs and tree assembly.
Which hook is used for the star and lights?
Use the Susan Bates® Silvalume® U.S. H/8 (5 mm) hook, or the size needed to obtain gauge, with Bernat® Velvet Minis™ for the ornaments.
How should the tree pockets be stuffed?
Stuff each pocket until the desired look is achieved. Stuff lightly enough to preserve the shaped tree sections and avoid stretching the seams.
How are the tree pieces joined?
First, join pairs of motifs through both thicknesses along two side edges, leaving the bottoms open. Then backstitch the three double-layer motifs through all layers using the ch-1 spaces as a guide. Close the bottom seams after stuffing.
Can the finished pillow be machine washed?
The pattern does not provide a washing method. Because the pillow contains stuffing and sewn-on dimensional ornaments, use gentle surface cleaning and follow the yarn manufacturer’s care instructions rather than assuming machine washing is suitable.
Can another yarn be substituted?
A substitution may be possible, but changing yarn weight or fiber can alter gauge, texture, dimensions, and stuffing needs. Swatch first and use the hook size required to obtain the stated gauge.
Conclusion
This Merry Mod Crochet Christmas Tree Pillow Pattern combines plush texture, clever construction, and colorful handmade details in one festive project. The layered tree pockets create depth, while the star and lights add personality. Display it on a sofa, give it as a holiday gift, or adapt the palette to match your décor. For additional inspiration, compare it with this Bernat Merry Mod Christmas tree pillow pattern and browse these free crochet Christmas pillow ideas.