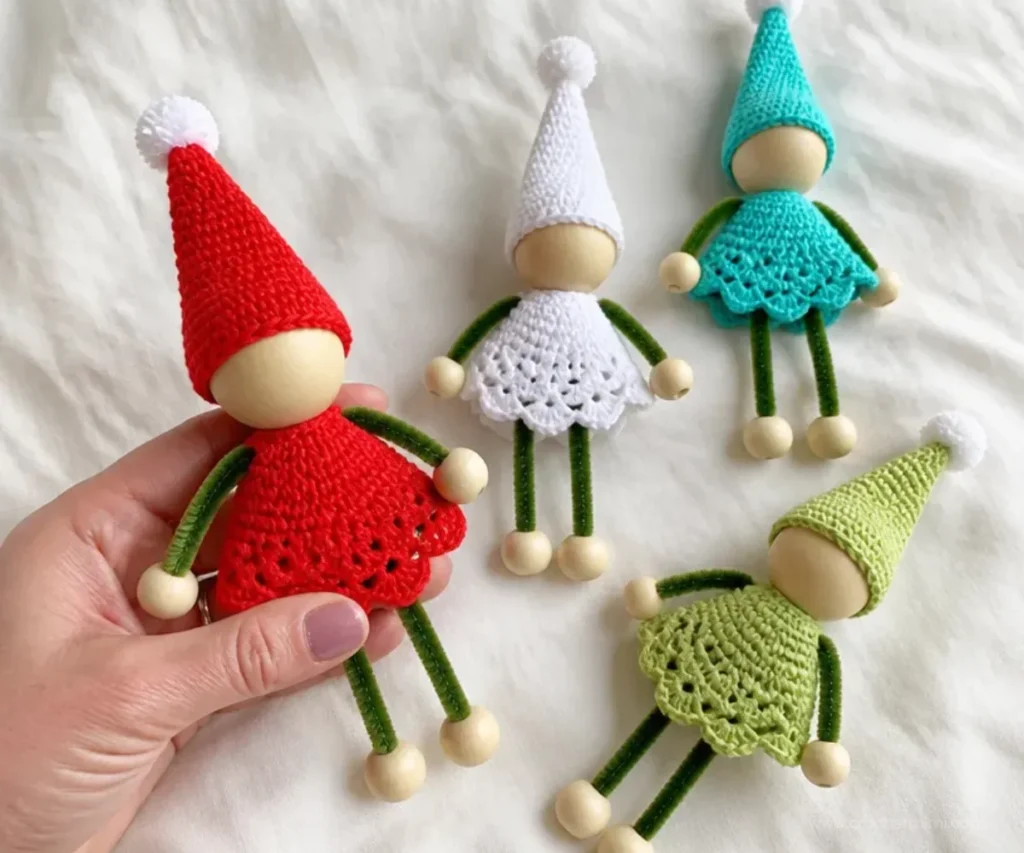
Aunt Lydia Crochet Tree Elves are cheerful miniature decorations made with crochet thread, wooden balls, pipe cleaners, and a tiny pom-pom. Each elf has a lacy circular top, a tapered hat, and a poseable wire body for hanging on a Christmas tree, bottle, or gift box. The project is especially enjoyable for crocheters who like seasonal ornaments, small handmade gifts, and detailed thread crochet. For another playful tree decoration, pair these elves with a crochet Halloween tree decoration when planning a year-round ornament collection.
Why You’ll Love This Crochet Project
These tree elves combine simple crochet shapes with creative three-dimensional assembly.
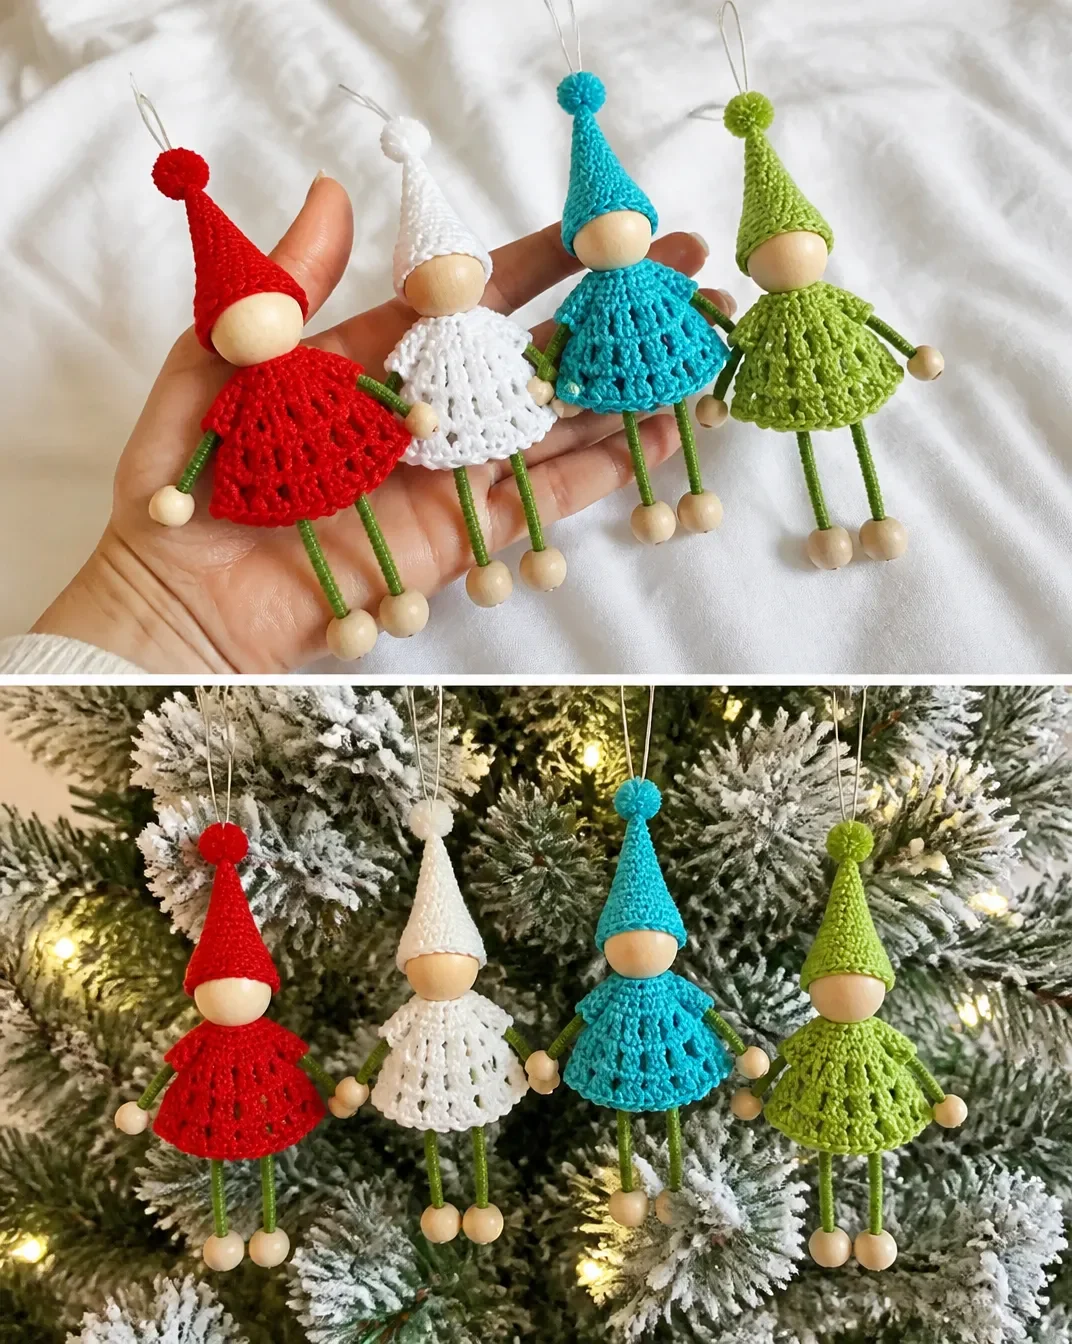
- They make charming holiday decorations. The finished elves can hang from a Christmas tree, bottle, or wrapped gift box.
- They use small amounts of thread. One ball of each listed color makes approximately 10 elves, making the pattern useful for multiples.
- They practice foundational techniques. The top uses a magic loop, joined rounds, double crochet increases, and V-stitch shaping.
- They offer color flexibility. White, Atom Red, Wasabi, and Aqua create a cheerful group, while the same construction supports many seasonal palettes.
- They make thoughtful handmade gifts. Individual elves can become ornaments, package toppers, or small decorations for a holiday display.
Crochet Mimi Tip: Prepare the wooden balls and cut the pipe cleaners for several elves at once, but assemble each elf carefully so the body remains centered.

What to Know Before You Begin
Each elf consists of two crocheted components: a circular Elf’s Top and a tapered Elf’s Hat. The top is worked in joined rounds with a B/1 (2.25 mm) crochet hook. The hat is crocheted flat in rows with a U.S. 7 (1.5 mm) steel crochet hook, then sewn into a cone-like shape.
The non-crocheted structure is made from a 12-inch [30.5 cm] pipe cleaner per elf. It is divided into a body, arms, and legs. A medium wooden ball forms the head, while four small wooden balls become the hands and feet. The hat is finished with a purchased pom-pom and glued to the wooden head.
The construction sequence is:
- Crochet the Elf’s Top.
- Crochet the Elf’s Hat.
- Cut and shape the pipe cleaners.
- Attach the legs, body, head, arms, hands, and feet.
- Sew and finish the hat.
- Attach an ornament hook for display.
Useful abbreviations include ch for chain, dc for double crochet, sc for single crochet, sc2tog for single crochet two together, sl st for slip stitch, and PM for place marker. “Rep” means repeat.
The designer notes that if the head ball is significantly different in size, the hat size may need to be adjusted. An assorted bag of wooden balls can be useful because a smaller ball may suit the hands and a slightly larger one may suit the feet. If you enjoy small thread projects, a beginner-friendly mandala crochet doily offers additional practice with fine yarn and precise rounds.
Materials and Tools
Crochet thread
- Aunt Lydia’s® Classic™ Crochet Thread size 10
- White: 400 yds / 366 m Elf 1: 1 ball
- Atom Red (2160): 350 yds / 320 m Elf 2: 1 ball
- Wasabi (0397): 350 yds / 320 m Elf 3: 1 ball
- Aqua (0450): 350 yds / 320 m Elf 4: 1 ball
- One ball of each color will make approximately 10 elves.
Hooks
- U.S. B/1 (2.25 mm) Susan Bates® Silvalume® crochet hook for Elf’s Top
- U.S. 7 (1.5 mm) Susan Bates® Steelite® crochet hook for Elf’s Hat, or size needed to obtain gauge
Construction supplies
- Pipe cleaner: per elf, 12″ [30.5 cm] long
- One medium wooden ball for the head: 2¼” [5.5 cm] diameter
- Four small wooden balls for hands and feet
- Small purchased pom-pom
- Hot glue gun
These decorations contain small parts and are not suitable for children under 8 years of age.
Complete Crochet Instructions
Elf’s Top
With U.S. B/1 (2.25 mm) crochet hook, make Magic Loop.
Rounds
1st rnd: Ch 3. 11 dc in magic loop. Join. PM on top of first dc for beg of rnd. 12 dc.
2nd rnd: Ch 3. 1 dc in same sp as sl st. 2 dc in each dc around. Join. 24 dc.
3rd rnd: Ch 3. 1 dc in same sp as sl st. 1 dc in next dc. * 2 dc in next dc. 1 dc in next dc. Rep from * around. Join. 36 dc.
4th rnd: Ch 3. 1 dc in same sp as sl st. 1 dc in each of next 2 dc. * 2 dc in next dc. 1 dc in each of next 2 dc. Rep from * around. Join. 48 dc.
5th rnd: Ch 3. 1 dc in same sp as sl st. 1 dc in each of next 3 dc. * 2 dc in next dc. 1 dc in each of next 3 dc. Rep from * around. Join. 60 dc.
6th rnd: Ch 5 (counts as ch 2 and 1 dc). 1 dc in same sp as sl st. * Skip next dc. (1 dc. Ch 2. 1 dc) in next dc. Rep from * around. Skip last dc. Join with sl st to 3rd ch of ch-5. Fasten off.
The sixth round creates the open V-stitch edge used later when the arms are attached.
Elf’s Hat
With U.S. 7 (1.5 mm) crochet hook, ch 23.
Rows
1st row: 1 sc in 2nd ch from hook and each ch to end of chain. Turn. 22 sc.
2nd row: Ch 1. Sc2tog. 1 sc in each sc to last 2 sts. Sc2tog. Turn. 20 sts.
Rep last row until 4 sts rem.
Next row: Ch 1. (Sc2tog) twice. Turn.
Next row: Ch 1. Sc2tog. Fasten off. Weave in ends.
Finishing and Assembly
Cut the pipe cleaner as follows:
- 3″ [7.5 cm] for Body
- 4″ [10 cm] for Arms
- 5″ [12.5 cm] for Legs
- Fold Leg pipe cleaner in half.
- Fold up the lower end of the Body pipe cleaner approx ½” [3 mm] to form an “U”.
- Place Legs in the “U” and twist closed.
- Insert top of Body through hole in the center of Elf’s Top and push Elf’s Top down approx 1½” [4 cm].
- Place Head wooden ball on top of Body pipe cleaner. Twist Body pipe cleaner end at top of wooden ball in a knot. Make sure it does not pull back through the hole.
- Fold Arm pipe cleaner in half and wrap it around Body pipe cleaner approx ½” [3 mm] below Elf’s Top.
- Slide Feet wooden balls onto Leg pipe cleaner and secure end. Rep for 2nd leg.
- Insert the arm through V-stitch edge of Elf’s Top and attach hand wooden ball to Arm pipe cleaner. Secure end. Rep for 2nd Arm.
- Sew back hat seam. Attach pom-pom to tip of Hat.
- Glue Hat to Head wooden ball, keeping seam at back.
- Insert an ornament hook through 2 sts at top of Hat to hang Tree Elf on Christmas Tree or on bottle or gift box.
When shaping the pipe cleaners, twist securely but avoid creating sharp exposed ends. The body knot in Step 5 is especially important because it keeps the wooden head from pulling back through the center opening.
Handmade Gift and Decoration Ideas
- Christmas tree ornaments: Hang several elves together in different thread colors for a coordinated holiday display.
- Gift-box toppers: Attach an elf to a wrapped package with an ornament hook or a small ribbon.
- Bottle decorations: Use the hanging loop to decorate a holiday beverage bottle or decorative container.
- Seasonal centerpiece: Arrange multiple elves around evergreen branches, pinecones, or wrapped presents.
- Handmade ornament sets: Make matching groups in White, Atom Red, Wasabi, and Aqua, then package them as a set.
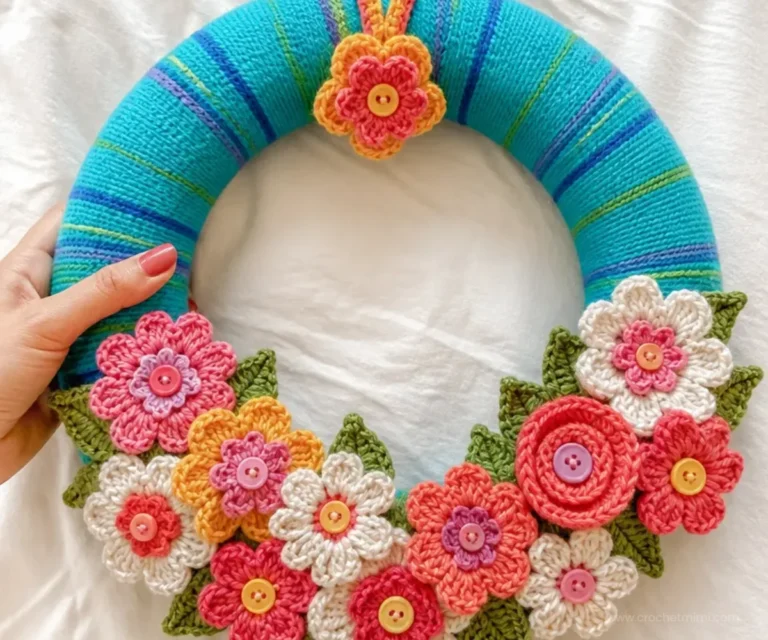
- Holiday craft displays: Combine the elves with other small crochet decorations, such as a crochet flower wreath for a playful contrast between seasonal and botanical décor.
Caring for Your Crochet Project
Dust the finished elf gently with a soft, dry brush or microfiber cloth. Because the decoration contains wooden balls, pipe cleaners, hot glue, and a purchased pom-pom, avoid soaking it or placing it in a washing machine.
For a small mark, use a barely damp cloth and spot-clean the crochet thread carefully. Do not saturate the wooden pieces or rub forcefully over the glued hat. Allow any cleaned area to dry fully at room temperature, away from direct heat.
Store the elves in a dry container with enough space to protect the hats and pom-poms. Avoid placing heavy decorations on top of them, and keep them away from radiators, strong sunlight, and excessive heat that could affect the glue or distort the thread.
Tips for Better Results
- Use the specified hooks for each component. The top and hat use different hook sizes, and the smaller steel hook helps form the hat’s compact fabric.
- Mark the beginning of the top rounds. The pattern uses joined rounds and specifically calls for placing a marker on top of the first double crochet.
- Count every increase. The Elf’s Top progresses from 12 dc to 24, 36, 48, and 60 dc before the final V-stitch round.
- Keep the magic loop snug. Tightening the center neatly helps prevent an unwanted opening beneath the body.
- Check the hat decreases. The second row has 20 stitches, and the repeated decrease row continues until 4 stitches remain.
- Center the body before securing the head. Push the top down approximately 1½” [4 cm], then knot the upper body pipe cleaner at the wooden ball.
- Secure small wooden balls firmly. After sliding the feet and hands into place, secure the pipe-cleaner ends so the balls cannot slip off.
- Keep the hat seam at the back. This gives the elf a cleaner front view when it hangs on a tree or package.
- Handle the hot glue carefully. Use the glue gun only for attaching the hat to the wooden head, and allow the adhesive to cool before handling the finished elf.
- Inspect the ornament hook. Insert it through 2 stitches at the top of the hat so the elf hangs securely.
For another floral-inspired handmade project that can complement a holiday craft collection, consider these beginner-friendly crochet red roses as a separate gift or display accent.
Creative Ways to Customize Your Project
The approved pattern can be followed exactly while still allowing optional styling changes.
- Rotate the thread colors: Assign Atom Red, Wasabi, Aqua, or White to different elves for a mixed-color group.
- Create a monochromatic set: Use one color family for all the tops and hats if you want a more coordinated tree display.
- Coordinate the pom-pom: Choose a pom-pom that matches the hat or contrasts with it, while keeping the supplied construction steps unchanged.
- Vary the display: Hang some elves on a tree and place others on gift boxes or bottles so the same set decorates several areas.
- Use different wooden-ball assortments: The designer notes that a smaller ball may work for the hands and a slightly larger one for the feet. If the head ball changes significantly in size, the hat size may need adjustment.
- Experiment with thread only as an optional modification: Changing thread size or hook size can affect the top’s circumference, hat fit, stitch definition, and the amount of yarn needed. Make a small test before producing multiple elves.
For a broader botanical theme, a blooming bouquet crochet blanket can provide color inspiration without changing the elf pattern itself.
Frequently Asked Questions
Is this pattern suitable for a beginner?
It uses familiar techniques such as a magic loop, double crochet, joined rounds, single crochet decreases, sewing, and basic assembly. Beginners should work slowly through the stitch counts and take extra care when shaping the pipe-cleaner body.
What yarn is recommended?
The pattern uses Aunt Lydia’s® Classic™ Crochet Thread size 10 in White, Atom Red (2160), Wasabi (0397), and Aqua (0450). One ball of each color will make approximately 10 elves.
Which hook makes the Elf’s Top?
Use a U.S. B/1 (2.25 mm) Susan Bates® Silvalume® crochet hook for the Elf’s Top.
Which hook makes the hat?
Use a U.S. 7 (1.5 mm) Susan Bates® Steelite® crochet hook for the Elf’s Hat, or the size needed to obtain gauge.
How much pipe cleaner is needed for one elf?
Each elf requires one 12″ [30.5 cm] pipe cleaner. Cut it into 3″ [7.5 cm] for the body, 4″ [10 cm] for the arms, and 5″ [12.5 cm] for the legs.
What size wooden ball is used for the head?
Use one medium wooden ball measuring 2¼” [5.5 cm] in diameter for the head. The project also uses four small wooden balls for the hands and feet.
Can the colors be changed?
Yes. Color changes are optional, but use thread with comparable characteristics and remember that a different thread size can change the finished proportions and hat fit.
How is the hat attached?
First, sew the back hat seam and attach a small purchased pom-pom to the tip. Then glue the hat to the wooden head, keeping the seam at the back.
Where can the finished elf be displayed?
Insert an ornament hook through 2 stitches at the top of the hat to hang the elf on a Christmas tree, bottle, or gift box.
Are the decorations safe for young children?
No. These decorations contain small parts and are not suitable for children under 8 years of age.
Conclusion
The Aunt Lydia Crochet Tree Elves Pattern turns fine crochet thread and simple craft supplies into cheerful, poseable holiday ornaments. Make one elf or a colorful group for trees, gifts, bottles, and seasonal displays. For more thread-based decoration ideas, browse classic crochet thread décor patterns and Aunt Lydia’s pattern collection for future projects.