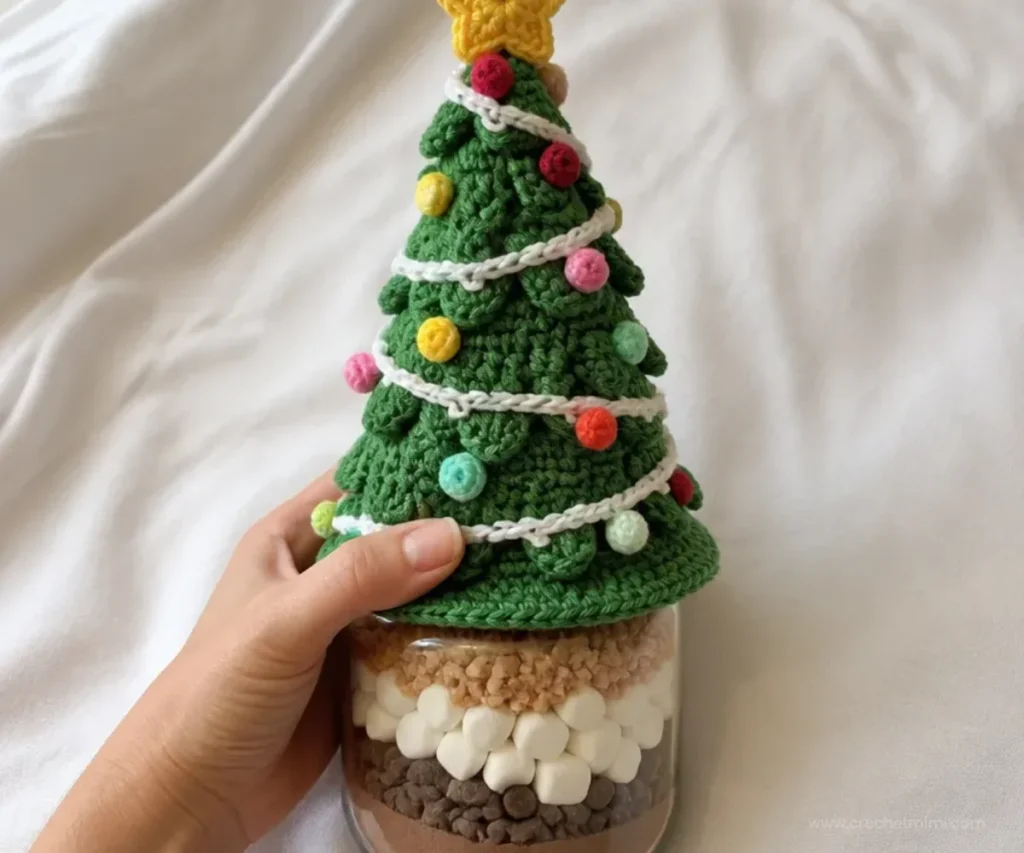
A cheerful crocheted tree topper turns an ordinary jar into festive holiday décor. This Crochet Christmas Tree Jar Topper Pattern includes a textured green tree, a two-piece star, a long white garland, and colorful ornaments. It is a practical seasonal project for decorating a kitchen, mantel, craft table, or gift jar. Crocheters who enjoy small holiday makes may also like this crochet bear ornament pattern for coordinating decorations.
Why You’ll Love This Crochet Project
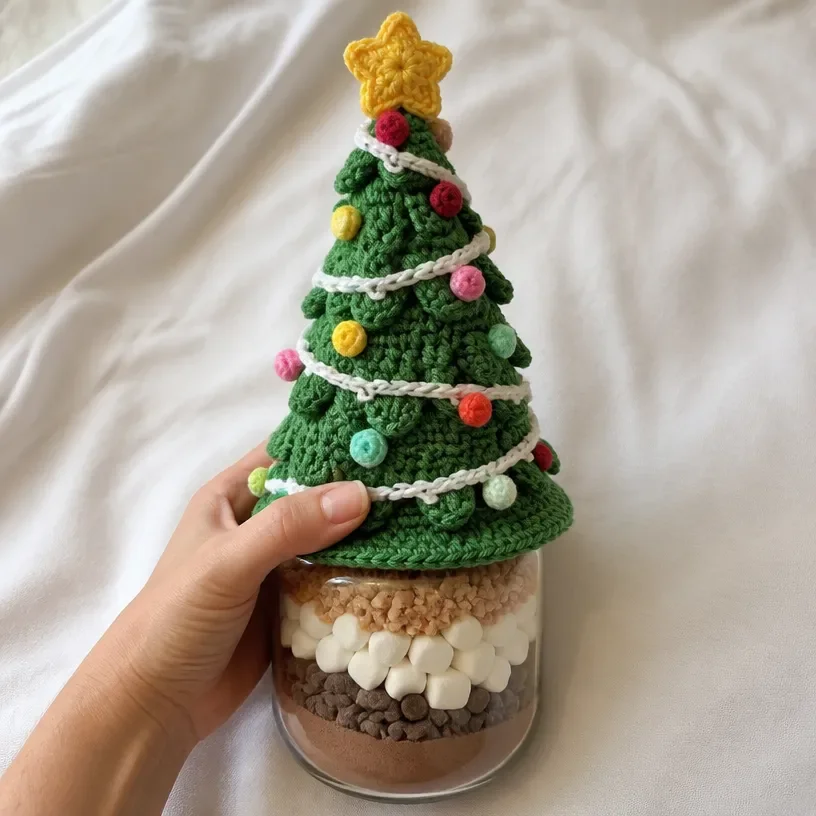
- It creates useful seasonal décor. The finished tree slips over a jar lid, giving a simple container a festive handmade covering.
- It practices shaping. The tree base grows through carefully spaced double-crochet increases, creating a tapered form.
- It includes several small components. The star, garland, and ornaments add variety without requiring a separate complicated project.
- It offers colorful finishing details. Lemon, cherry red, perfect pink, and minty green ornaments stand out against the Paddy Green tree.
- It makes a thoughtful handmade gift. Place the topper on a jar filled with a suitable gift or use it as part of a holiday display.
Crochet Mimi Tip: Keep the tree base nearby while making the decorative pieces so you can check their placement and balance before sewing everything in place. You may also find Diy Crochet Bottle Topper Pattern useful.
Pattern Overview
This project includes one tree, two star pieces, one garland, and three ornaments each in four colors. The tree base is worked first with Color A, using back-loop-only rounds to create the shape and leave front loops available for the outer layer. You may also find April Crochet Flowers Wreath Pattern Spring Decor useful.
After the base is complete, the outer layer is built from chain spaces and slip stitches worked into the front loops left behind. The decorative edge uses double crochet and picot stitches. The star is made in two pieces and joined during finishing. A 200-chain garland and small six-single-crochet ornaments complete the decoration.
The pattern uses US crochet terminology. Useful abbreviations include:
- ch: chain
- sc: single crochet
- hdc: half double crochet
- dc: double crochet
- sl st: slip stitch
Special Stitch
Picot Stitch: ch 3, slip stitch into first chain.
Materials You’ll Need
- RED HEART® Super Saver®, 1 skein each:
- 368 Paddy Green, Color A
- 316 Soft White, Color B
- 235 Lemon, Color C
- 319 Cherry Red, Color D
- 706 Perfect Pink, Color E
- 520 Minty F
- Susan Bates® Crochet Hook 5.5mm [US I-9]
- Yarn needle
- Jar for topper use
The Paddy Green yarn forms the tree. Soft White is used for the garland, while Lemon makes the star and Lemon, Cherry Red, Perfect Pink, and Minty F create the ornaments.
Step-by-Step Crochet Instructions
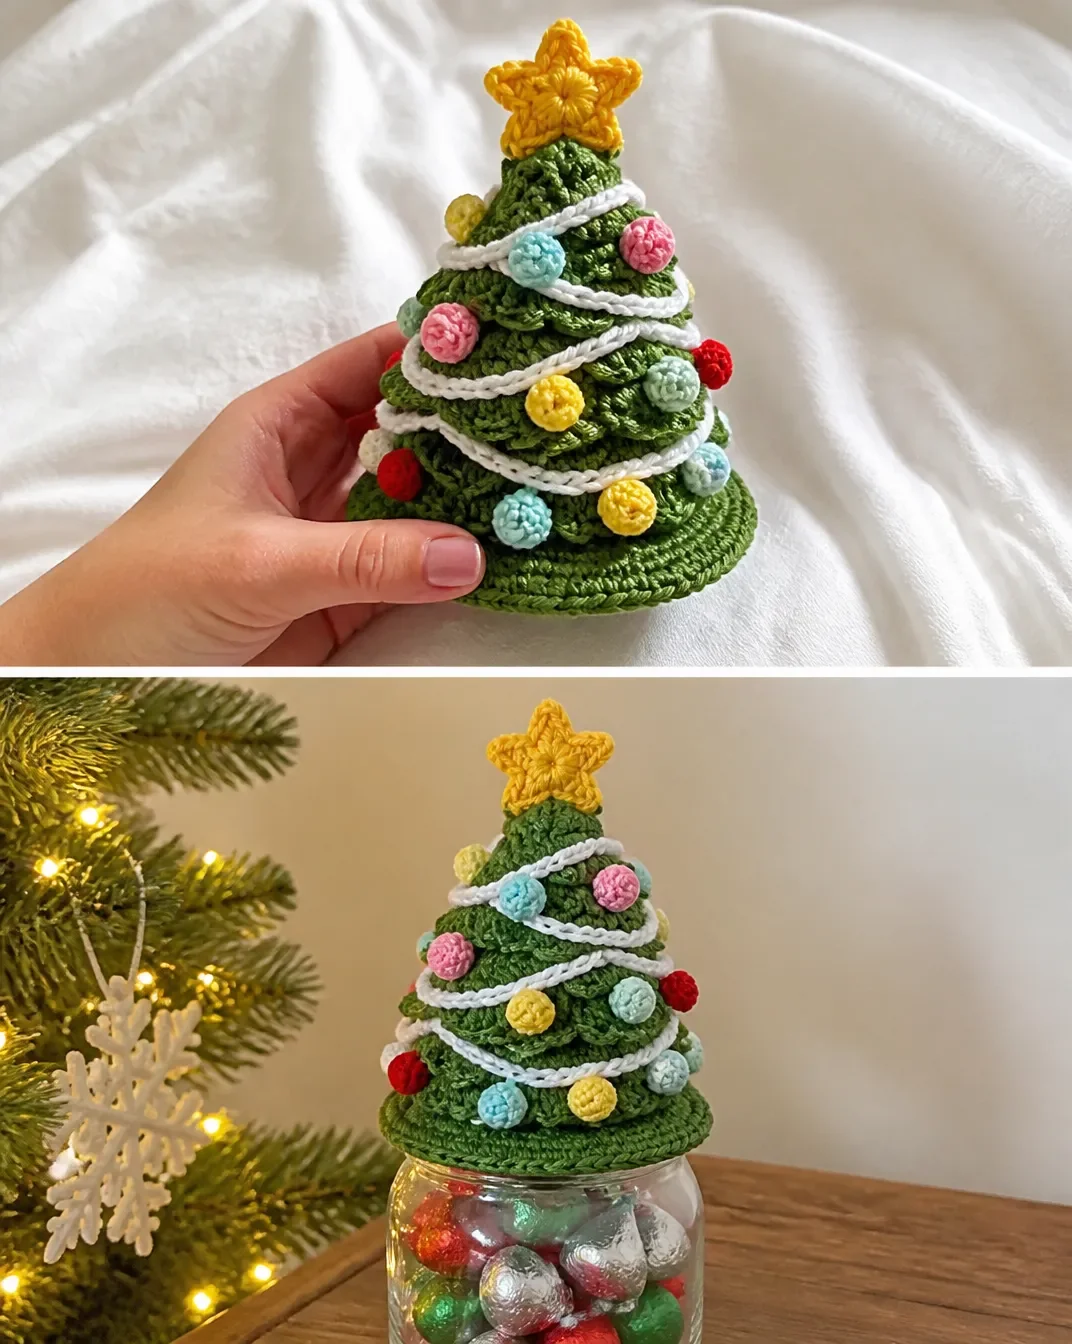
Follow the component quantities carefully. The tree base remains attached to the yarn after Round 16 so the outer layer can be worked into the front loops left behind.
Christmas Tree Jar Topper Make 1 Tree
Tree Base
With A, make an adjustable ring as follows:
- Wrap yarn around your finger with the yarn tail to the left and under the working yarn.
- Insert hook through the circle from front to back.
- Yarn over using the working yarn and pull through loop.
Round 1: Ch 1, 6 sc in adjustable ring, join to first sc. Pull starting end tight to close the circle 6 sc.
Rounds 2 & 3: Sc in each of next 6 sts.
Round 4: Working in back loops only, (hdc, dc) in next st, 1 dc in next st, 2 dc in next st, 1 dc in next st; repeat from * once more 9 sts.
Round 5: Working in back loops only, 2 dc in next st, 1 dc in each of next 2 sts; repeat from * 2 more times 12 dc.
Round 6: Working in back loops only, 2 dc in next st, 1 dc in each of next 3 sts; repeat from * 2 more times 15 dc.
Round 7: Working in back loops only, 2 dc in next st, 1 dc in each of next 4 sts; repeat from * 2 more times 18 dc.
Round 8: Working in back loops only, 2 dc in next st, 1 dc in each of next 5 sts; repeat from * 2 more times 21 dc.
Round 9: Working in back loops only, 2 dc in next st, 1 dc in each of next 6 sts; repeat from * 2 more times 24 dc.
Round 10: Working in back loops only, 2 dc in next st, 1 dc in each of next 7 sts; repeat from * 2 more times 27 dc.
Round 11: Working in back loops only, 2 dc in next st, 1 dc in each of next 8 sts; repeat from * 2 more times 30 dc.
Round 12: Working in back loops only, 2 dc in next st, 1 dc in each of next 9 sts; repeat from * 2 more times 33 dc.
Round 13: Working in back loops only, 2 dc in next st, 1 dc in each of next 10 sts; repeat from * 2 more times 36 dc.
Round 14: Working in back loops only, 2 dc in next st, 1 dc in each of next 11 sts; repeat from * 2 more times 39 dc.
Round 15: Working in back loops only, 2 dc in next st, 1 dc in each of next 12 sts; repeat from * 2 more times 42 dc.
Round 16: Working in back loops only, *2 dc in next st, 1 dc in each of next 13 sts; repeat from * 2 more times, then 1 hdc in next st, 1 sc in next st, slip st in next st 48 sts.
Do not fasten off.
Outer Layer of Tree
You will now be working into all the front loops left behind.
Round 1 (Outer layer): Turn, *ch 3, skip 2 sts, slip st into next front loop; repeat from * around.
Repeat this round until you have reached the top of the tree and worked the last front loop.
Next round (Outer layer): Turn, 3 sc in first ch space, sc into slip st, *(2 dc, Picot Stitch, 2 dc) in next ch space, sc in next slip st; repeat from * around.
Repeat this round until you have reached the bottom of the tree; sc in st after the last ch space. Fasten off.
Star Tree Topper Make 2
With C, make an adjustable ring.
Round 1: Ch 1, 5 sc in adjustable ring, join to first sc. Pull starting end tight to close the circle 5 sc.
Round 2: *Ch 3, turn; skip 1 ch, 1 sc in each of next 2 ch, slip st into next sc; repeat from * 4 more times.
Fasten off, leaving a 24” (61 cm) tail.
Garland
With B, ch 200.
Row 1: Slip st into 2nd ch from hook and in each ch across 199 slip sts.
Fasten off, leaving a 60” (152.5 cm) tail.
Christmas Ornaments Make 3 Each Using C, D, E, and F
Make an adjustable ring.
Round 1: Ch 1, 6 sc in adjustable ring, join to first sc. Pull starting end tight to close the circle.
Fasten off, leaving a 12” (30.5 cm) tail.
Finishing and Assembly
With yarn needle and long tail, join the front and back of the star together and attach to the top of tree.
Using long yarn tail, attach garland around tree, sliding the needle and yarn through the garland between branches.
Using long yarn tails, attach ornaments to tree.
Weave in all loose ends.
Place the lid cover on top of the jar.
Finished Project Ideas
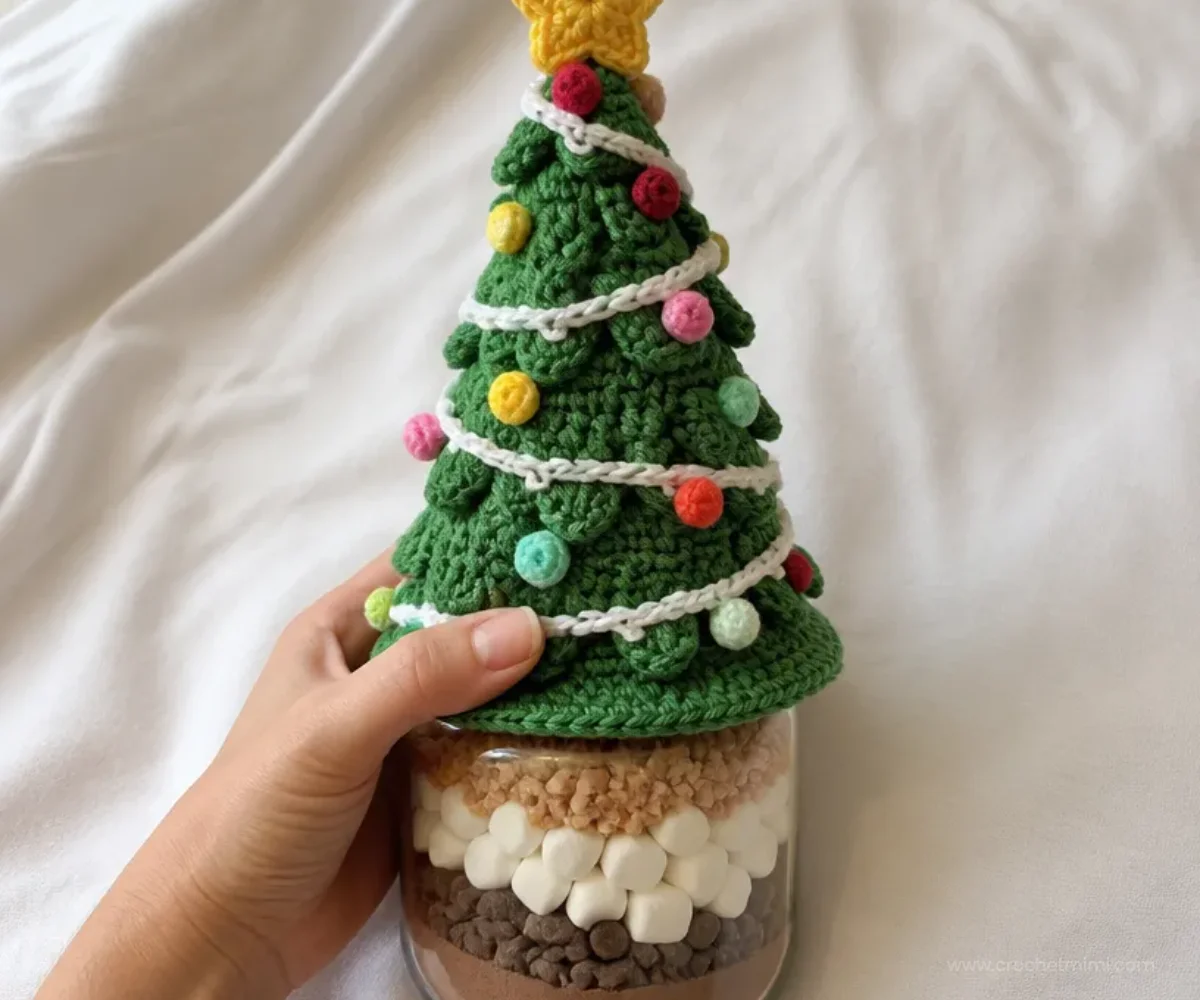
- Use the topper on a jar displayed on a holiday mantel, sideboard, or kitchen shelf.
- Place several decorated jars together as a colorful Christmas arrangement.
- Add the topper to a filled jar for a handmade seasonal gift presentation.
- Coordinate the jar with other handmade holiday décor, such as crochet Halloween jar cozies adapted for a different seasonal display.
- Make several toppers in coordinated color palettes for a craft fair table or family gift set.
- Use the decorated jar as a small centerpiece around candles or wrapped presents, keeping the yarn away from heat and open flames.
Caring for Your Crochet Project
Dust the topper gently with a soft brush or use a vacuum cleaner on a low setting with a fabric-safe attachment. Pay particular attention to the picot details, garland, star, and small ornaments because they can catch or snag.
For small marks, spot clean carefully with a barely damp cloth and allow the topper to dry completely before placing it back on a jar. Avoid soaking the piece or exposing it to excessive heat, which may distort the crocheted shape or loosen the attached decorations.
Store the topper in a dry place when not in use. A lidded container or clean storage bag can help protect the star and ornaments from dust. Store it without heavy items pressing down on the tree.
Helpful Crochet Tips
- Mark the beginning of important rounds. The increasing tree base has many similar rounds, so a stitch marker can help you keep track of your position.
- Count every round’s stitch total. The tree base progresses from 9 sts in Round 4 to 48 sts in Round 16. Checking the count early can prevent the shape from becoming uneven.
- Work carefully in the back loops only. This technique leaves the front loops available for the outer layer. Accidentally working through both loops can make those loops difficult to locate later.
- Keep the tree base attached after Round 16. The outer layer begins from the front loops left behind, so do not fasten off at the end of the base.
- Turn as directed in the outer layer. Both outer-layer rounds include a turn, which helps position the decorative branches correctly.
- Preserve the long tails. The star, garland, and ornaments use their tails for assembly. Measure the specified tail lengths before cutting.
- Attach decorations gradually. Place the garland and ornaments around the tree first, then sew them on once the spacing looks balanced.
- Secure loose ends thoroughly. Weave in all ends after assembly so the topper remains tidy when it is removed from and placed on a jar.
Creative Ways to Customize Your Project
The approved pattern uses classic holiday colors, but the finishing palette can be changed without altering the construction. For example, optional gold, silver, or icy blue shades could replace the star or ornament colors for a different seasonal look.
You can also make the ornaments in one color for a coordinated style or alternate two colors around the tree. Keep Color A for the tree if you want to preserve the original contrast, or use another green shade as an optional substitution.
Changing yarn type or hook size may affect the topper’s dimensions, texture, drape, and fit over the jar lid. If you make a substitution, compare the finished topper with the intended jar before completing assembly. A larger hook may create a looser fabric, while a smaller hook may produce a firmer, smaller cover.
For a broader handmade holiday display, pair the jar with another seasonal tree project, such as this crochet Halloween tree pattern, using the same idea of themed tabletop decoration.
Frequently Asked Questions
Is this project suitable for a beginner?
It is a manageable project for a crocheter who knows basic US stitches and is ready to practice increases, back-loop-only work, front-loop placement, picots, and simple assembly. Reading each round carefully is important because the tree base changes its increase spacing.
What yarn and hook does the pattern use?
The pattern uses RED HEART® Super Saver® and a Susan Bates® Crochet Hook 5.5mm [US I-9]. The color assignments are listed in the Materials section and should be followed for the intended design.
How many ornaments are included?
Make three ornaments each using Colors C, D, E, and F. This creates twelve small ornaments in total.
Why should I not fasten off after Round 16?
The outer layer is worked into all the front loops left behind from the tree base. Keeping the yarn attached after Round 16 allows you to continue into the next section as directed.
How is the star attached?
Make two star pieces with Color C. Fasten off each piece while leaving a 24” (61 cm) tail, then use a long tail and yarn needle to join the front and back of the star and attach it to the top of the tree.
Can I change the colors?
Yes, color changes are an optional styling choice. Keep the component roles in mind: Color A is the tree, Color B is the garland, Color C is used for the star and one ornament color, and Colors D, E, and F are additional ornament colors.
How is the topper used?
After all loose ends are woven in, place the lid cover on top of the jar. Make sure the jar is stable and keep the yarn decoration away from excessive heat or open flames.
Can I use the topper on a different jar?
A different jar may work, but changing jar dimensions can affect the fit. Compare the completed cover with the intended lid before attaching all decorations, especially if substituting yarn or hook sizes.
Conclusion
This Crochet Christmas Tree Jar Topper Pattern combines shaped crochet, picot branches, a star, garland, and colorful ornaments in one festive project. For another version of the same seasonal idea, compare this Red Heart Christmas tree jar topper pattern or browse these holiday jar topper crochet patterns. Display your finished topper, gift it, or customize the colors for your holiday décor.