
A colorful crochet April flowers wreath brings cheerful spring style to a front door, mantel, or wall. This design combines large and small posies, daisies, round flowers, leaves, and a striped yarn-wrapped wreath form for a full handmade display. The crochet flower bouquet pattern is another lovely project to explore if you enjoy botanical crochet. This Crochet April Flowers Wreath Pattern is suitable for crocheters who enjoy making small motifs, practicing basic stitches, and assembling several pieces into one seasonal decoration.
Why You’ll Love This Crochet Project
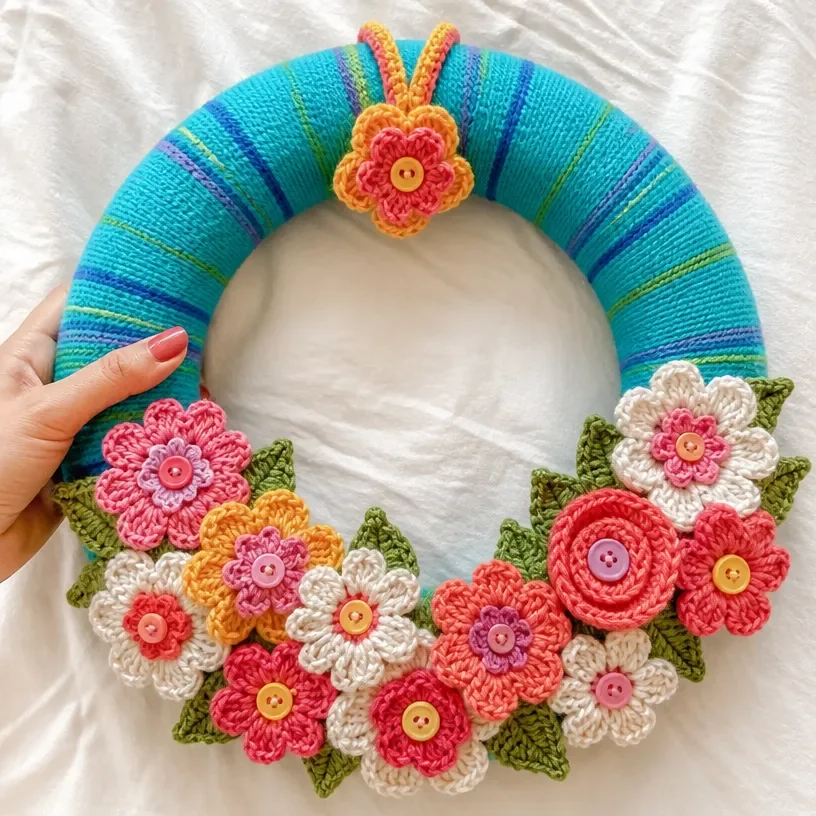
- It uses several flower shapes. Posies, daisies, and coiled round flowers create visual variety without requiring complicated construction.
- It makes a cheerful seasonal decoration. The Wildflower, Turqua, Cornmeal, Light Raspberry, Coral, and Soft White palette gives the wreath a bright spring appearance.
- It offers useful practice. You will work in rounds, crochet chain-based petals, shape leaves, and sew individual motifs into a coordinated arrangement.
- It makes a thoughtful handmade gift. A finished wreath can brighten a friend’s entryway, nursery, craft room, or seasonal display.
- It allows flexible arranging. The flowers are pinned in place before sewing, so you can adjust the composition until the lower third of the wreath looks balanced.
Crochet Mimi Tip: Keep the flower pieces grouped by color and type as you work. This makes finishing and arranging much easier. You may also find Diy Halloween Crochet Spiderweb Wreath Pattern useful.
Before You Start Crocheting
This wreath begins with a 14-inch straw or Styrofoam wreath form covered in alternating sections of yarn. The pattern uses color A and color B for the wrapping, while colors C through F create the flowers and color G creates the leaves.
You will make:
- 4 large posies, one each with C, D, E, and F
- 4 small posies, one each with C, D, E, and F
- 4 round flowers, one each with C, D, E, and F
- 4 daisies, one each with C, D, E, and F
- 1–2 leaves for each flower
- 1 crocheted hanger using C and E held together
The construction sequence is straightforward: crochet the motifs, make and attach leaves and buttons, wrap the wreath form, arrange the flowers, sew them in place, and add the hanger. The design uses US crochet terminology, including sc, hdc, dc, and tr. If you enjoy seasonal wreath projects, you may also like this crochet fall wreath design for a different palette and time of year.
Materials You’ll Need
Yarn
- RED HEART® Super Saver®, 1 skein each:
- 3955 Wildflower A
- 512 Turqua B
- 320 Cornmeal C
- 774 Light Raspberry D
- 726 Coral E
- 316 Soft White F
- 629 Green Tones G
Hook
- Susan Bates® Crochet Hook, 3.75mm [US F-5]
Other Supplies
- 14” [35.5cm] straw or Styrofoam® wreath form
- Assorted buttons, 12mm and 19mm diameter
- White glue
- Straight pins
- Yarn needle
- Glue for wreath form covering
The wreath form provides the structure, while the straight pins temporarily hold the arrangement during assembly. The yarn needle is used to sew motifs and buttons securely.
Step-by-Step Crochet Instructions
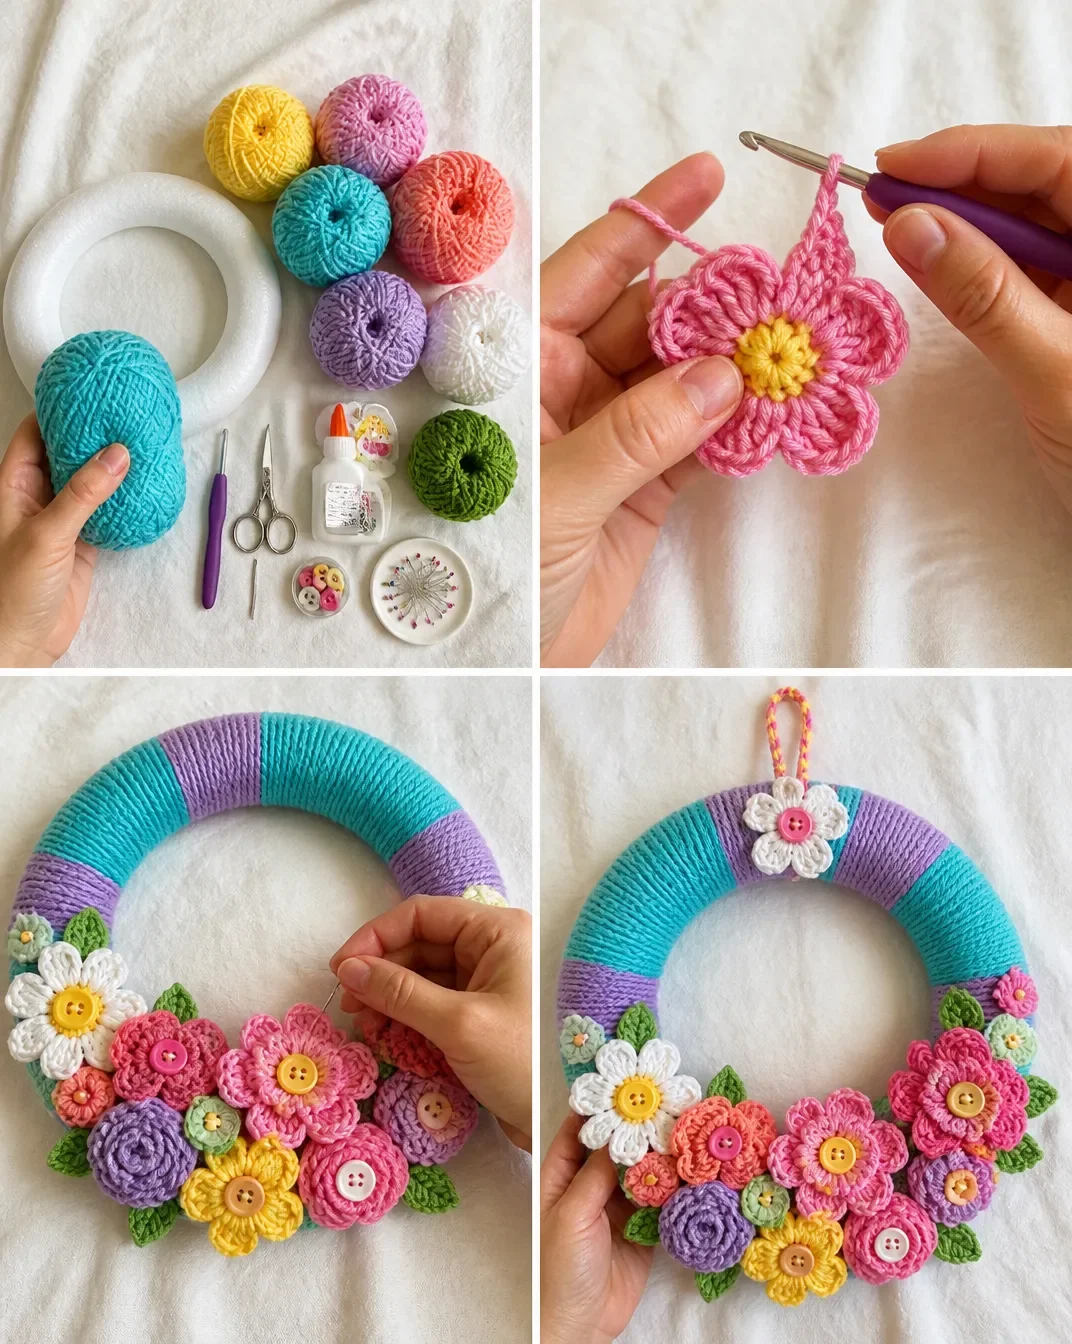
Work the components in the order below. Leave the specified long tails for sewing whenever instructed.
Large Posy
Make 1 each with C, D, E and F.
- Ch 2.
- Round 1: 6 sc in 2nd ch from hook, slip st in first sc – 6 sc.
- Round 2: *(Ch 4, tr, ch 4, sc) in same st, (sc, ch 4, tr, ch 4, sc) in same st; repeat from * 4 more times, slip st in first ch – 6 petals.
- Fasten off, leaving a long tail.
Small Posy
Make 1 each with C, D, E and F.
- Ch 2.
- Round 1: 6 sc in 2nd ch from hook, slip st in first sc.
- Round 2: Ch 2, *(hdc, ch 2, sc) in same st, (sc in next st, ch 2, hdc) in same st, ch 2, sc in same st; repeat from * 4 more times, slip st in first ch – 6 petals.
- Fasten off, leaving a long tail for sewing.
Leaves
Make 1–2 for each flower.
With G, ch 7.
Row 1: Sc in 2nd ch from hook, sc in next st, hdc in next st, dc in next st, hdc in next st, 3 sc in next st, turn to work along opposite edge of foundation ch, hdc in next ch, dc in next ch, hdc in next ch, sc in next 2 ch, slip st in first sc.
Fasten off, leaving a long tail for sewing.
Round Flower
Make 1 each with C, D, E and F.
- Ch 18.
- Row 1: Sc in 2nd ch from hook, 3 sc in next 4 ch, 3 hdc in next 4 ch, 3 dc in next 4 ch, 3 tr in next 4 ch.
- Fasten off, leaving a long tail for sewing.
- Loosely wind into a coil with sc sts in center and sew together.
Daisy
Make 1 each with C, D, E and F.
Outer Petals
- Ch 2.
- Round 1: 8 sc in 2nd ch from hook, slip st in first sc to join – 8 sc.
- Round 2: Ch 6, sc in 2nd ch from hook, sc in next ch, hdc in next ch, dc in next 2 ch, sc in next st; repeat from * 7 more times, slip st to first ch – 8 petals.
- Fasten off, leaving a long tail for sewing.
Inner Petals
- Ch 2.
- Round 1: 6 sc in 2nd ch from hook, slip st in first sc to join – 6 sc.
- Round 2: Ch 4, sc in 2nd ch from hook, hdc in next ch, dc in next ch, sc in next st; repeat from * 5 more times, slip st in first ch – 6 petals.
- Fasten off, leaving a long tail for sewing.
- Sew Inner Petal in center of Outer Petals.
Wreath Yarn Wrapping
- Wrap A around Wreath form to cover 2½” [6.5cm] completely. Glue ends to form.
- Wrap B around Wreath form to cover next 2½” [6.5cm]. Glue ends.
- Continue to wrap A and B around Wreath form, alternating colors, to cover completely.
Finishing the Flowers
- For each Posy, sew button and small Posy to center of each Large Posy.
- Sew one or two leaves to back of each Posy, Daisy and Round Flower.
- Sew buttons to centers of Daisies and Round Flowers.
- Weave in ends.
Assembly
- Following photo and holding flowers in place with pins, arrange flowers around front lower third of Wreath as desired, leaving one flower for hanger.
- When desired arrangement has been obtained, sew pieces in place.
Hanger
With 1 strand of C and E held together:
- ch 80
- slip st in first ch to join
- Fasten off.
- Fold ch around top of wreath, pulling one folded end through opposite end for hanger.
- Sew last flower in front of hanger.
Ways to Display Your Finished Crochet
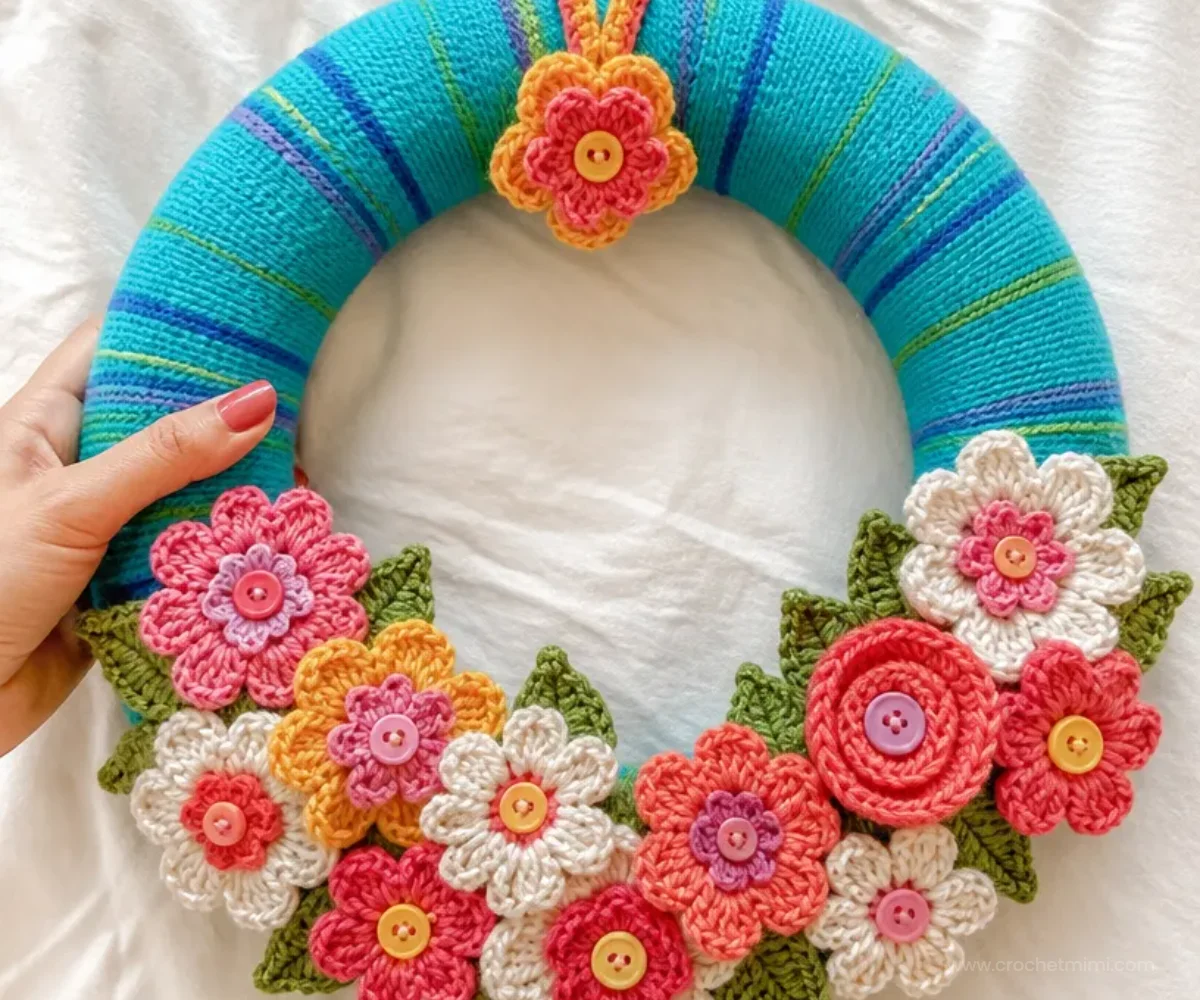
- Hang the wreath on an interior door where the flowers are protected from weather and frequent handling.
- Display it above a mantel, console table, or entryway bench as a spring accent.
- Give it as a handmade housewarming or seasonal gift.
- Use it as part of a spring decorating arrangement with coordinating table linens or pastel accessories.
- Create a small floral display nearby using complementary crochet projects, such as beginner-friendly crochet red roses.
- Rotate the wreath into a seasonal collection by storing it carefully and bringing it out each spring.
Caring for Your Crochet Project
Dust the wreath gently with a soft, dry cloth or a clean, soft brush. Pay particular attention to the flower centers, buttons, and spaces between petals.
Avoid soaking the wreath or placing it in a washing machine. The wreath form, glued yarn ends, buttons, and sewn layers are better protected with light surface cleaning only. If a petal becomes flattened, reshape it gently with your fingers rather than applying strong heat.
Store the wreath flat or hang it in a cool, dry storage area. Use a breathable cover to protect it from dust, and avoid placing heavy items on top of the flowers. Keep it away from excessive heat and prolonged direct sunlight, which can affect the yarn and glued sections.
Tips for Better Results
- Keep your tension consistent. Even tension helps the petal shapes remain recognizable and keeps the flowers balanced in size.
- Count the center stitches. The large posy begins with 6 sc, while the daisy’s outer petals begin with 8 sc and its inner petals begin with 6 sc.
- Leave long sewing tails. The tails are useful for attaching leaves, joining coils, and securing flowers to the wreath.
- Shape the round flowers gently. Wind each strip loosely into a coil so the graduated stitches can form a rounded flower rather than a tight knot.
- Pin before sewing. Arrange the flowers around the front lower third of the wreath first. Move pieces as needed before making permanent stitches.
- Secure the buttons carefully. Check that each button is firmly sewn to the flower center before attaching the flower to the wreath.
- Cover the wreath form evenly. Keep the A and B yarn sections neat and close together so the form does not show through.
- Weave in ends before final placement. A tidy back makes the wreath easier to handle and prevents loose tails from showing around the flowers.
Creative Ways to Customize Your Project
The approved pattern uses a bright spring palette, but the arrangement can be styled in several optional ways without changing the construction.
- Use one dominant color for all flowers and reserve the remaining shades for accents.
- Arrange the posies in the center and place daisies around the outer edges for a more structured look.
- Alternate warm shades such as Cornmeal, Coral, and Light Raspberry for a sunny display.
- Use Soft White flowers as visual highlights among the brighter colors.
- Add extra leaves within the stated “1–2 for each Flower” instruction if you want a fuller green effect.
- Coordinate the wreath with a crochet floral display, such as a crochet mandala doily placed on a nearby table.
Changing yarn weight or hook size is optional, but it can alter the flower dimensions, petal texture, amount of yarn required, and the way the motifs fit around the wreath form. If you substitute materials, make a small sample flower first and plan the arrangement around the resulting size.
Frequently Asked Questions
Is this wreath suitable for a beginner?
It can be a good project for a beginner who knows basic chains, single crochet, half double crochet, double crochet, treble crochet, slip stitches, and simple sewing. The separate motifs also make it easy to practice one component at a time.
What hook size does the pattern use?
The pattern uses a Susan Bates® 3.75mm [US F-5] crochet hook.
How many flowers are made?
You make one large posy, one small posy, one round flower, and one daisy in each of colors C, D, E, and F. That creates four of each flower type. You also make 1–2 leaves for each flower.
Can the flower colors be changed?
Yes. The color assignments can be changed as an optional styling choice. Keep the approved construction the same, and remember that substituting colors does not change the stitch instructions.
How are the flowers attached?
First, arrange the flowers around the front lower third of the yarn-covered wreath and hold them in place with straight pins. Once the arrangement is satisfactory, sew the pieces in place using the yarn tails and yarn needle.
How is the wreath hung?
The hanger is made with 1 strand of C and E held together. Chain 80, slip stitch in the first chain to join, fasten off, fold the chain around the top of the wreath, pull one folded end through the opposite end for the hanger, and sew the last flower in front of the hanger.
Can the wreath be washed?
Avoid washing, soaking, or machine cleaning the finished wreath. Dust it gently and use careful spot cleaning only when necessary to protect the wreath form, glue, buttons, and sewn flower layers.
Can another yarn be used?
Another yarn may be used as an optional substitution, but it can change the scale, texture, drape, and yarn requirements. Test one flower before making the full set so you can judge how it fits the 14-inch wreath form.
Conclusion
This Crochet April Flowers Wreath Pattern combines colorful yarn wrapping with textured handmade flowers, leafy accents, and a simple hanging loop. Once finished, it can brighten a spring display or become a thoughtful handmade gift. For another version of the same seasonal idea, compare the Red Heart April Flowers wreath pattern and browse additional crochet flower pattern ideas for future projects.