
A crochet bottle topper adds a cheerful handmade touch to a wine bottle, sparkling cider, or another special beverage. This pattern includes two festive designs: a classic Santa and a charming reindeer. The small tubular bodies are quick to decorate with facial details, a beard, pom-pom, antlers, or scarf. They make thoughtful host gifts and seasonal table accents, especially alongside handmade décor such as an easy crochet wreath.
Why You’ll Love This Crochet Project
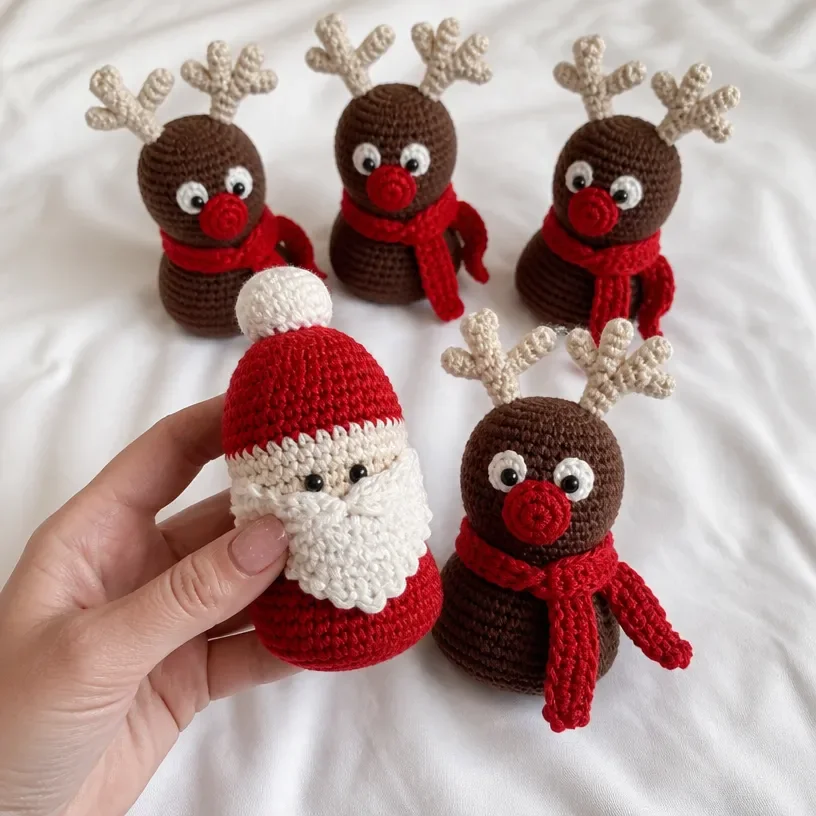
- Two designs are included. Make a Santa bottle topper, a reindeer bottle topper, or a coordinated pair for a holiday display.
- It uses familiar stitches. The main bodies use single crochet in rounds, while the reindeer includes increases and a bobble nose for shaping practice.
- It makes a useful handmade gift. Place one over a bottle of wine, sparkling cider, or another bottled drink before presenting it to a host.
- It decorates without taking up much space. The toppers can dress up a dining table, kitchen counter, bar cart, or holiday gift basket.
- The details create personality. A beard and pom-pom define Santa, while antlers, eyes, a bobble nose, and scarf complete the reindeer.
Crochet Mimi Tip: Keep the face and finishing details positioned consistently if you make both versions so the pair looks coordinated. You may also find Beginner Friendly Crochet Pattern Red Roses useful.
Before You Start Crocheting
This crochet bottle toppers pattern creates two separate character designs. The Santa version has a striped body, a shaped top, a beard, a pom-pom, and embroidered French-knot eyes. The reindeer version uses the Santa body instructions with color changes omitted, then adds shaping, a bobble nose, antlers, eyes, and a scarf. You may also find Bridal Nosegay Crochet Pattern Tutorial useful.
Work the bodies in joined rounds beginning with a chain ring. The beard, antlers, eyes, and scarf are worked in rows or short circular sections and then sewn or tied into place. The pattern refers to a larger hook for the body and main details and a smaller hook for the reindeer’s antlers, eyes, and scarf; use the hook sizes specified in your pattern materials or the corresponding pattern source.
Useful abbreviations:
- ch: chain
- sc: single crochet
- sl st: slip stitch
- sc2tog: single crochet two together
- hdc: half double crochet
- RS: right side
- rem: remaining
- MC: main color
- A, B, and C: contrast colors
- yoh: yarn over hook
For another small handmade décor project using carefully joined rounds, see this beginner-friendly mandala crochet doily.
Materials You’ll Need
Santa version
- Bernat® Super Value™ (7 oz/197 g; 440 yds/402 m), Main Color (MC): Cherry Red (53436) 1 ball
- Bernat® Super Value™, Contrast A: Oatmeal (53010) 1 ball
- Bernat® Super Value™, Contrast B: Natural (07414) 1 ball
- Black embroidery floss
- Yarn needle
- Larger hook
- Smaller hook
Reindeer version
- Bernat® Super Value™ (7 oz/197 g; 440 yds/402 m), Main Color (MC): Chocolate (53013) 1 ball
- Bernat® Super Value™, Contrast A: Cherry Red (53436) 1 ball
- Bernat® Super Value™, Contrast B: Oatmeal (53010) 1 ball
- Bernat® Super Value™, Contrast C: Natural (07414) 1 ball
- Black embroidery floss
- Yarn needle
- Larger hook
- Smaller hook
The larger hook is used for the bottle-topper body and Santa beard. The smaller hook is used for the reindeer antlers, eyes, and scarf. Black embroidery floss creates the facial details, while the yarn needle is used for sewing pieces and closing the reindeer head.
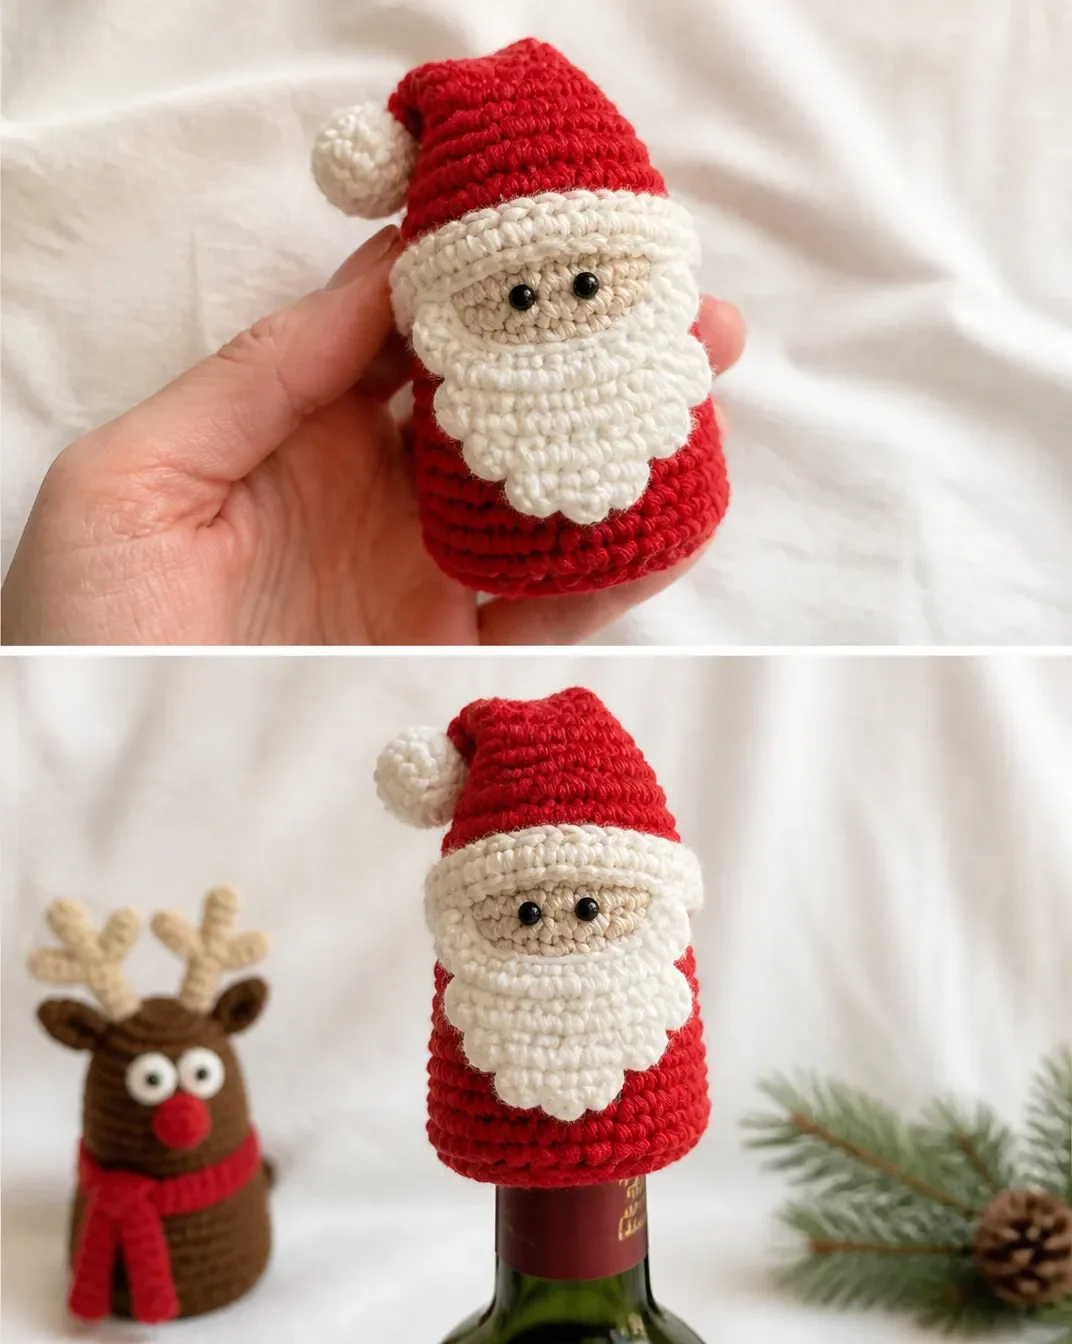
Complete Crochet Tutorial
Follow the version-specific instructions below. Work each component in the stated order, keeping the color changes and stitch counts exactly as written.
Santa version Crochet 1 of 2
Body
Work in rounds; start with ring.
With MC and larger hook, ch 18. Join with sl st to first ch to make a ring.
1st rnd: Ch 1. 1 sc in each ch around. Join with sl st to first sc.
2nd rnd: Ch 1. 1 sc in each sc around. Join with sl st to first sc.
Rep last rnd 4 times more, joining A at end of last rnd.
With A, rep 2nd rnd 3 times more.
Join MC at end of last rnd.
Next rnd: With MC, ch 1. 1 sc in first sc. Sc2tog. 1 sc in next sc. Sc2tog. Rep from * around. Join with sl st to first sc. 12 sts rem.
Next 2 rnds: Ch 1. 1 sc in each st around. Join with sl st to first sc.
Next rnd: Ch 1. *Sc2tog. Rep from * around. 3 sts rem. Fasten off.
Beard
With B and larger hook, ch 5.
1st row: (RS). 1 sc in 2nd ch from hook. 1 sc in each ch to end of ch. Turn. 4 sc.
2nd to 4th rows: Ch 1. 2 sc in first sc. 1 sc in each sc to last sc. 2 sc in last sc. Turn. 10 sc at end of 4th row.
5th row: Ch 1. 1 sc in each of next 2 sc. Turn. Leave rem sts unworked.
6th and 7th rows: Ch 1. 1 sc in each of next 2 sc. Turn. Fasten off at end of 7th row.
With RS facing, skip next 6 unworked sc. Join B with sl st in next sc.
Ch 1. 1 sc in same sp as sl st. 1 sc in last sc. Turn.
Next 2 rows: Ch 1. 1 sc in each of next 2 sc. Turn. Fasten off at end of last row.
Pompom
Wind B around 2 fingers approximately 15 times. Remove from fingers and tie tightly in center. Cut through each side of loops. Trim to a smooth round shape. Attach pom-pom to top of Hat.
Santa finishing
Attach Beard to Body as shown in picture. With black embroidery floss, embroider eyes on face using French knots.
Reindeer version Crochet 2 of 2
Body
Use the Santa instructions with changes.
With MC and larger hook, work from to as given for Santa, omitting reference to color change.
After the Santa version’s “rep/shape” section, work the following additional rounds:
Next rnd: Ch 1. (2 sc in next sc. 1 sc in each of next 8 sc) twice. Join with sl st to first sc. 20 sc.
Next rnd: Ch 1. 1 sc in each sc to end of rnd. Join with sl st to first sc.
Next rnd: Ch 1. 1 sc in first sc. 2 sc in next sc. 1 sc in each of next 9 sc. 2 sc in next sc. 1 sc in each of next 8 sc. Join with sl st to first sc. 22 c. (as written)
Next rnd: Ch 1. 1 sc in each of first 6 sc.
With A, (yoh and draw up a loop in next st. Yoh and draw through 2 loops on hook) 3 times.
Yoh and draw through 4 loops on hook bobble nose made.
With MC, 1 sc in each sc to end of rnd. Join with sl st to first sc.
Next 5 rnds: Ch 1. 1 sc in each sc around. Join with sl st to first sc.
Fasten off at end of last rnd, leaving a long end.
Sew top of Reindeer closed.
Antlers make 2
With B and smaller hook, ch 12.
1st row: 1 sc in 2nd ch from hook. 1 sc in each of next 2 ch.
*Ch 4. 1 sc in 2nd ch from hook. 1 sc in each of next 2 ch. 1 sc in each of next 4 ch of foundation ch. Rep from * once more.
1 sc in each ch to end of ch. Fasten off.
Eyes make 2
With C and smaller hook, ch 2.
6 sc in 2nd ch from hook. Join with sl st to first sc. Fasten off.
Scarf
With A and smaller hook, ch 45.
1st row: 1 hdc in 3rd ch from hook. 1 hdc in each ch to end of ch. Fasten off.
Reindeer finishing
Attach Antlers to top of Reindeer head. Sew eyes to front of head. With black embroidery floss embroider eyes. Tie Scarf around neck.
Finished Project Inspiration
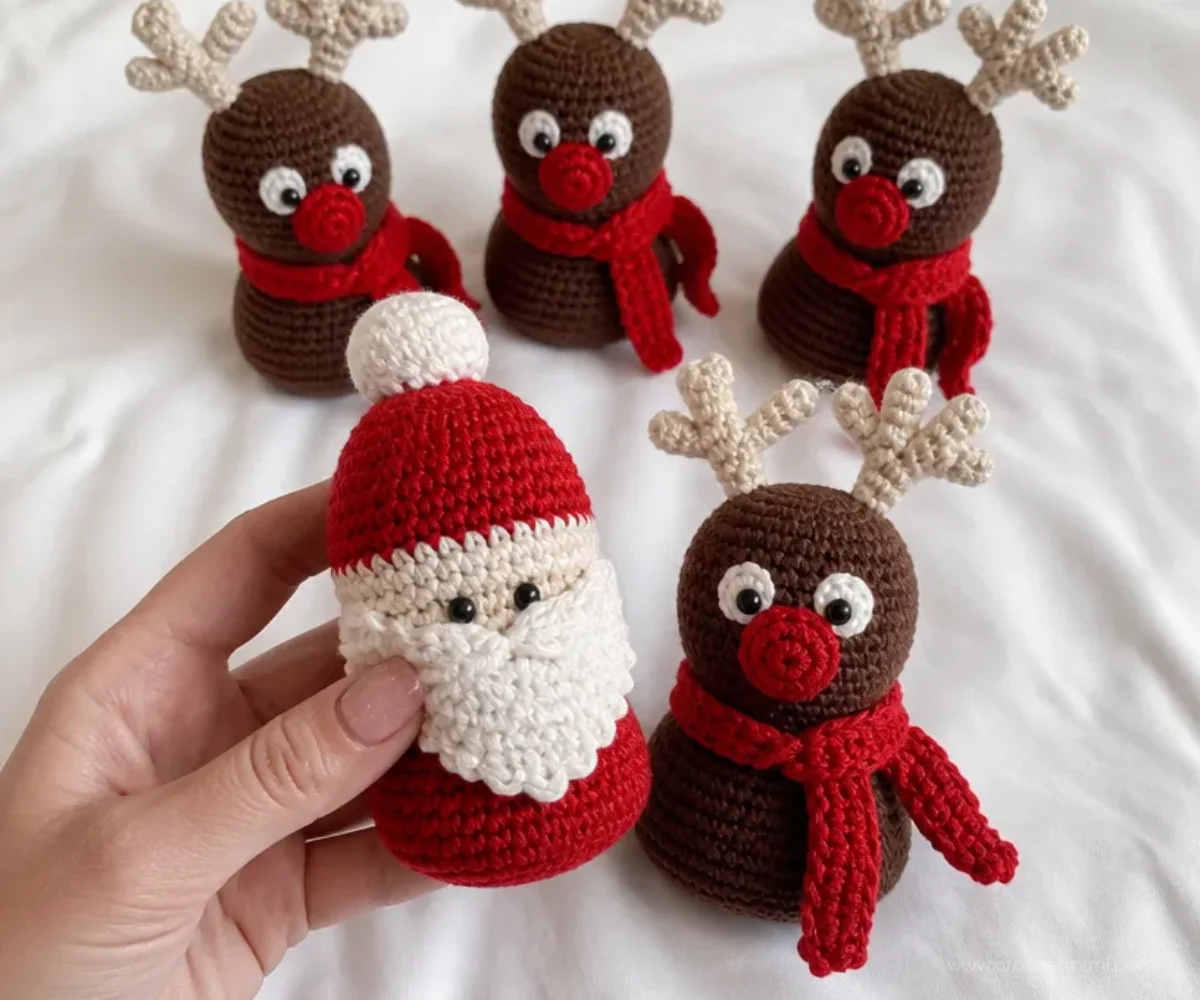
- Dress up a holiday bottle: Place the Santa or reindeer topper over a bottle before giving it as a host or hostess gift.
- Create a character pair: Display one Santa and one reindeer together on a bar cart, buffet, or dining table.
- Build a seasonal gift basket: Combine a topped bottle with wrapped treats, cocoa, cookies, or other festive gifts.
- Use them as table accents: Position toppers around the center of a holiday meal without needing a large centerpiece.
- Make a coordinated display: Add other handmade seasonal pieces, such as a colorful crochet bouquet blanket, to a cozy holiday arrangement.
- Personalize gifts by character: Choose Santa for a traditional look and reindeer for a playful woodland-inspired theme.
Caring for Your Crochet Project
Keep the finished toppers dry and protect the sewn-on details from snagging. For routine cleaning, gently dust the yarn with a soft, dry cloth or use careful spot cleaning when necessary. Avoid soaking the pieces unless the yarn manufacturer’s care instructions specifically support that method.
Store the toppers in a cool, dry place away from excessive heat, direct sunlight, and crushing pressure. Place them upright or loosely supported so the reindeer antlers, scarf, Santa beard, and pom-pom retain their shape. If a component becomes slightly flattened, reshape it gently by hand rather than pulling on the stitches.
Tips for Better Results
- Count the starting chain carefully. The Santa and reindeer bodies begin with ch 18, so join the chain without twisting it before starting the first round.
- Mark the beginning of each round. Joined rounds can be easy to misread, especially when working the shaping decreases and reindeer increases.
- Keep color changes tidy. Join A at the end of the specified Santa round and join MC at the end of the following contrast section so the stripes remain clean.
- Watch the decrease counts. The Santa shaping leaves 12 sts rem after the first decrease round and 3 sts rem after the final decrease round.
- Form the bobble nose deliberately. For the reindeer nose, draw up and reduce the loops exactly as written before continuing with MC.
- Sew details securely but lightly. Attach the beard, antlers, and eyes with enough tension to hold them in place without puckering the body.
- Trim the pom-pom gradually. Cut and shape the loops in small amounts so the finished pom-pom remains round.
- Use black floss sparingly for French knots. Small, evenly placed knots give Santa a neat expression without making the face appear crowded.
For another giftable floral project that benefits from careful color placement, consider these beginner-friendly crochet red roses.