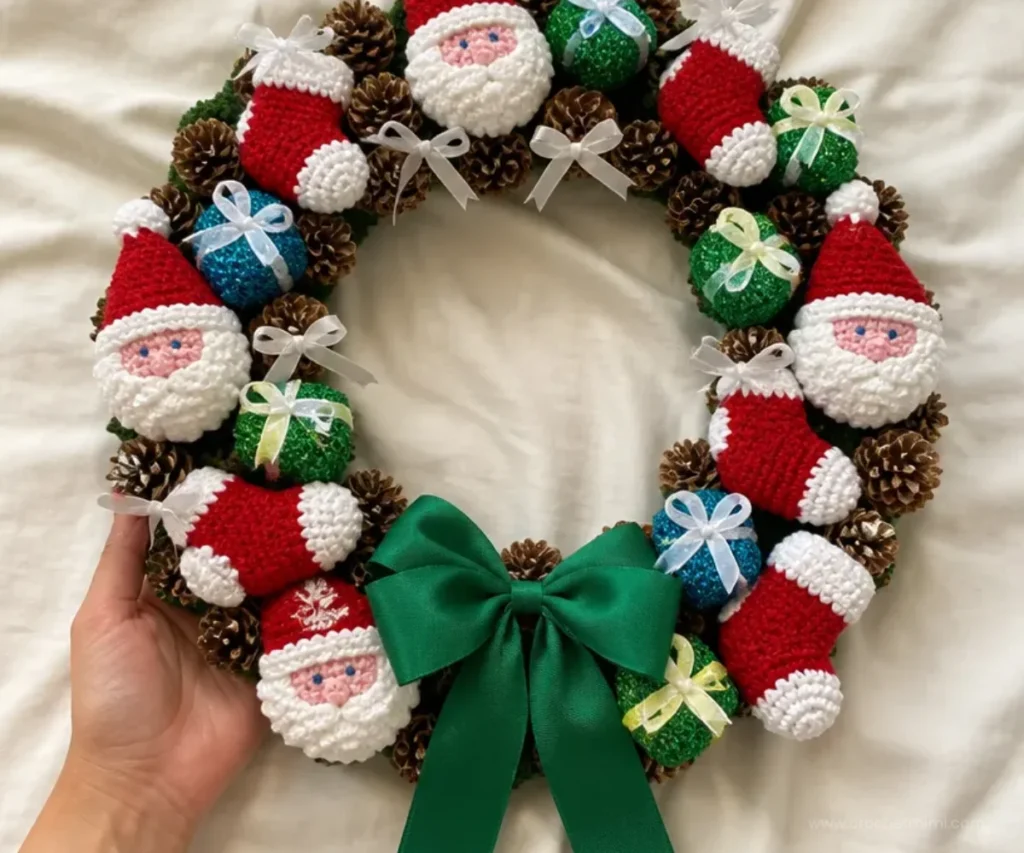
A Merry Christmas wreath is a cheerful way to combine crochet with classic holiday decorating. This design features three tiny Santas, four stockings, five sparkling gift boxes, dried pine cones, and layered ribbon on a 12-inch wreath form. It makes a festive door decoration, mantel accent, or handmade gift for a crochet-loving friend. The same seasonal spirit can also inspire a crochet bear ornament for coordinating tree décor.
Why You’ll Love This Crochet Project
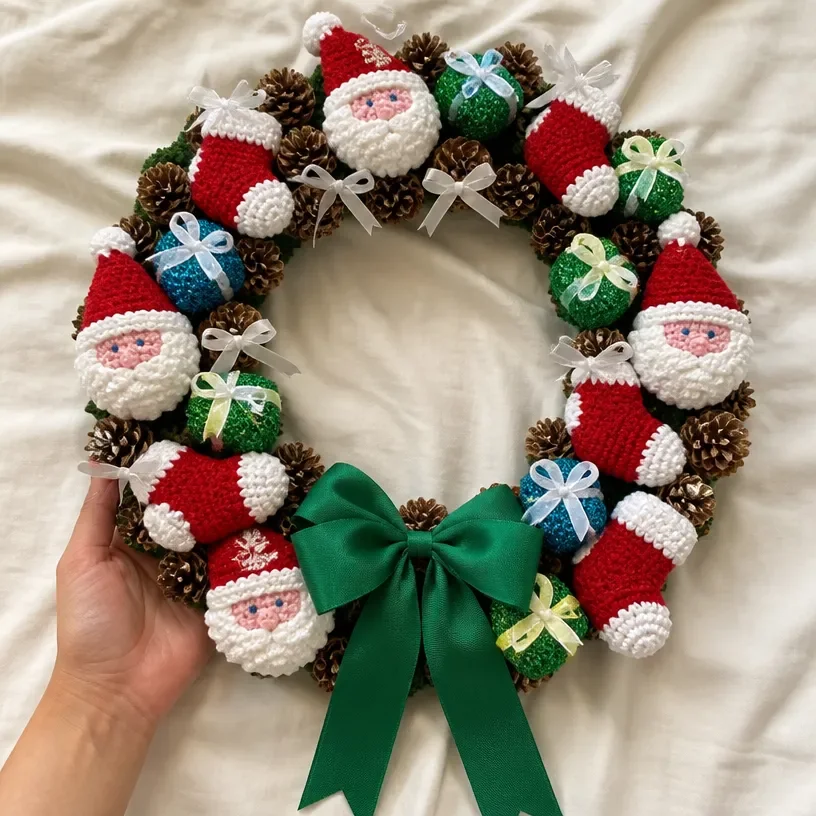
- It combines several small crochet projects. Santas, stockings, and gift boxes offer variety without requiring one large, repetitive piece.
- The finished wreath has plenty of texture. Raised details, stuffed shapes, sparkle yarn, ribbon, and pine cones create a dimensional holiday display.
- It is useful for seasonal decorating. Hang it on a door, wall, cabinet, or mantel throughout the Christmas season.
- It supports crochet skill building. The pattern includes joined rounds, short rows, shaping, color changes, sewing, stuffing, and decorative assembly.
- It makes a thoughtful handmade gift. A completed wreath can be given as a housewarming present or used as a reusable annual decoration.
Crochet Mimi Tip: Finish and arrange all crocheted components before applying glue. This makes it easier to create a balanced wreath and reduces the chance of placing pieces too close together. You may also find April Crochet Flowers Wreath Pattern Spring Decor useful.
Pattern Overview
This Merry Christmas wreath pattern uses three crocheted Santas, four stockings, and five gift boxes. The Santas are assembled from a face, a pointed hat, and a small pompom. Each stocking is crocheted in sections cuff, leg, heel, foot, and toe then sewn and lightly stuffed. The gift boxes are built from one main piece and two side pieces before being stuffed and decorated with ribbon.
The crocheted decorations are attached to a 12-inch [30.5 cm] Styrofoam wreath. The wreath may be wrapped completely with optional Emerald Sugar’n Cream yarn before the pieces are glued in place. Pine cones and a ribbon bow complete the arrangement.
The pattern uses a 4 mm (U.S. G or 6) crochet hook, or the size needed to obtain gauge. The supplied yarn notes indicate that one ball each of Colors A, B, and C makes 15 Santas; one ball each of Colors A and C makes 7 stockings; and one ball of Sparkle makes 5 gift boxes. This project uses only part of those stated quantities for the wreath arrangement.
Useful abbreviations include:
- ch: chain
- sl st: slip stitch
- sc: single crochet
- dc: double crochet
- RS: right side
- yoh: yarn over hook
- Sc2tog: single crochet two together
Materials You’ll Need
- Lily Sugar’n Cream Cotton 4 ply Solids 2.5 oz [70.9 g] / Sparkles 2 oz [56.7 g]:
- Color A (Red): 1 ball
- Color B (Baby Pink): 1 ball
- Color C (White): 1 ball
- Color D (Mistletoe Sparkle): 1 ball
- Small amount of blue yarn
- Size 4 mm (U.S. G or 6) crochet hook, or size needed to obtain gauge
- Stuffing
- Glue gun and glue sticks
- Green ribbon: 2 yds [1.8 m] of ⅝ inch [15 mm] wide
- White ribbon: 3 yds [2.75 m] of ¼ inch [10 mm] wide
- 20 small dried pine cones
- Styrofoam wreath: 12 ins [30.5 cm] in diameter
- 1 ball Sugar’n Cream (Emerald) to wrap wreath, optional
The blue yarn is used to embroider the Santa eyes. Stuffing gives the stockings and gift boxes shape, while the glue gun attaches the finished decorations and pine cones to the wreath form.
The stated yarn-production notes are as follows:
- 1 ball each of A, B, and C makes 15 Santas.
- 1 ball each of A and C makes 7 stockings.
- 1 ball of Sparkle makes 5 gift boxes.
Complete Crochet Tutorial
Follow the components in the order given. Keep track of the color changes and stitch counts, especially when working the stocking heel and gift-box shaping rows.
Santa Make 3
Face
With B, ch 6. Join with sl st to form ring.
1st rnd: Ch 3. 7 dc in ring. Break B and join C in last dc. With C, 8 dc in same ring. Sl st in first dc.
2nd rnd: Ch 3. Sl st in top of first B st.
Ch 3. Sl st in top of next st. Rep from * to * for all B sts.
Ch 5. Sl st into next C st. Rep from * to * to complete ring.
Fasten off.
Hat
With A, ch 9.
1st row: 1 sc in 2nd ch from hook. 1 sc in each sc to end of ch. 8 sc. Turn.
2nd row: Ch 1. Miss first sc. 1 sc in each sc to end of row. Turn.
Rep 2nd row until one st remains. Fasten off.
Pompom
Join C with sl st to point of Hat.
Ch 4. Join with sl st to form ring.
1st rnd: Ch 1. 12 sc in ring.
Break yarn leaving 6 ins [15 cm] end. Thread yarn through a needle and draw through top of each st in ring. Draw up firmly and fasten off.
Finishing the Santa
Sew Hat to Face as illustrated.
Embroider two eyes using blue yarn.
Stocking Make 4
Cuff
With C, ch 13.
1st row (RS): 1 sc in 2nd ch from hook. 1 sc in each ch to end of ch. 12 sc. Ch 1. Turn.
2nd row: 1 sc in each sc to end of row. Ch 1. Turn.
Rep 2nd row once more, joining A at end of last row.
Leg
With A, 1 sc in each sc to end of row. Ch 1. Turn.
Rep last row until work from beg measures 3 ins [7.5 cm] ending with RS facing and omitting turning ch at end of last row. Fasten off.
Heel
With RS of work facing, miss first 9 sc.
Join C with sl st in next sc. Ch 1. 1 sc in same sc. 1 sc in each of last 2 sc.
Bring other side of leg around.
Work 1 sc in each of first 3 sc. Ch 1. Turn.
Next row: 1 sc in each of first 4 sc. Ch 1. Turn.
Next row: 1 sc in each of first 2 sc. Ch 1. Turn.
Next row: 1 sc in each of next 2 sc. 1 sc in next sc of long row below. 3 sts. Ch 1. Turn.
Next row: 1 sc in each of next 3 sc. 1 sc in next sc of long row below. 4 sts. Ch 1. Turn.
Cont as for last 2 rows until 6 sts of Heel have been worked, omitting turning ch at end of last row. Fasten off.
Foot
With RS of work facing, miss first 3 sc of Heel.
Join A with sl st in next sc. Ch 1.
1 sc in same sc.
1 sc in each of next 2 sc of Heel.
Miss next sc of Leg.
1 sc in each of next 4 sc.
Miss next sc of Leg.
1 sc in each of next 3 sc of Heel.
Ch 1. Turn. 10 sts.
Next row: 1 sc in each sc to end of row. Ch 1. Turn.
Next row: 1 sc in each sc to end of row, changing to C in last sc. Ch 1. Turn.
Toe
Next 2 rows: With C, 1 sc in each sc to end of row. Ch 1. Turn.
Next row: (Draw up a loop in each of next 2 sc. Yoh and draw a loop through all loops on hook Sc2tog made) 5 times. Fasten off.
Finishing the Stocking
Sew Cuff and Leg back seams.
Sew Foot and Toe seams.
Sew corners of Heel closed.
Stuff lightly.
Gift Box Make 5
Box Main Piece
With D, ch 8.
1st row: 1 sc in 2nd ch from hook. 1 sc in each ch to end of ch. Turn. 7 sc.
2nd to 6th rows: Ch 1. 1 sc in each sc to end of row. Turn.
7th row: Ch 1. 1 sc in back loop only of each sc to end of row. Turn.
8th to 10th rows: Ch 1. 1 sc in each sc to end of row. Turn.
11th row: Rep 7th row.
Rep from 2nd to 6th once. Fasten off.
Box Sides Make 2
Ch 7.
1st row: 1 sc in 2nd ch from hook. 1 sc in each ch to end of ch. Turn. 6 sc.
2nd to 4th rows: Ch 1. 1 sc in each sc to end of row. Turn.
Fasten off.
Finishing the Gift Box
Sew first row of Main Piece to last row to form a box with sides open.
Sew one Box Side in position.
Stuff Box.
Sew remaining Box Side in position.
Tie a length of ribbon around Box, tie a bow, and stitch in place.
Assembly
If desired, wrap yarn around Styrofoam Wreath to cover completely.
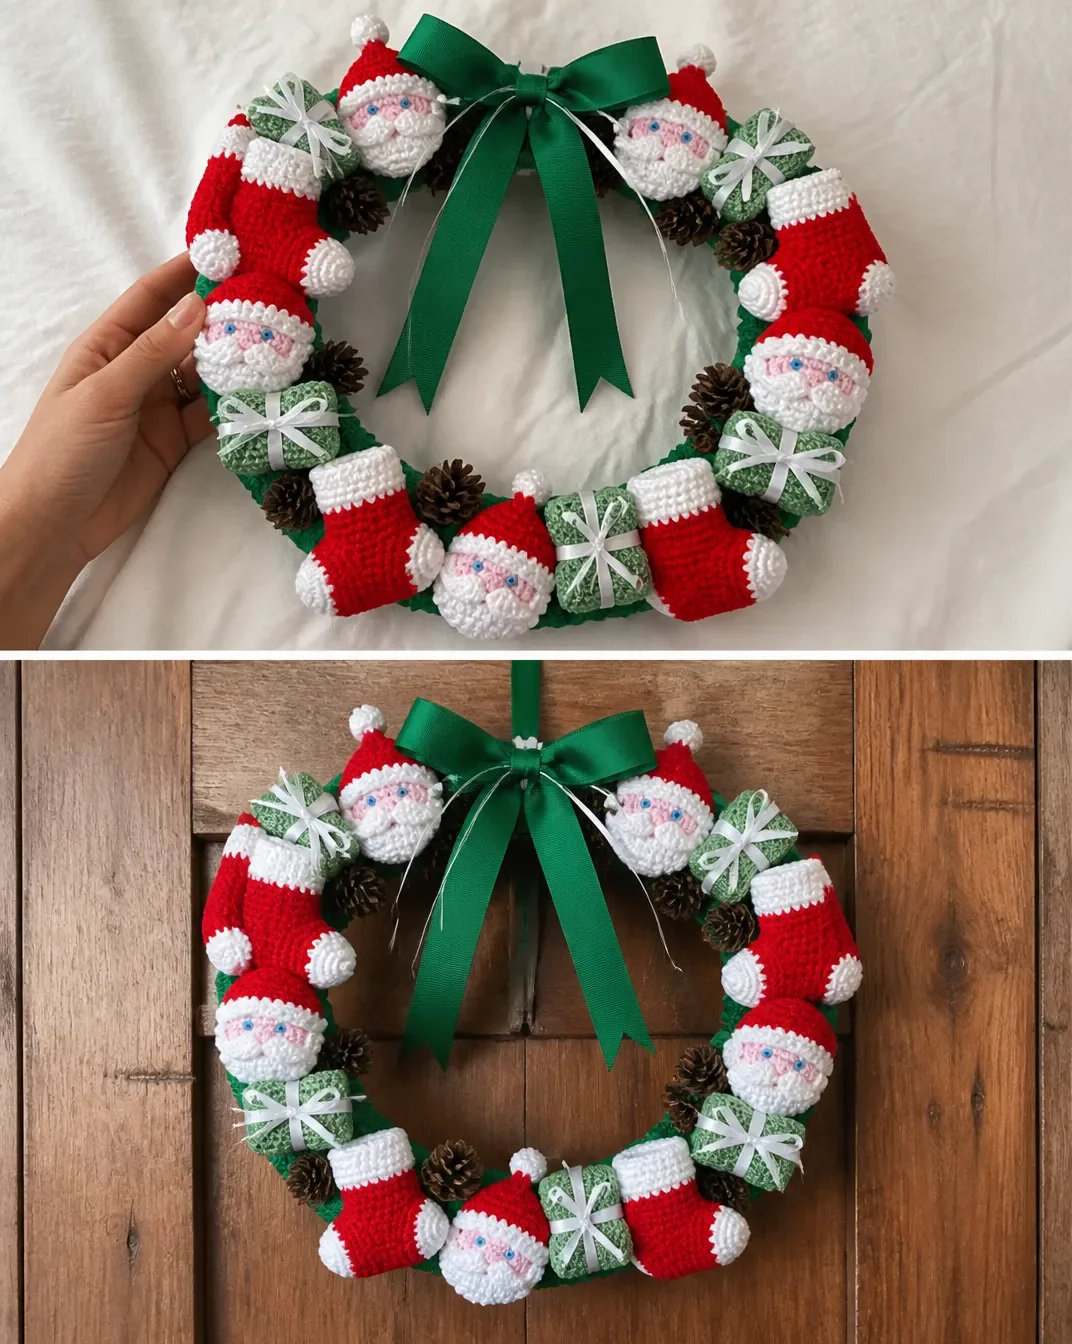
Using photo as a guide, glue Santas, Stockings and Gift Boxes on Wreath as illustrated.
Glue on pine cones and ribbon bow.
Finished Project Inspiration
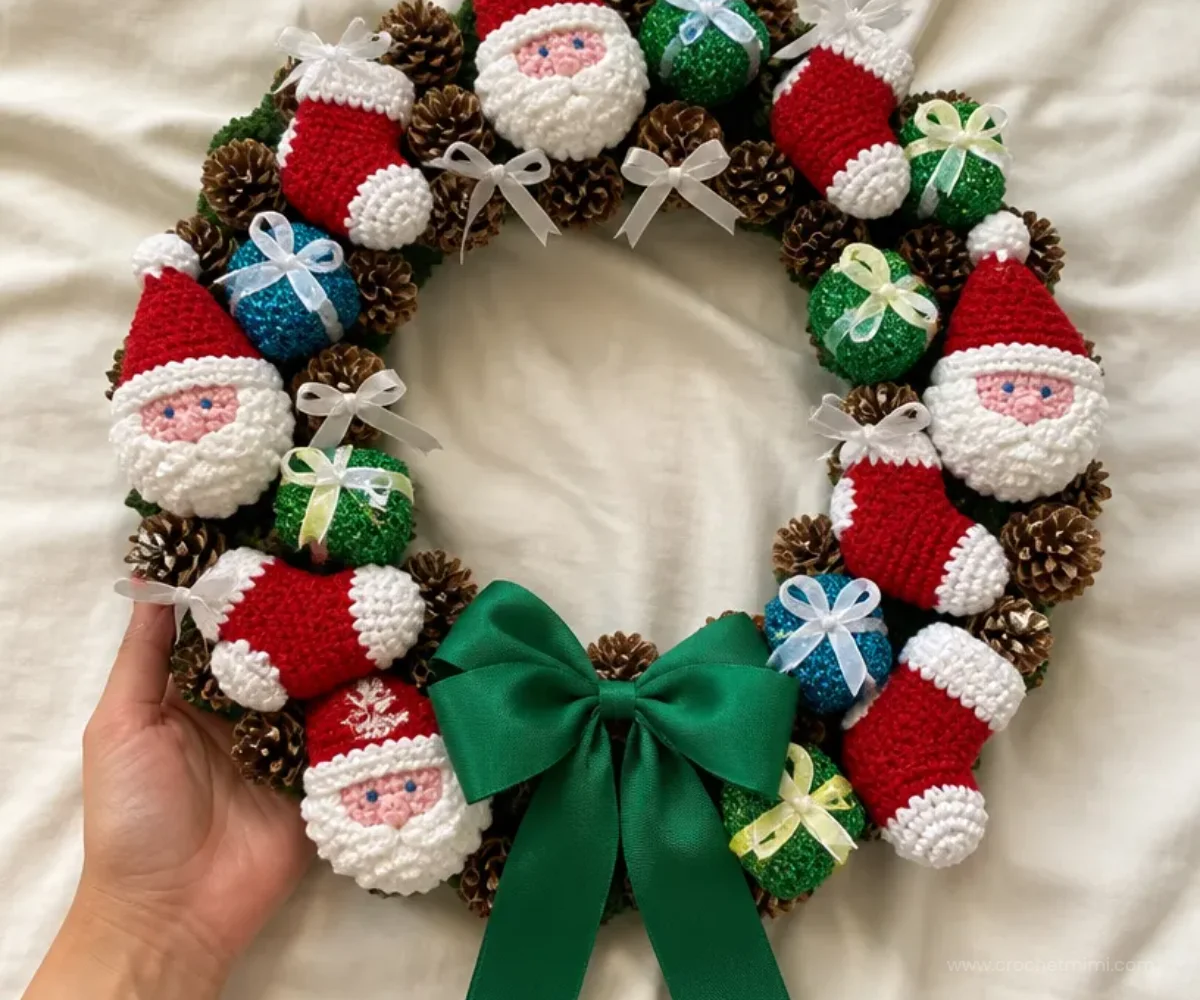
- Front-door decoration: Hang the wreath on a protected front door where the Santas, stockings, and gift boxes can greet visitors.
- Mantel display: Place it above a fireplace or along a mantel with evergreen branches and other holiday decorations.
- Wall accent: Use the wreath as a focal point in an entryway, dining room, craft room, or children’s room.
- Handmade seasonal gift: Give the completed wreath to a family member, teacher, neighbor, or friend who enjoys handmade décor.
- Christmas party decoration: Display it near a dessert table, gift-wrapping station, or holiday gathering area.
- Coordinated seasonal collection: For another wreath style later in the year, consider an easy autumn crochet wreath or a spring floral design.
Caring for Your Crochet Project
Because this wreath includes crocheted pieces, stuffing, hot glue, ribbon, dried pine cones, and a Styrofoam form, do not machine wash, soak, or submerge it. These methods could damage the structure and loosen the decorative elements.
Dust the wreath gently with a soft, dry cloth, makeup brush, or low-pressure handheld duster. Work around the pine cones and glued pieces rather than pulling on them. For a small mark on a crocheted component, use a barely damp cloth and dab carefully; avoid saturating the yarn or the wreath form.
Store the wreath flat or hang it in a cool, dry place. Keep it away from excessive heat, direct moisture, and strong sunlight. A large breathable storage container can help protect the ribbon, yarn, and small decorations between seasons.
Tips for Better Results
- Use a stitch marker or removable scrap yarn when needed. The Santa face is worked in a joined ring, so identifying the first stitch can make the second round easier to follow.
- Count the stocking cuff carefully. The foundation chain and first row should produce 12 sc before the leg begins.
- Watch the stocking heel placement. The heel starts after the first 9 sc are missed with the right side facing. Read each short row before working it.
- Keep the back-loop-only row visible on the gift box. This row creates a fold line in the main piece, so working through both loops by mistake can affect the box shape.
- Stuff lightly and evenly. The stockings and gift boxes should hold their form without stretching the seams or making the pieces too bulky for the wreath.
- Leave useful yarn tails for sewing. Secure and weave in ends after seams are closed, keeping the finishing neat on the visible side.
- Arrange before gluing. Lay out all components and pine cones first, then adjust spacing so the wreath looks balanced from a distance.
- Use care with hot glue. Apply glue in small amounts and protect your fingers and work surface while attaching the pieces.
For a different holiday display using small crocheted motifs, a crochet fall wreath pattern can provide useful inspiration for arranging dimensional decorations around a wreath form.
Color and Styling Variations
The approved pattern uses red, baby pink, white, and Mistletoe Sparkle, but the color placement can inspire optional adaptations.
- Replace the pink face color with a different skin-tone shade if desired, while keeping the construction unchanged.
- Use a traditional red-and-white palette for a classic Santa display.
- Try icy blue, white, and silver-toned yarns for a winter-themed wreath, understanding that a different yarn may affect gauge, texture, dimensions, and yarn requirements.
- Coordinate the ribbon with the main yarn colors rather than using contrasting green and white.
- Add the optional Emerald yarn wrap for a fully covered green base, or leave the Styrofoam visible if the decorations will cover it completely.
- For a non-Christmas seasonal collection, a crochet spiderweb wreath project shows how the same general wreath concept can be adapted for Halloween.
These are styling options only; they do not change the approved instructions or component counts.
Frequently Asked Questions
Is this Merry Christmas wreath pattern suitable for beginners?
It includes straightforward single crochet and double crochet sections, but the stocking heel, sewing, stuffing, and assembly require careful attention. A beginner comfortable with basic stitches can work through it slowly.
How many crocheted decorations are made?
The pattern makes 3 Santas, 4 stockings, and 5 gift boxes. It also includes 2 box sides for each gift box as construction pieces.
What hook size should I use?
Use a 4 mm (U.S. G or 6) crochet hook, or the size needed to obtain gauge.
Can I change the yarn colors?
Yes, color changes are an optional styling choice. Keep the color assignments organized so you know which yarn is Color A, B, C, and D while following the instructions. Changing yarn type or weight may affect gauge, dimensions, texture, and yarn requirements.
Do the stockings and gift boxes need stuffing?
Yes. The stockings are stuffed lightly after the seams are sewn. Each gift box is stuffed after one Box Side is sewn in position and before the remaining Box Side is attached.
How are the decorations attached to the wreath?
If desired, wrap the Styrofoam Wreath completely with yarn first. Then, using the photo as a guide, glue the Santas, stockings, gift boxes, pine cones, and ribbon bow onto the wreath.
Can I wash the finished wreath?
Do not machine wash, soak, or submerge this finished wreath because it contains stuffing, hot glue, ribbon, dried pine cones, and a Styrofoam form. Dust it gently and spot-clean cautiously when necessary.
What other floral-inspired crochet project could coordinate with this wreath?
For a year-round handmade accent, the beginner-friendly red roses pattern offers a different direction for crochet flowers and botanical décor.
Conclusion
This Merry Christmas wreath brings together tiny Santas, stockings, sparkling gift boxes, pine cones, and ribbon in one festive handmade display. Arrange the pieces carefully, keep the stuffing light, and let the wreath reflect your preferred holiday colors. For additional pattern inspiration, compare this design with the Merry Christmas wreath project from Primitive Gatherings and the free Merry Christmas wreath pattern from Yarnspirations.