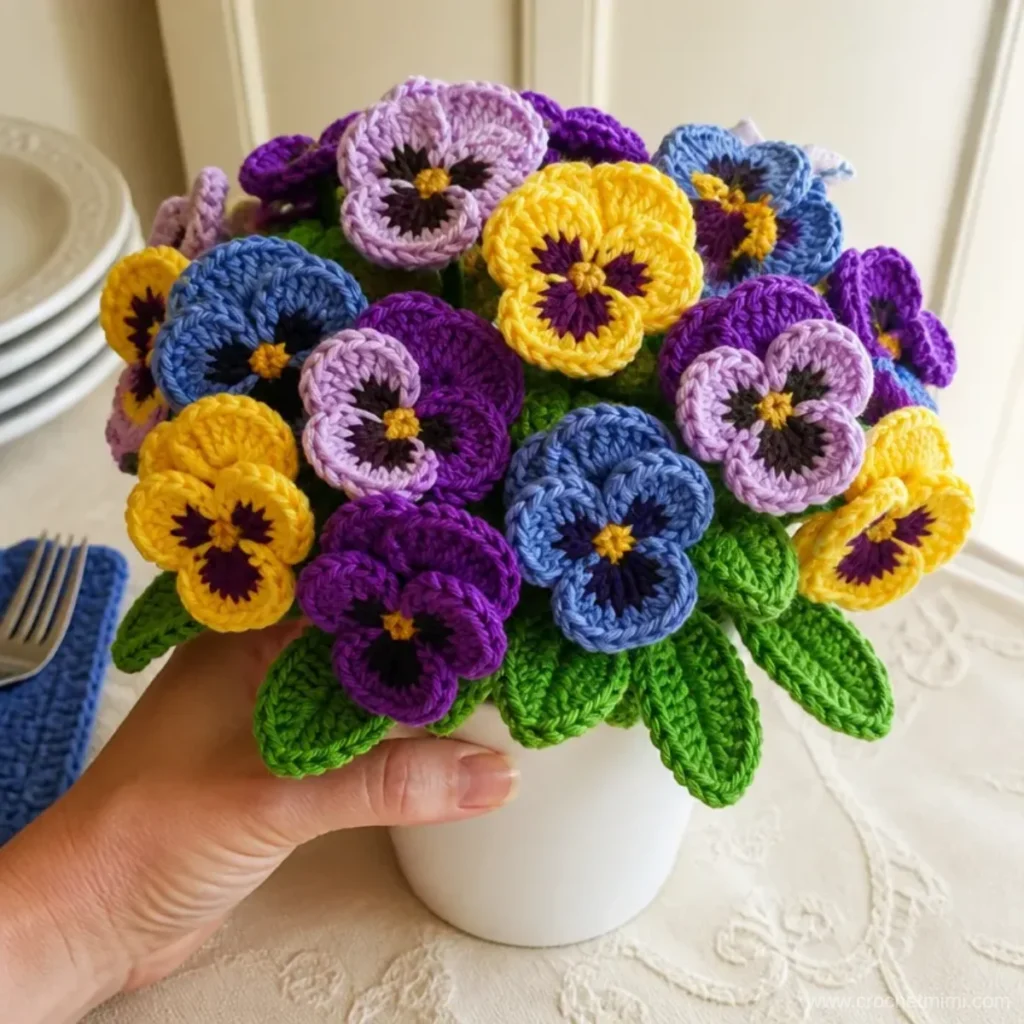
A pansy bouquet brings together richly colored crochet flowers and a leafy green base to create a cheerful display that lasts far longer than fresh blooms. This Pansy Bouquet Pattern uses Soft Violet, Hot Purple, Cornflower Blue, Sunshine, and Hot Green Lily® Sugar’n Cream yarn to form a full cluster of pansies in a 3½-inch plastic pot. It is an enjoyable project for crocheters who like floral motifs, colorful home décor, handmade gifts, or coordinated arrangements inspired by a crochet bouquet color planning guide.
Why You’ll Love This Crochet Project
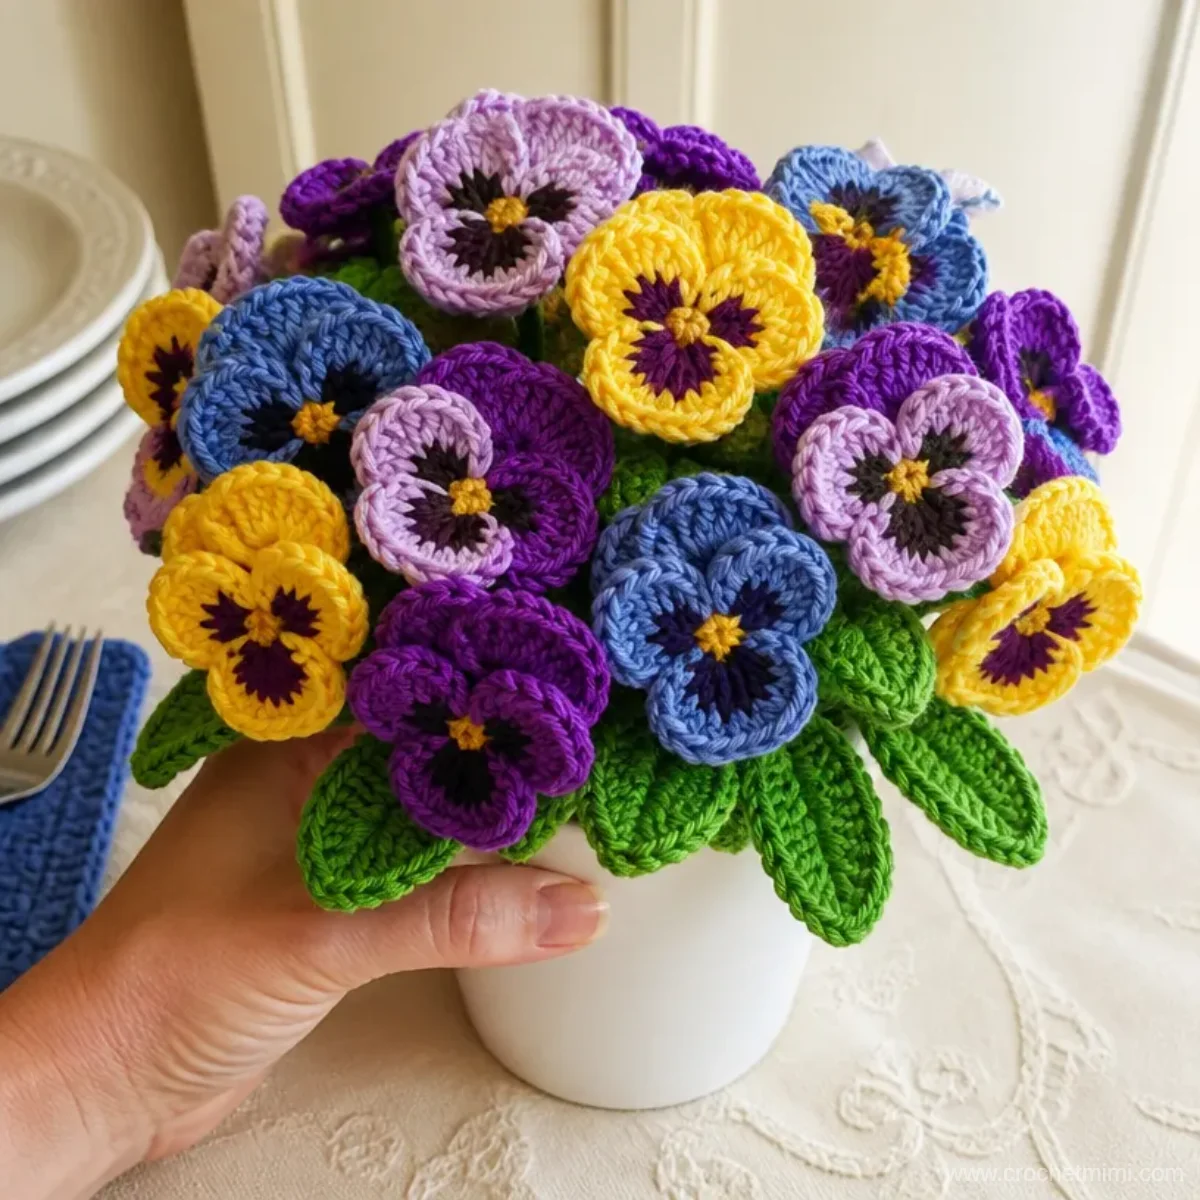
- It creates a lasting floral display. The finished cluster can brighten a shelf, table, desk, or windowsill without watering or seasonal replacement.
- The pansies have varied petal shapes. Each flower combines small picot-edged petals with larger rounded petals, giving the bouquet a lively, dimensional appearance.
- The color palette is naturally cheerful. Purple, violet, blue, yellow, and green work together for a garden-inspired arrangement.
- It practices useful crochet techniques. You will work into rings and chain spaces, make increases, form picots, shape petals, and join rounds.
- It makes a thoughtful handmade gift. The potted bouquet is suitable for spring decorating, birthdays, teacher gifts, or anyone who enjoys handmade botanical accents.
Crochet Mimi Tip: Arrange the pansies on the green base before sewing them in place. This lets you check the color balance and make small placement adjustments while the components are still easy to move.
How This Crochet Project Comes Together
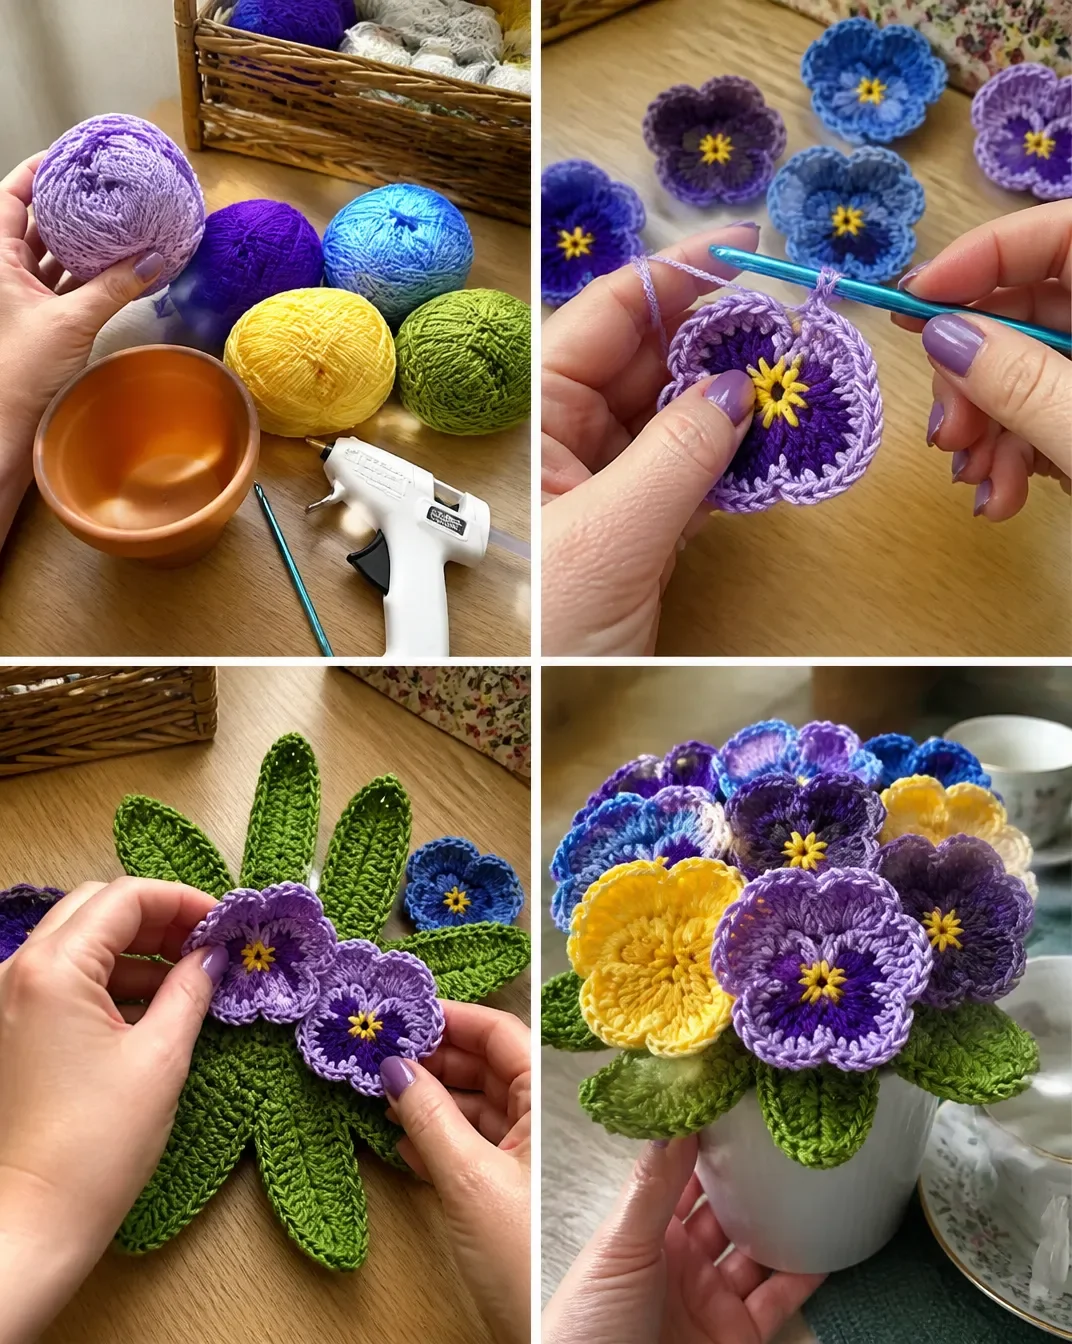
The project consists of nine pansies and one crocheted green base. Make three pansies with Contrast A as Color 2, three with Contrast B as Color 2, and three with Contrast C as Color 2. Contrast D forms the center structure of each pansy, while Contrast E creates the base.
The base begins with a small circle worked in single crochet and expanded through two rounds of double-crochet increases. The fourth round forms four long petals and four short petals around the edge. Six pansies are sewn around the base, one at the beginning of each long petal, with the colors alternated. The remaining three pansies are sewn inside the base.
Finally, place stuffing inside the plastic pot, cover it with the completed pansy cluster, and glue the cluster to the pot if necessary.
The approved instructions use US crochet terminology. Helpful abbreviations include:
- ch: chain
- sc: single crochet
- hdc: half double crochet
- dc: double crochet
- sl st: slip stitch
- sp: space
- rnd: round
- rep: repeat
Materials You’ll Need
- Lily® Sugar’n Cream
- Solids: 2.5 oz/70.9 g
- Ombres: 2 oz/56.7 g
- Contrast A (00093 Soft Violet): 1 ball
- Contrast B (01317 Hot Purple): 1 ball
- Contrast C (00083 Cornflower Blue): 1 ball
- Contrast D (00073 Sunshine): 1 ball
- Contrast E (01712 Hot Green): 1 ball
- Size 4 mm (U.S. G or 6) crochet hook, or size needed to obtain gauge
- Plastic pot: 3½ ins [9 cm] in diameter
- Hot glue gun
Amounts are given for the complete cluster of pansies. The hot green yarn is used for the base, while the other colors create the flowers and their contrasting petal details.
Step-by-Step Crochet Instructions
Pansy
With D, ch 4. Join with sl st to form a ring.
First round
Ch 1. (2 sc in ring. Ch 2) twice. (2 sc in ring. Ch 5) 3 times. Join with sl st to first sc. Break D.
Second round
Join Color 2 with sl st to first ch-2 sp. Ch 2. (2 hdc. Ch 3. 1 sl st in first ch – Picot made. 2 hdc) all in same ch-2 sp.
Miss next sc. Sl st in next sc.
(2 hdc. Picot. 2 hdc) all in next ch-2 sp.
[Miss next sc. Sl st in next sc. (1 hdc. 9 dc. 1 hdc) all in next ch-5 sp] 3 times.
Miss next sc. Sl st in next sc. Join with sl st to top of ch 2. Fasten off.
Pansy Cluster
Make 3 Pansies each with A, B and C as Color 2.
Base
With E, ch 2.
First round
8 sc in 2nd ch from hook. Join with sl st in first sc.
Second round
Ch 3 (counts as dc). 1 dc in same sp as sl st. 2 dc in each sc around. Join with sl st to top of ch 3. 16 dc.
Third round
Ch 3 (counts as dc). 1 dc in same sp as sl st. 2 dc in each dc around. Join with sl st to top of ch 3. 32 dc.
Fourth round
Ch 1.
1 sc in each of next 4 dc. Ch 12. 1 sc in 2nd ch from hook. 1 hdc in next ch. (2 dc in next ch. 1 dc in next ch) 3 times. 2 dc in next ch. 1 hdc in next ch. 1 sc in next ch. 1 sc in each of next 4 sc. Ch 8. 1 sc in 2nd ch from hook. 1 hdc in next ch. 2 dc in next ch. 1 dc in next ch. 2 dc in next ch. 1 hdc in next ch. 1 sc in next ch. Rep from * around. Join with sl st to first sc. Fasten off. (4 long petals and 4 short petals).
Assembly and Finishing
Sew 6 Pansies around Base – one at beg of each long petal, alternating colors.
Sew rem 3 Pansies inside of Base.
Place stuffing inside of pot.
Cover with Cluster of Pansies.
Glue Cluster to pot if necessary.
Ways to Display Your Finished Crochet
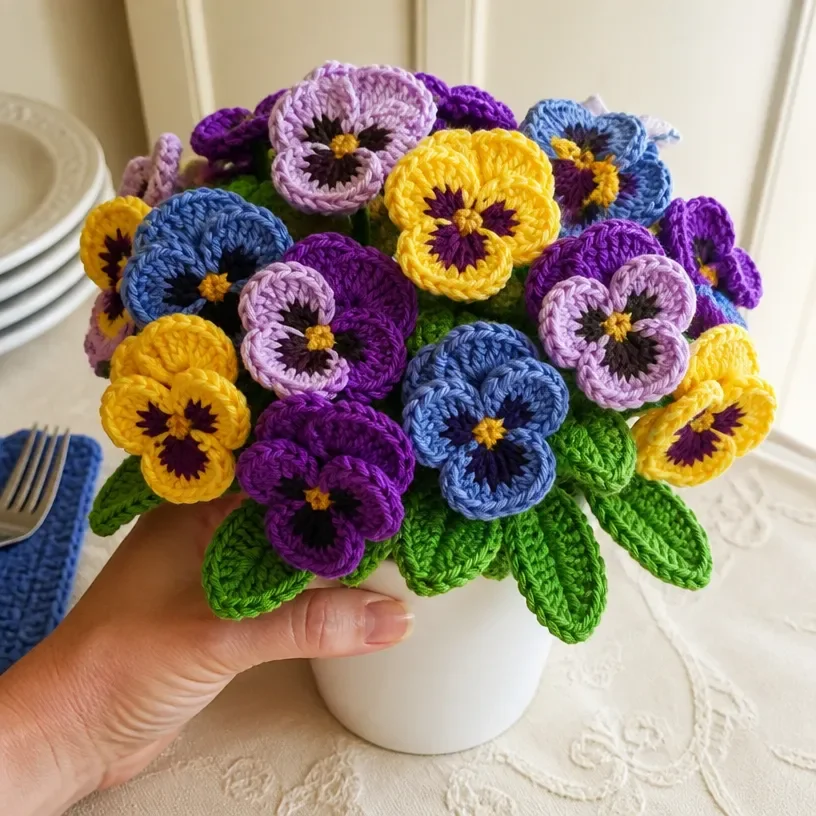
- Use it as a small table centerpiece. Place the potted cluster on a dining table, entryway table, or coffee table where its compact size will remain visible without taking over the space.
- Decorate a spring display. Pair the pansy bouquet with other seasonal décor in soft yellow, blue, violet, or green.
- Give it as a handmade gift. The finished pot works well as a cheerful gift for a birthday, housewarming, teacher appreciation occasion, or spring celebration.
- Create a flower grouping. Display the pansy pot beside other crocheted floral projects, such as a crochet daisy bouquet, for a fuller handmade garden arrangement.
- Use it in a craft-room display. Its colorful petals can add a permanent floral accent to a desk, craft shelf, or sewing area.
- Make a wedding-inspired arrangement. The purple and blue flowers can complement a larger handmade display with coordinated ribbons, table décor, or other crochet blooms.
Caring for Your Crochet Project
Keep the potted bouquet away from excessive heat, since the hot glue and plastic pot can soften or become less secure in high temperatures. Avoid placing it directly against a heater, in strong heat, or in a location where it may be knocked over.
Dust the flowers gently with a soft, dry cloth, a clean makeup brush, or a low-air setting held at a safe distance. Take care around the picots and petal edges, which can catch on rough fabric or sharp objects.
For small marks, use careful spot cleaning rather than soaking the completed arrangement. The project includes a glued pot and stuffing, so machine washing and immersion are not appropriate. If a petal becomes flattened, reshape it gently with your fingers and allow it to rest in position.
Store the bouquet upright in a dry place. For longer-term storage, use a roomy box that does not press against the pansies, and avoid placing heavy objects on top.
Tips for Better Results
- Keep the ring opening secure. When beginning the pansy and base, maintain even tension so the starting ring is firm but still easy to work into.
- Mark the first stitch if needed. The rounds are joined with slip stitches, and a removable marker can help you identify the first stitch before making each join.
- Count the base increases. The base should contain 16 dc after the second round and 32 dc after the third round. These counts help confirm that the circular foundation is developing correctly.
- Make each picot consistently. The picot is formed with ch 3 followed by 1 sl st in the first chain. Keep the chain tension even so the small decorative points match.
- Identify the long and short petals. The ch-12 sequence forms a long petal, while the ch-8 sequence forms a short petal. The completed fourth round has 4 long petals and 4 short petals.
- Plan the flower placement before sewing. Set six pansies around the long petals, alternating colors, then place the remaining three inside the base.
- Secure yarn ends neatly. Weave in ends on the back or inside of the work before attaching the flowers so they do not show through the finished arrangement.
- Use glue sparingly. The instructions say to glue the cluster to the pot if necessary. Apply only enough adhesive to hold the arrangement securely and keep it away from visible flower surfaces.
Color and Styling Variations
The approved pattern uses specific colors, but you can make optional color changes while keeping the construction the same.
- Use different color groups for the three sets of pansies, such as pink, coral, and cream for a warm garden palette.
- Create a cool arrangement with shades of blue, lavender, and white while retaining green for the base.
- Alternate the flower colors in a regular sequence around the base for a more structured look.
- Use one dominant color for all nine pansies and reserve a contrasting shade for the centers.
- Place the pot inside a decorative cover or coordinate it with a larger floral display, such as a handmade bridal arrangement inspired by a crochet bridal rose bouquet.
- Try a different yarn only as an optional substitution. Changing yarn fiber, thickness, or hook size may affect gauge, petal texture, finished dimensions, and the amount of yarn required. Make a test flower first and use the hook size needed to obtain the desired fabric.
Do not alter the approved color assignments unless you are intentionally customizing the project. The original sequence remains the reference for making the specified bouquet.
Frequently Asked Questions
Is this Pansy Bouquet Pattern suitable for beginners?
It can be a good project for beginners who are comfortable with basic chains, single crochet, half double crochet, double crochet, slip stitches, and working into chain spaces. The picot and petal shaping require careful counting.
How many pansies are made?
The pattern makes nine pansies total: three with Contrast A as Color 2, three with Contrast B as Color 2, and three with Contrast C as Color 2.
What yarn colors are used?
The pattern uses Soft Violet, Hot Purple, Cornflower Blue, Sunshine, and Hot Green Lily® Sugar’n Cream yarn. Contrast D, Sunshine, begins each pansy, and Contrast E, Hot Green, is used for the base.
What hook size is recommended?
Use a size 4 mm, U.S. G or 6, crochet hook, or the size needed to obtain gauge.
How is the base shaped?
The base begins with 8 sc in the second chain from the hook. The next two rounds increase to 16 dc and then 32 dc. The fourth round shapes four long petals and four short petals.
How are the pansies attached?
Sew six pansies around the base, placing one at the beginning of each long petal and alternating colors. Sew the remaining three pansies inside the base.
How does the bouquet stay in the pot?
Place stuffing inside the plastic pot, cover it with the pansy cluster, and glue the cluster to the pot if necessary.
Can the colors be changed?
Yes. Color changes are an optional customization, but preserve the separate roles of the flower colors and green base if you want the arrangement to retain its original visual structure.
Can the finished bouquet be washed?
Because the project includes stuffing, a plastic pot, and possible hot glue, avoid machine washing or soaking. Dust gently and spot clean only when necessary.
Conclusion
This Pansy Bouquet Pattern combines colorful flowers, decorative picots, and a shaped green base into a cheerful potted arrangement. Once you understand the flower and base construction, you can enjoy experimenting with coordinated palettes and displays. For more floral inspiration, explore these easy flower cross-stitch patterns or a purple daffodil and pansy bouquet kit before planning your next handmade garden project.