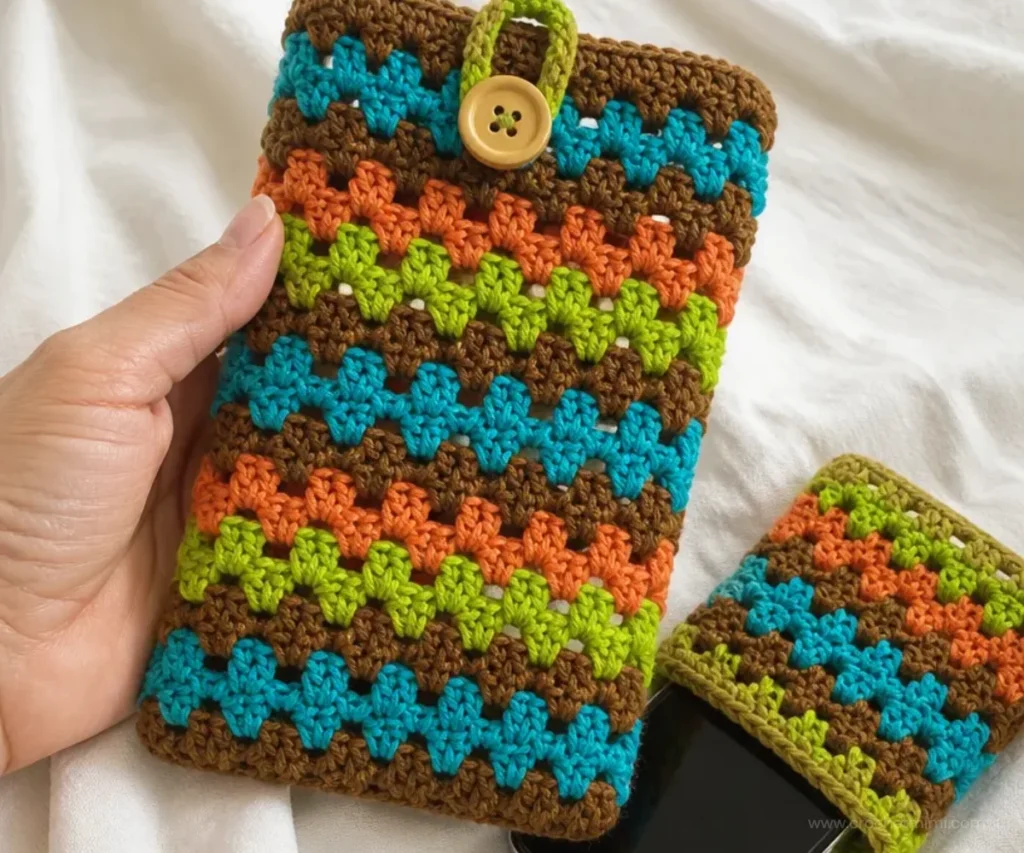
Crochet a practical, colorful mobile phone cover with this beginner-friendly Mobile Phone Covers Pattern. The design uses simple single crochet stitches, chain spaces, striped color changes, and a button closure to create a useful handmade accessory. Make one for yourself, prepare several as gifts, or coordinate the colors with a favorite outfit. If you enjoy handmade accessories and seasonal crochet projects, you may also like this spring crochet wreath pattern for another colorful project.
Why You’ll Love This Crochet Project
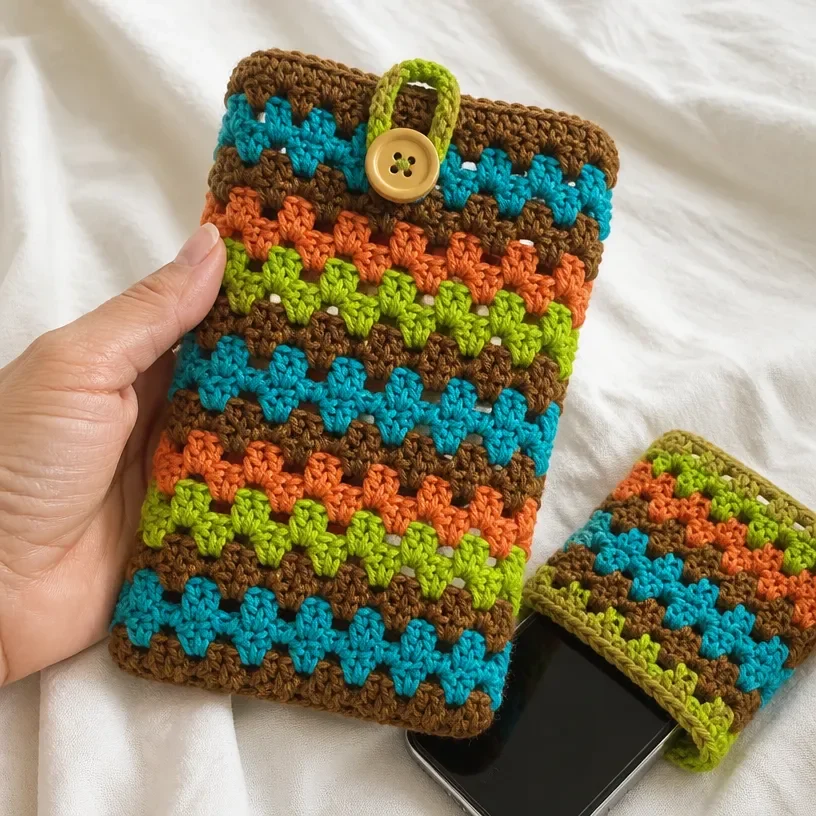
- Useful everyday accessory: The finished cover helps protect and carry a mobile phone while adding a handmade touch.
- Simple stitch pattern: The main fabric uses single crochet and chain spaces, making it approachable for crocheters who are building confidence.
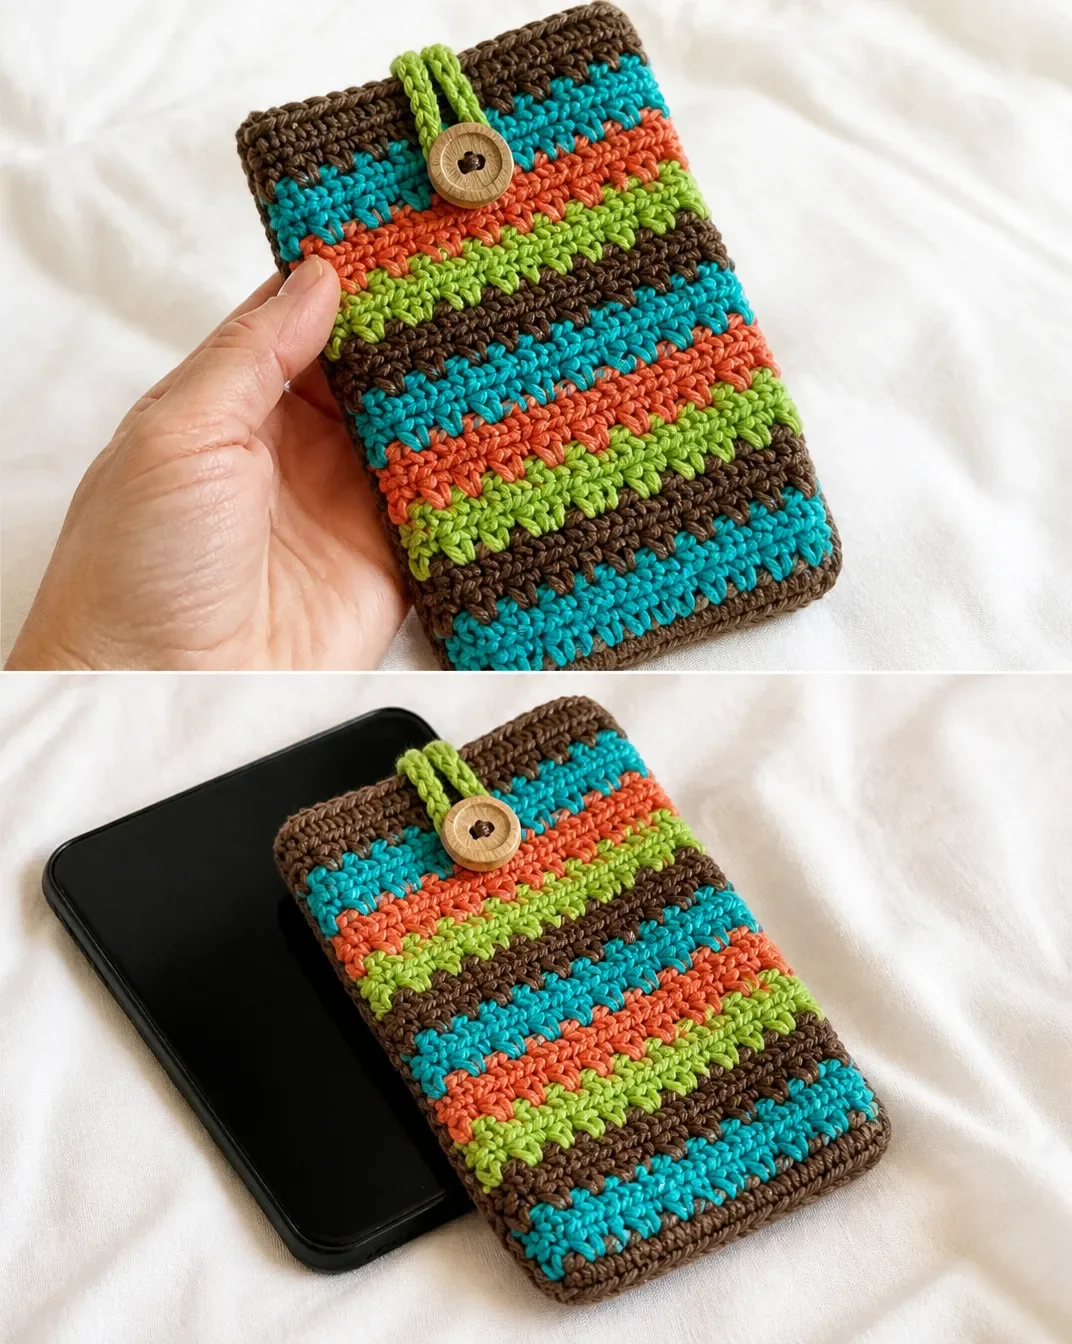
- Colorful stripe arrangement: Both versions create attractive bands of contrasting color without complicated shaping.
- Gift-friendly design: The small size and button closure make this a practical handmade gift.
- Good colorwork practice: Changing colors at specific rounds helps you practice joining yarn neatly and managing several shades.
Crochet Mimi Tip: Before beginning, arrange your four yarn colors in the order shown for your chosen version. This makes the round-by-round color sequence easier to follow.
Before You Start Crocheting
This pattern creates one mobile phone cover worked in joined rounds around a foundation chain. The first round establishes an oval-shaped base, and the remaining rounds build upward with single crochet stitches separated by chain-1 spaces. A button loop is added after the final main round, and one button is sewn to the front.
Two color versions are included. Version 1 makes eight covers from one ball each of its four colors, while Version 2 makes six covers from one ball each of its four colors. The supplied instructions do not include a finished measurement or gauge value, so use the recommended hook or the size needed to obtain gauge.
The pattern uses these US crochet abbreviations:
- ch: chain
- sc: single crochet
- sl st: slip stitch
- rnd: round
- sp: space
- rep: repeat
- st/sts: stitch/stitches
For another small, decorative crochet project that also emphasizes careful round work, see this beginner-friendly mandala doily pattern.
Materials You’ll Need
Yarn
Lily® Sugar’n Cream® (70.9 g/2.5 oz; 109 m/120 yds).
Version 1
- Contrast A, Warm Brown 01130: 15 m / 16.5 yds or 1 ball
- Contrast B, Hot Blue 01742: 5.5 m / 6 yds or 1 ball
- Contrast C, Tangerine 01699: 5.5 m / 6 yds or 1 ball
- Contrast D, Hot Green 01712: 5.5 m / 6 yds or 1 ball
One ball each of A, B, C, and D will make 8 Covers.
Version 2
- Contrast A, Sage Green 00084: 5.5 m / 6 yds or 1 ball
- Contrast B, Warm Brown 01130: 5.5 m / 6 yds or 1 ball
- Contrast C, Hot Green 01712: 5.5 m / 6 yds or 1 ball
- Contrast D, Hot Blue 01742: 18.5 m / 20 yds or 1 ball
One ball each of A, B, C, and D will make 6 Covers.
Tools and Notions
- 3.75 mm (U.S. F or 5) crochet hook, or size needed to obtain gauge
- 1 button
Step-by-Step Crochet Instructions
The complete pattern is provided below in the original construction order. Choose either Version 1 or Version 2 after completing the shared beginning.
Version 1
Work from [blank] to [blank] as given for Version 1.
Rounds 1–4
Rnd 1 (With A, ch 14)
1 sc in 2nd ch from hook.
(Ch 1. Miss next ch. 1 sc in next ch) 5 times.
Ch 1. Miss next ch.
(1 sc. Ch 1) twice in last ch.
Working across opposite side of foundation ch, (miss next ch. 1 sc in next ch. Ch 1) 5 times.
1 sc in last ch.
Ch 1.
Join with sl st to first sc.
28 sts.
Rnd 2
Sl st in next ch-1 sp. Ch 1.
1 sc in same sp.
Ch 1. Miss next sc. 1 sc in next ch-1 sp.
Rep from * around, ending with ch 1.
Miss last sc.
Join with sl st to first sc.
Fasten off.
Rnd 3 (Join B)
Join B with sl st in last ch-1 sp of previous rnd.
Ch 1.
1 sc in same sp.
Ch 1. Miss next sc. 1 sc in next ch-1 sp.
Rep from * around, ending with ch 1.
Miss last sc.
Join with sl st to first sc.
Rnd 4
As 2nd rnd.
Fasten off.
Rounds 5–12
Rnds 5 and 6
With C, as 3rd and 4th rnds.
Rnds 7 and 8
With A, as 3rd and 4th rnds.
Rnds 9 and 10
With D, as 3rd and 4th rnds.
Rnds 11 and 12
With A, as 3rd and 4th rnds.
Rounds 13–20
Rnds 13 and 14
With C, as 3rd and 4th rnds.
Rnds 15 and 16
With B, as 3rd and 4th rnds.
Rnds 17 and 18
With A, as 3rd and 4th rnds. Do not fasten off A.
Rnd 19
With A, as 2nd rnd.
Rnd 20
With D, as 3rd rnd. Do not fasten off.
Button Loop and Finishing
Button loop (after last main rnd)
Cont as follows for button loop:
With D, sl st across each st and ch-1 sp to center back of last rnd.
Ch 24 (button loop).
Join with sl st in center back.
Fasten off.
Assembly / Finishing
Sew button to front to correspond to button loop.
Version 2
Work from [blank] to [blank] as given for Version 1.
Rounds 3–10
Rnd 3 (Join B)
Join B with sl st in last ch-1 sp of previous rnd.
Ch 1.
1 sc in same sp.
Ch 1. Miss next sc. 1 sc in next ch-1 sp.
Rep from * around, ending with ch 1.
Miss last sc.
Join with sl st to first sc.
Rnd 4
As 2nd rnd.
Rnds 5 and 6
With C, as 3rd and 4th rnds.
Rnds 7 and 8
With A, as 3rd and 4th rnds.
Rnds 9 and 10
With B, as 3rd and 4th rnds.
Rounds 11–20
Rnds 11 to 14
With D, as 3rd and 4th rnds twice.
Rnds 15 and 16
With C, as 3rd and 4th rnds.
Rnds 17 to 20
With D, as 3rd and 4th rnds twice. Do not fasten off.
Button Loop and Finishing
Button loop (after last main rnd)
Cont as follows for button loop:
With D, sl st across each st and ch-1 sp to center back of last rnd.
Ch 24 (button loop).
Join with sl st in center back.
Fasten off.
Assembly / Finishing
Sew button to front to correspond to button loop.
Ways to Display Your Finished Crochet
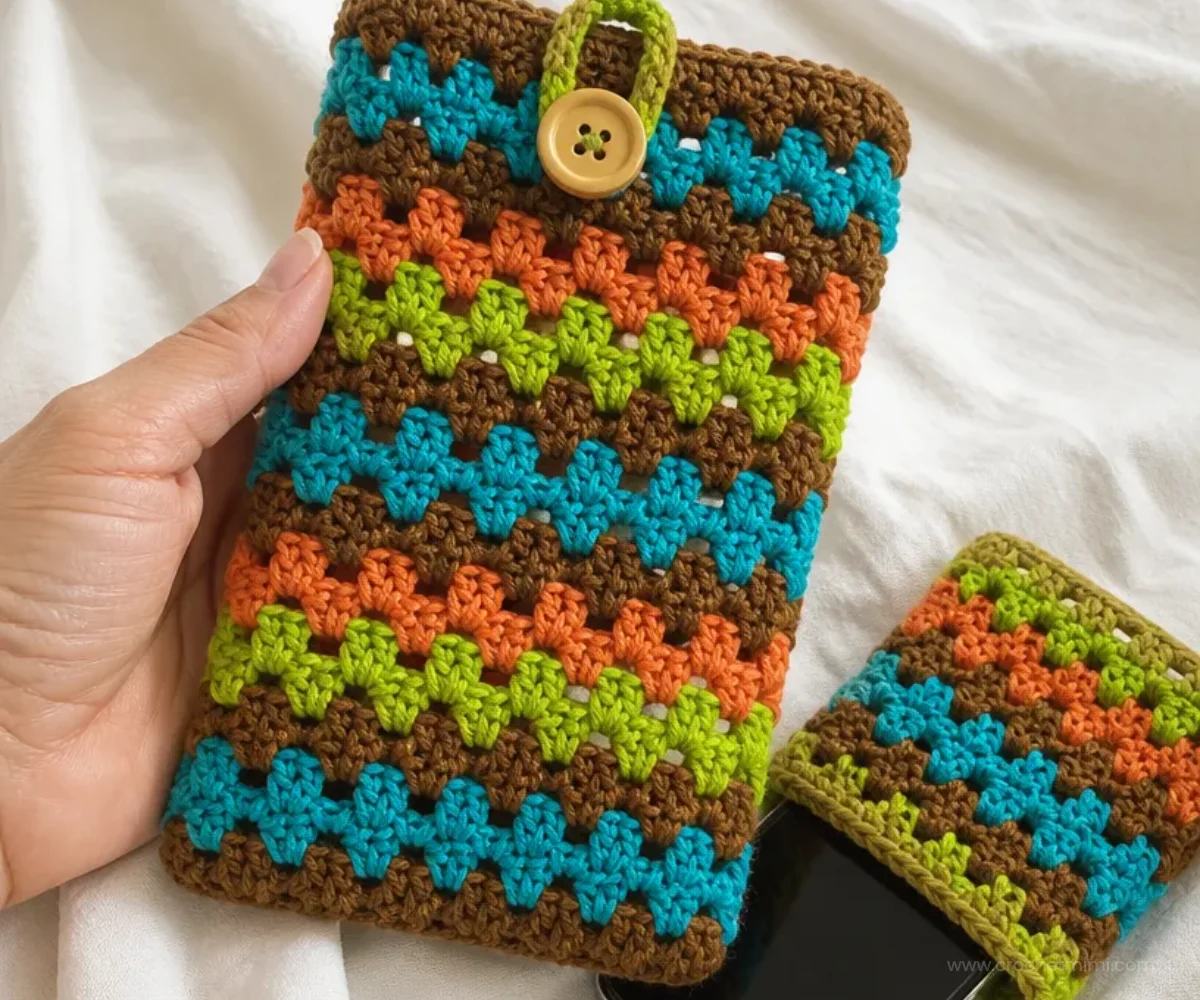
- Use it as an everyday phone holder: Keep the cover in a handbag, tote, or travel bag for a colorful protective layer.
- Make a coordinated gift set: Create covers in several color combinations for friends or family members.
- Match personal colors: Choose the version whose palette best suits the recipient, or use the color assignments as inspiration for your own yarn selection.
- Create a crochet accessory collection: Pair the cover with other handmade accessories in complementary shades.
- Prepare small handmade gifts: Because the pattern is designed around small amounts of yarn, it is suitable for making multiple covers from the listed supplies.
For a larger coordinated handmade gift idea, consider this crochet bouquet blanket pattern as inspiration for combining bright color palettes across projects.
Caring for Your Crochet Project
- Keep the cover dry and protect it from excessive moisture.
- Dust it gently with a soft, dry cloth or a clean, soft brush.
- For a small mark, use careful spot cleaning rather than soaking the cover.
- Allow the cover to dry completely before placing a phone inside.
- Store it flat or lightly stuffed with clean tissue so the shape remains stable.
- Keep the button loop from being pulled or stretched unnecessarily.
- Avoid excessive heat, which may affect the yarn, button, or overall shape.
- Follow the yarn manufacturer’s care instructions when laundering is necessary.
Tips for Better Results
- Count the first round carefully. The foundation chain is worked on both sides, and the completed first round should have 28 sts.
- Identify every ch-1 sp. Later rounds place single crochet stitches into chain-1 spaces, so locating these spaces accurately keeps the fabric even.
- Join new colors neatly. Version 1 and Version 2 both depend on clearly defined color bands, so make each color change at the specified round.
- Watch the joining point. Join each round with a slip stitch to the first single crochet unless the instruction specifically directs another placement.
- Keep the fabric flexible. Consistent tension is important because tight stitches can make the phone cover less accommodating.
- Check the button placement before sewing. Position the button so the 24-chain loop closes securely without pulling the fabric.
- Secure yarn ends carefully. Weave in ends on the inside of the cover so they do not interfere with the phone.
- Use the correct version throughout. Version 1 and Version 2 have different color sequences and yarn usage, so avoid switching between them unintentionally.
A floral accessory project can also help you practice tidy color changes; this beginner-friendly red rose pattern offers another colorful crochet project to explore.
Creative Ways to Customize Your Project
These ideas are optional and should be treated separately from the approved pattern instructions:
- Change the palette: Substitute a different four-color combination while keeping the same contrast assignments and round sequence.
- Use seasonal colors: Try warm oranges and golds for autumn, icy blues for winter, or soft pastels for spring.
- Coordinate the button: Choose a button that complements Contrast A or one of the brighter stripe colors.
- Make matching sets: Use Version 1 for one group of gifts and Version 2 for another, keeping the construction consistent while changing the stripe arrangement.
- Try another yarn carefully: A different yarn may alter the fabric thickness, texture, dimensions, and yarn requirements. Use the recommended hook size only as a starting point and adjust as needed to obtain gauge.
- Create a coordinated handmade collection: Pair the cover with other colorful crochet accessories, such as a small floral-inspired gift arrangement or a decorative piece. A crochet bridal nosegay pattern can inspire an elegant complementary color scheme.
Frequently Asked Questions
Is this mobile phone cover pattern beginner-friendly?
The pattern uses single crochet, chain stitches, slip stitches, joined rounds, and basic color changes. Beginners should read the round instructions carefully and count the first round before continuing.
What yarn is recommended?
The pattern uses Lily® Sugar’n Cream® yarn with the listed colors and quantities for Version 1 or Version 2. If substituting yarn, remember that fiber, thickness, and tension can affect the cover’s fabric and size.
What crochet hook should I use?
Use a 3.75 mm (U.S. F or 5) crochet hook, or choose the size needed to obtain gauge.
How many covers can the yarn make?
One ball each of Contrasts A, B, C, and D will make 8 Covers for Version 1. One ball each of Contrasts A, B, C, and D will make 6 Covers for Version 2.
How is the cover closed?
A 24-chain button loop is made after the final main round. Sew one button to the front so it corresponds with the loop.
Can I change the colors?
Yes. Color changes are an optional customization, but keep track of the contrast letters and round sequence so the intended stripe arrangement remains clear.
Do Version 1 and Version 2 use the same color arrangement?
No. Version 1 uses Warm Brown, Hot Blue, Tangerine, and Hot Green in its specified sequence. Version 2 uses Sage Green, Warm Brown, Hot Green, and Hot Blue in a different sequence.
How should I care for the finished cover?
Protect it from excessive moisture and heat, dust it gently, and use careful spot cleaning when needed. Let it dry fully before placing a phone inside.
Conclusion
This Mobile Phone Covers Pattern combines useful construction with colorful stripes, simple stitches, and a practical button closure. Make Version 1 or Version 2 as written, or use the color sequence as inspiration for a personalized accessory. For another custom phone-cover idea, explore this custom phone case pattern or browse this phone case DIY app for additional design inspiration.