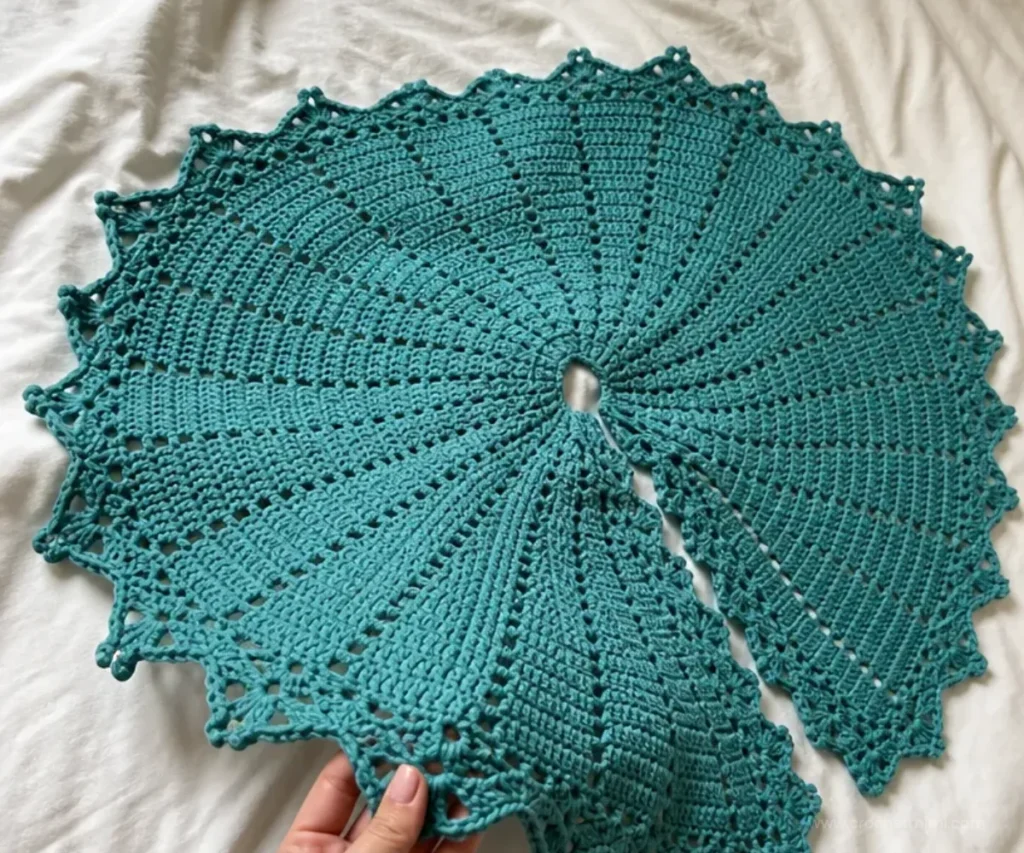
A crochet Christmas tree skirt adds a handmade layer of warmth and texture beneath the tree. This design is built from eleven connected motifs, followed by an openwork border with picots for a festive finish. It is a satisfying project for crocheters who enjoy repeating sections, shaping with increases, and joining pieces as they work. Use a color that complements your ornaments, or coordinate it with a small crochet bear Christmas ornament display for a cohesive handmade holiday theme.
Why You’ll Love This Crochet Project
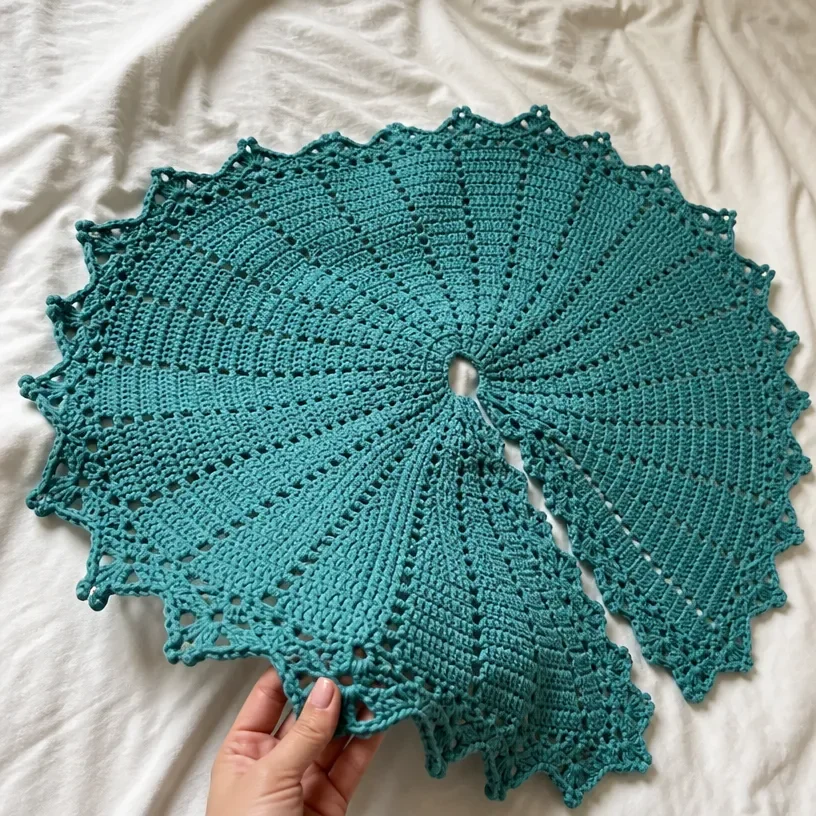
- It creates a substantial seasonal decoration. The connected motif construction produces a circular skirt that frames the base of a Christmas tree beautifully.
- The motifs offer structured repetition. Once the first motif is complete, the remaining ten motifs follow a related sequence with joining worked as you go.
- The border adds decorative detail. Chain spaces, clusters, treble crochet, and picots create an airy edge rather than a plain finish.
- It is easy to personalize with color. The supplied pattern calls for two balls of Bernat® Super Value™, so you can choose a shade that suits your holiday decorating.
- It makes a thoughtful handmade gift. A finished tree skirt can be given as a seasonal housewarming gift or kept as part of a family holiday collection.
Crochet Mimi Tip: Keep the first motif nearby while making the second through eleventh motifs. It makes it easier to identify the corresponding chain-4 spaces used for joining.
Pattern Overview
This project is made in three stages:
- Crochet one First Motif.
- Crochet ten additional motifs, joining each one to the left side of the previous motif as directed.
- Work the four-row border after all eleven motifs are complete.
The motif shaping uses double crochet, treble crochet, slip stitches, chain spaces, and repeated increases. The border uses double crochet, single crochet, treble crochet, treble-two-together, clusters, and picots.
The pattern uses these common US crochet abbreviations:
- ch: chain
- dc: double crochet
- tr: treble crochet
- sc: single crochet
- sl st: slip stitch
- st/sts: stitch/stitches
- beg: beginning
- rem: remaining
- rep: repeat
- RS: right side
- WS: wrong side
For another seasonal decorating idea, a crochet Halloween tree pattern can inspire a similar approach to themed displays throughout the year.
Materials You’ll Need
- Bernat® Super Value™: 7 oz/197g; 440 yds/402 m, color of your choice, 2 balls
- Crochet hook: Size U.S. H/8 (5 mm), or size needed to obtain gauge
Step-by-Step Crochet Instructions
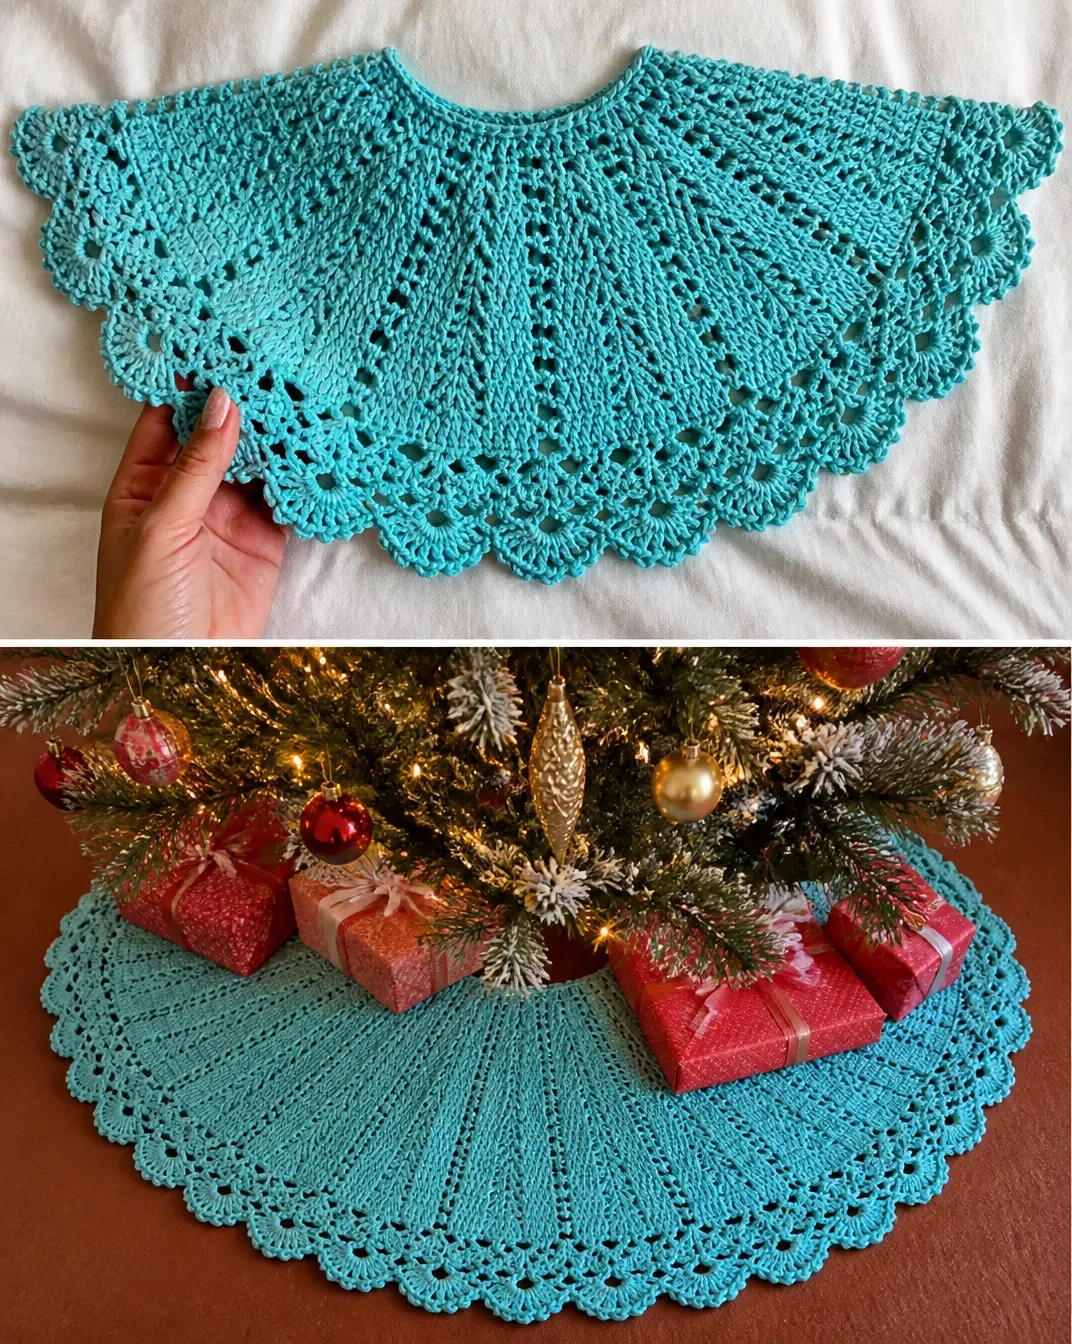
Construction Overview
Make Eleven Motifs (a “First Motif” plus “Second to Eleventh Motifs”) and join them as directed. Work Border after motifs are complete.
First Motif
1st row (WS)
(3 dc. Ch 3. 4 dc) in 4th ch from hook – counts as beg shell.
Miss next 9 ch. Ch 3. (4 dc. Ch 3. 4 dc) in next ch – shell made. Rep from * to end of chain.
Turn.
2nd row (RS)
Sl st in each of first 4 dc and ch-3 sp.
Ch 3 (counts as dc).
2 dc in same sp as last sl st.
Turn.
Leave rem sts unworked.
3rd row
Ch 4. 2 dc in first dc. 1 dc in next dc.
(2 dc. 1 tr) in last dc.
Turn.
4th row
Ch 4. 2 dc in first tr. 1 dc in each dc to last tr.
(2 dc. 1 tr) in last tr.
Turn.
5th row
Sl st in each of first 6 sts.
Ch 4. 2 dc in same sp as last sl st.
1 dc in each dc to last 6 sts.
(2 dc. 1 tr) in next dc.
Turn.
Leave rem 5 sts unworked.
6th to 8th rows
As 3rd row 3 times.
9th row
As 5th row.
10th to 12th rows
As 3rd row 3 times.
13th row
As 5th row.
14th to 16th rows
As 3rd row 3 times.
17th row
Sl st in each of first 15 sts.
Ch 4. 2 dc in same sp as last sl st.
1 dc in each of next 3 dc.
(2 dc. 1 tr) in next dc.
Fasten off.
Leave rem 14 sts unworked.
Second to Eleventh Motifs
Make the second through eleventh motifs by joining each motif to the previous one as directed.
1st row (RS)
Join yarn with sl st to ch-3 sp of next shell on left side of previous Motif.
Ch 3. 2 dc in same sp as last sl st.
Turn.
2nd row
Ch 4. 2 dc in first dc. 1 dc in next dc.
(2 dc. 1 tr) in last dc.
Turn.
3rd row
Ch 4. 2 dc in first tr. 1 dc in each dc to last tr.
(2 dc. 1 tr) in last st.
Turn.
4th row
Ch 4. 2 dc in first tr. 1 dc in each dc to last tr.
(2 dc. 1 tr) in last st.
Sl st in top of corresponding ch-4 of previous Motif.
Turn.
5th row
Sl st in each of first 6 sts.
Ch 4. 2 dc in same sp as last sl st.
1 dc in each dc to last 6 sts.
(2 dc. 1 tr) in next dc.
Turn.
Leave rem 5 sts unworked.
6th and 7th rows
As 3rd row twice.
8th and 9th rows
As 4th and 5th rows.
10th and 11th rows
As 3rd row twice.
12th and 13th rows
As 4th and 5th rows.
14th and 15th rows
As 3rd row twice.
16th row
As 4th row.
17th row
Sl st in each of first 15 sts.
Ch 3. 1 dc in same sp as last sl st.
1 dc in each of next 3 dc.
(1 dc. 1 tr) in next dc.
Fasten off.
Leave rem 14 sts unworked.
Border
Work the border after all eleven motifs are complete.
Border: 1st row (RS)
Join yarn with sl st to first dc of 16th row of Eleventh Motif.
Ch 10 (counts as dc and ch 7).
Miss next 6 dc.
1 dc in next dc.
Ch 7. Miss next 6 dc. 1 sc in first tr of 17th row. Ch 3. Miss next 2 dc. 2 dc in next dc. Ch 3. Miss next 2 dc. 1 sc in last tr of 17th row. Ch 7. Miss next 6 dc of 16th row. 1 dc in next dc. Ch 7. Miss next 7 sts.*
-2 dc in next joining sl st. Ch 7. Miss next 7 sts. 1 dc in next dc of 16th row of next Motif.
Rep from * 10 times more, then from * to once.**
1 dc in last dc of 16th row.
Turn.
Border: 2nd row
Ch 3 (counts as dc).
1 dc in first dc.
Ch 3. 3 dc in next ch-7 sp. Ch 6. 3 dc in next ch-7 sp.*
(Ch 3. 2 dc in next dc) twice.
Rep from * 10 times more, then from * to once.**
Ch 3. 2 dc in 3rd ch of ch 10.
Turn.
Border: 3rd row
Ch 3 (counts as dc).
1 dc in next dc.
Ch 6. 3 dc in next ch-6 sp. Ch 6.*
Miss next (3 dc, ch-3 sp, 2 dc).
(3 dc. ch 3. 3 dc) in next ch-3 sp.
Rep from * 10 times more, then from * to once.**
1 dc in each of last 2 dc.
Turn.
Border: 4th row
Ch 3 (counts as dc).
1 dc in next dc.
Ch 7. Tr2tog. Ch 7.*
Miss next 3 dc.
(3 dc. Ch 3. Sl st to top of last dc – picot made. 3 dc) in next ch-3 sp.
Rep from * 10 times more, then from * to once.**
1 dc in each of last 2 dc.
Fasten off.
Ways to Display Your Finished Crochet
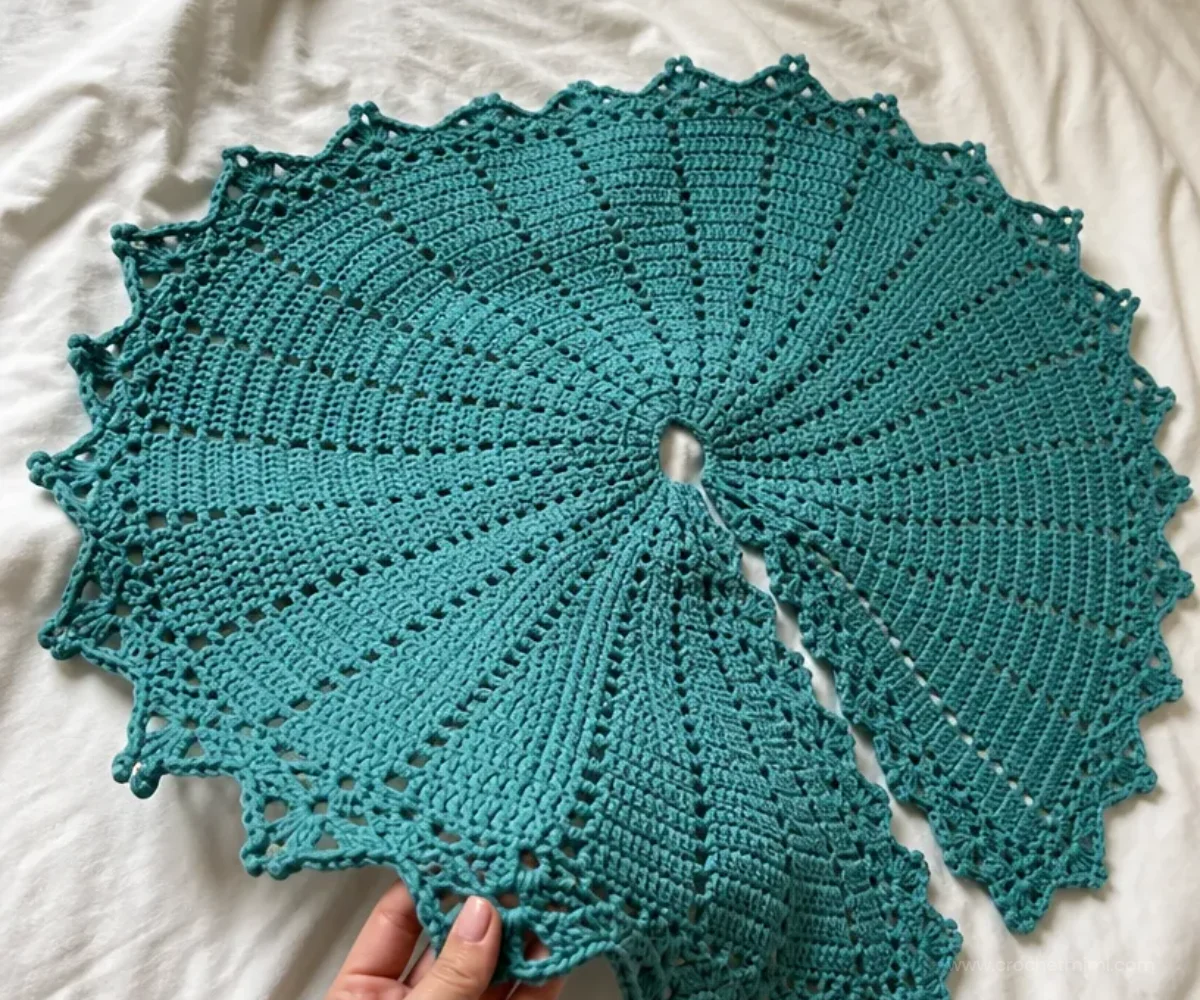
- Place the skirt beneath a tabletop or full-size Christmas tree to frame the stand and conceal its base.
- Coordinate the yarn color with ornaments, ribbon, stockings, or a tree topper.
- Use it as part of a handmade holiday vignette around a small artificial tree.
- Give the completed skirt as a seasonal housewarming gift.
- Fold it carefully and include it with other handmade decorations in a reusable holiday storage box.
- Pair it with handmade seasonal accents, such as a floral-inspired centerpiece or crocheted ornaments, for a coordinated display. A spring project such as an April crochet flower wreath can also provide ideas for arranging color and texture in other seasonal decorations.
Caring for Your Crochet Project
Dust the finished tree skirt gently with a soft brush or use a vacuum on a low setting with a protective fabric layer between the nozzle and crochet. Pay special attention to the open chain spaces and picots, which can catch easily.
For small marks, spot clean carefully according to the yarn manufacturer’s care instructions. Avoid pulling the border while cleaning or storing. Allow the skirt to dry completely before folding it.
Store it in a dry container away from direct sunlight, moisture, and sharp decorations. Fold rather than compressing it tightly, and place it where hooks, wire, or rough ornament surfaces cannot snag the stitches.
Tips for Better Results
- Make a careful first motif. The first motif establishes the shaping and provides the reference for joining the remaining motifs.
- Mark the right and wrong sides. The first row begins on the WS, while the second row begins on the RS. A removable stitch marker can help prevent turning confusion.
- Watch the chain spaces. The ch-3 and ch-7 spaces are important landmarks in both the joining process and border.
- Count the unworked stitches. Several rows specifically leave remaining stitches unworked, so do not continue across the entire row by habit.
- Join to the corresponding ch-4 carefully. In the fourth row of each additional motif, the slip stitch goes to the top of the corresponding ch-4 of the previous motif.
- Keep your tension steady. Loose or tight chain spaces can make the motifs uneven and may affect how the completed skirt lies beneath the tree.
- Secure ends neatly. Fasten off at the specified points and weave in ends without pulling the motif out of shape.
- Take care with the picots. In the final border row, the slip stitch to the top of the last dc creates each picot, so keep these stitches clearly defined.
Creative Ways to Customize Your Project
The approved instructions should remain unchanged, but the finished appearance can be customized through yarn choice and styling:
- Choose a traditional red, green, cream, or white shade for a classic holiday palette.
- Use a neutral color to let colorful ornaments stand out above the skirt.
- Select a color that matches an existing tree collar, ribbon, or room décor.
- Use the same pattern in a different yarn only as an optional experiment; changing yarn weight or fiber can alter gauge, drape, motif size, border proportions, and the amount of yarn required.
- Pair the skirt with a handmade botanical accent in another room, such as beginner-friendly crochet red roses, while keeping the tree display itself seasonal.
- If you enjoy round lace-inspired crochet, a beginner-friendly mandala crochet doily may suggest complementary colors for a holiday tabletop arrangement.
Frequently Asked Questions
How many motifs does this tree skirt use?
The pattern uses eleven motifs total: one First Motif and ten Second to Eleventh Motifs.
When is the border added?
Work the border after all eleven motifs are complete and joined as directed.
What yarn is recommended?
The pattern specifies Bernat® Super Value™, 7 oz/197g; 440 yds/402 m, in the color of your choice, using two balls.
What hook size should I use?
Use a U.S. H/8 (5 mm) crochet hook, or use the size needed to obtain gauge.
Can I change the yarn color?
Yes. The pattern allows a color of your choice. Keep in mind that changing yarn type or weight may affect gauge, drape, dimensions, texture, and yarn requirements.
Are the additional motifs joined as they are made?
Yes. The second through eleventh motifs begin by joining yarn to the ch-3 space of the next shell on the left side of the previous motif. The fourth row also joins to the corresponding ch-4 of the previous motif.
What decorative detail finishes the edge?
The four-row border includes chain spaces, double crochet groups, treble crochet, treble-two-together, and picots.
How should the finished skirt be stored?
Dust it gently, spot clean only as needed according to the yarn manufacturer’s care instructions, let it dry completely, and store it folded in a dry place away from snagging items.
Conclusion
This crochet Christmas tree skirt combines repeating motifs, joined-as-you-go construction, and an elegant openwork border for a meaningful handmade holiday decoration. Choose a color that suits your tree, follow the motif sequence carefully, and enjoy styling the finished piece beneath your seasonal display. For additional inspiration, compare it with this chunky crochet Christmas tree skirt pattern and this collection of free crochet Christmas tree skirt patterns.