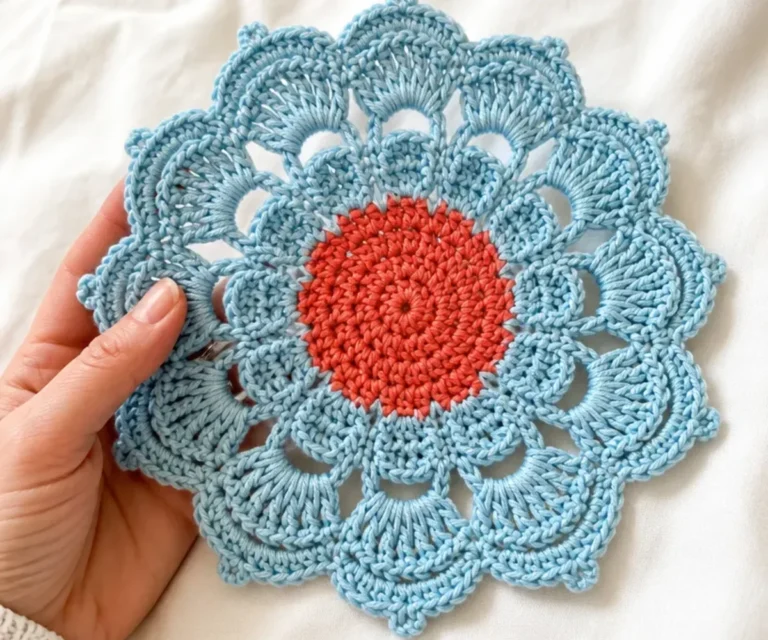
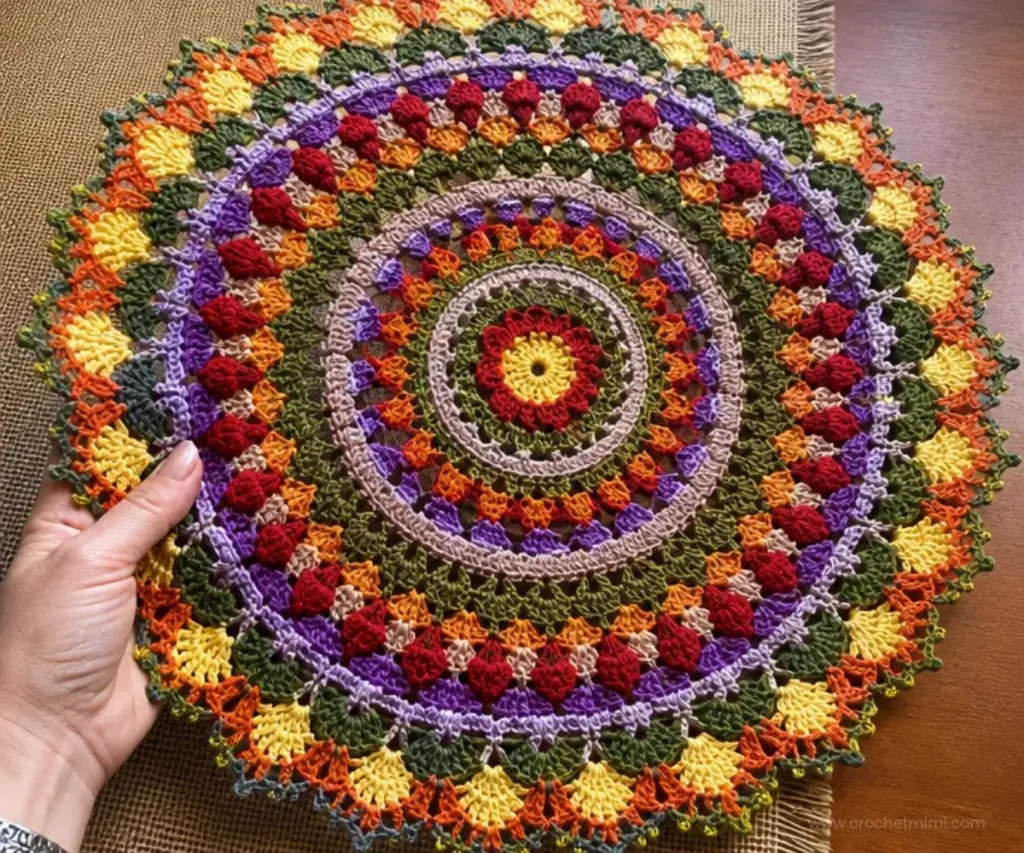
The Crochet Mandala Doily Pattern creates a colorful, circular design with layered clusters, popcorn stitches, textured groups, open chain spaces, and a picot-edged finish. Made with fine crochet thread in seven coordinating shades, the finished doily measures about 14 inches (35.5 cm) in diameter. It makes an elegant table accent, handmade gift, or framed fiber-art display. If you enjoy colorful botanical crochet, you may also like these beginner-friendly crochet red roses as a complementary project.
Why You’ll Love This Crochet Project
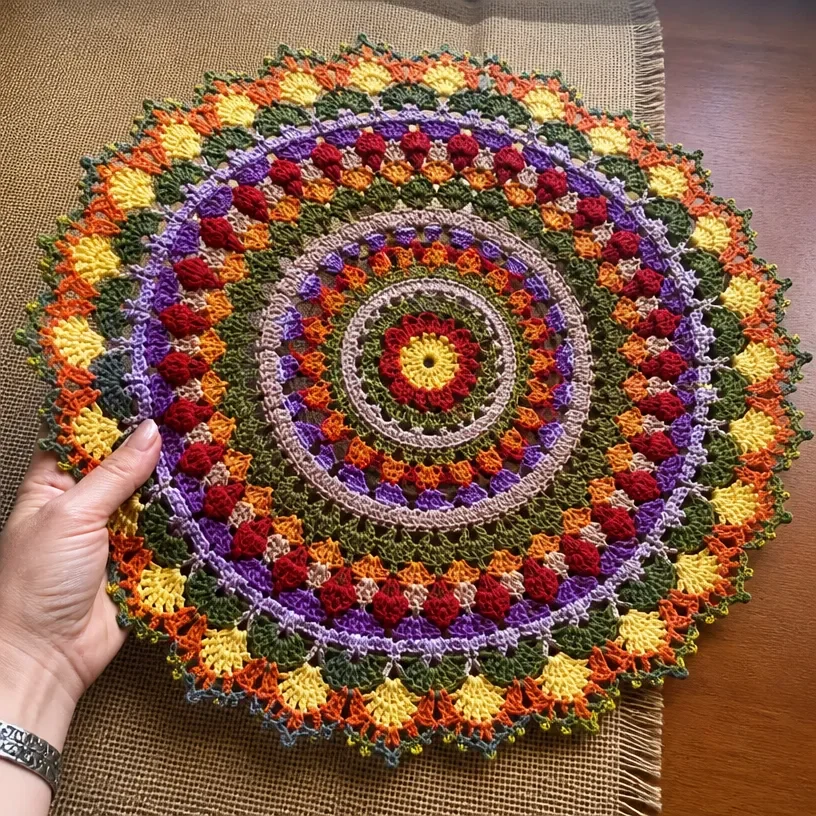
- Striking color progression: Goldenrod, pumpkin, copper, forest green, olive, violet, and cardinal red create a warm mandala palette.
- Excellent stitch practice: The pattern includes clusters, popcorns, front-post double crochet, treble decreases, back-loop work, and picots.
- Decorative texture: Raised stitches and layered groups give the surface dimension without requiring separate motifs or assembly.
- Useful finished size: At about 14 inches across, the doily works well beneath a centerpiece, lamp, vase, or decorative bowl.
- A thoughtful handmade gift: A carefully blocked and finished doily can be given for birthdays, housewarmings, holidays, or special occasions.
Crochet Mimi Tip: Keep each color change neat by fastening off and weaving in the ends after the specified rounds rather than leaving all finishing work until the very end.
Before You Start Crocheting
This project is worked as one circular doily made over 17 rounds. Each round builds on the previous one, beginning with eight cluster sections and gradually increasing into a broad, highly textured circle. The final round adds small picots that create a delicate, embellished edge.
The finished doily measures about 14 inches [35.5 cm] in diameter. The supplied pattern does not specify a skill level, but familiarity with basic crochet stitches, joining rounds, color changes, and reading repeated instructions will be helpful.
The adjustable-ring technique is used at the beginning. Several rounds also require working around stitches from an earlier round, working in back loops only, or inserting the hook into spaces between groups.
Abbreviations and stitch terms
- beg- = beginning
- ch = chain
- Cl = cluster
- dc = double crochet
- Fpdc = front-post double crochet
- sc = single crochet
- sl st = slip stitch
- tr3tog = treble crochet three together
- picot = the picot stitch specified in the pattern
- popcorn = popcorn stitch as specified in the pattern
Materials You’ll Need
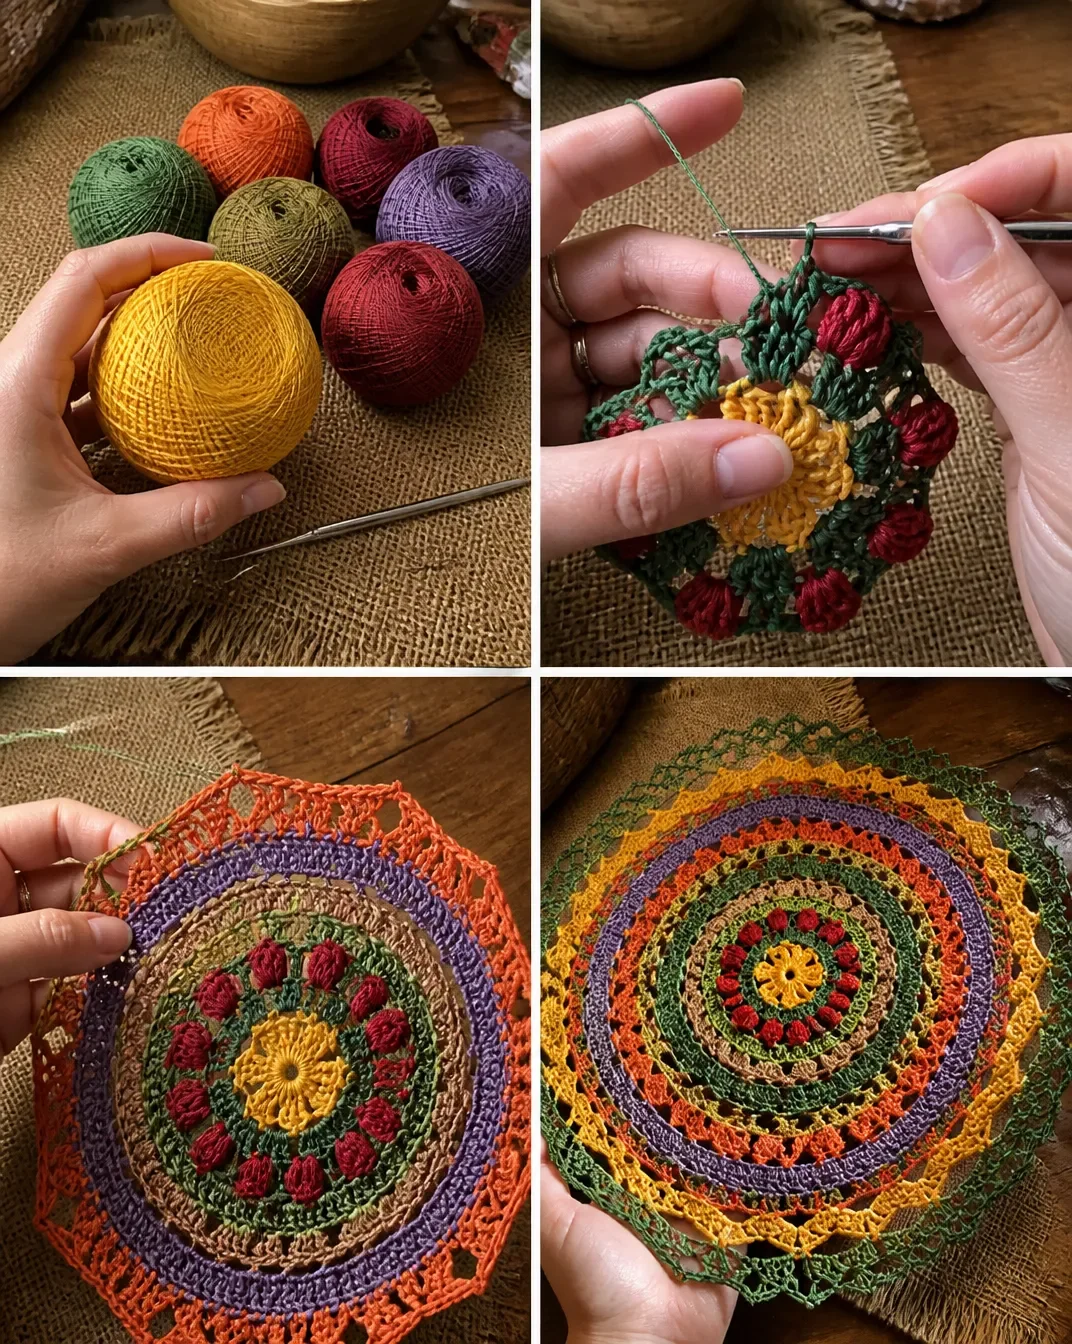
- Aunt Lydia’s® Classic Crochet Thread, Size 10, 1 ball each:
- 421 Goldenrod A
- 431 Pumpkin B
- 310 Copper Mist C
- 449 Forest Green D
- 672 Olive E
- 119 Violet F
- 196 Cardinal Red G
- Susan Bates® Steel Crochet Hook: 2.1 mm [US 3]
- Thread needle
The fine crochet thread and steel hook are used to create the detailed, openwork structure of the mandala doily. Keep the color labels nearby because the pattern changes shades frequently.
Complete Crochet Instructions
Doily size
Doily measures about 14″ [35.5 cm] diameter.
Special technique: Adjustable ring
Wrap yarn into a ring, ensuring that the tail falls behind the working yarn. Grip ring and tail between middle finger and thumb. Insert hook through center of ring, yarn over (with working yarn) and draw up a loop. Work stitches of first round in the ring. After the first round of stitches is worked, pull gently on tail to tighten ring.
Doily
Round 1 (right side)
With A, make an adjustable ring.
Beg-Cl in ring, [ch 5, Cl in ring] 7 times, ch 5; join with slip st in top of beginning ch – 8 clusters and 8 ch-5 spaces.
Fasten off A and weave in ends.
Round 2
With right side facing, draw up a loop of G in any ch-5 space, (beg-popcorn, ch 3, popcorn) in same ch-5 space,
*ch 3, (popcorn, ch 3, popcorn) in next ch-5 space; repeat from * around, ch 3;
join with slip st in top of beginning ch 16 popcorns and 16 ch-3 spaces.
Fasten off G and weave in ends.
Round 3
With right side facing, draw up a loop of E in any ch-3 space, ch 8 (counts as dc, ch 5), dc in next ch-3 space,
*ch 5, dc in next ch-3 space; repeat from * around, ch 5;
join with slip st in 3rd ch of beginning ch 16 dc and 16 ch-5 spaces.
Round 4
Slip st in first ch-5 space, ch 3 (counts as dc), 5 dc in same ch-5 space, 6 dc in each of next 15 ch-5 spaces;
join with slip st in top of beginning ch Sixteen 6-dc groups.
Fasten off E and weave in ends.
Round 5
With right side facing, join C with sc in first dc of any 6-dc groups, sc in next 5 dc, Fpdc around next dc of Round 3,
*sc in next 6 dc of Round 4, Fpdc around next dc of Round 3; repeat from * around;
join with slip st in first sc 16 Fpdc and sixteen 6-sc groups.
Fasten off C and weave in ends.
Round 6
With right side facing, draw up a loop of F in back loop of any st, ch 3 (counts as dc), dc in back loop of each st around;
join with slip st in top of beginning ch 112 dc.
Fasten off F and weave in ends.
Round 7
With right side facing, draw up a loop of B in any st, beg-tr3tog,
*ch 4, tr3tog; repeat from * around, skip last st;
join with slip st in top of beginning ch 37 tr3tog and 37 ch-4 spaces.
Fasten off B and weave in ends.
Round 8
With right side facing, draw up a loop of D in any ch-4 space, ch 3 (counts as dc), 4 dc in same ch-4 space, 5 dc in each ch-5 space around;
join with slip st in top of beginning ch Thirty-seven 5-dc groups.
Fasten off D and weave in ends.
Round 9
With right side facing, join A with sc in first dc of any 5-dc group, sc in next 4 dc, Fpdc around next tr3tog of Round 7,
*sc in next 5 dc of Round 8, Fpdc around next tr3tog of Round 7; repeat from * around;
join with slip st in first sc Thirty-seven 5-sc groups and 37 Fpdc.
Fasten off A and weave in ends.
Round 10
With right side facing, draw up a loop of G in any Fpdc,
(beg-Cl, ch 3, Cl) in same st, (Cl, ch 3, Cl) in each Fpdc around;
join with slip st in top of beginning ch 74 clusters and 37 ch-3 spaces (thirty-seven (Cl, ch 3, Cl) groups).
Fasten off G and weave in ends.
Round 11
With right side facing, draw up a loop of C in any ch-3 space, ch 3 (counts as dc) 4 dc in same ch-3 space, 5 dc in each ch-3 space around;
join with slip st in top of beginning ch Thirty-seven 5-dc groups.
Fasten off C and weave in ends.
Round 12
With right side facing, join F with sc in first dc of any 5-dc group, sc in next 4 dc, dc in next space between (Cl, ch 3, Cl) groups of Round 10,
*sc in next 5 dc of Round 11, dc in next space between (Cl, ch 3, Cl) groups of Round 20; repeat from * around;
join with slip st in first sc Thirty-seven 5-sc groups and 37 dc.
Fasten off F and weave in ends.
Round 13
With right side facing, draw up a loop of E in back loop of first sc of any 5-sc groups, ch 3 (counts as dc);
working in back loops only, dc in next 4 sc,
*ch 2, skip next dc, dc in next 5 sc; repeat from * to last dc, ch 2, skip last dc;
join with slip st in top of beginning ch Thirty-seven 5-dc groups and 37 ch-2 spaces.
Fasten off E and weave in ends.
Round 14
With right side facing, draw up a loop of B in any ch-2 space, beg-Cl in same ch-2 space,
*ch 5, skip next 2 dc, sc in next dc, ch 5, skip next 2 dc, Cl in next ch-2 space; repeat from * to last 5-dc group, ch 5, skip next 2 dc, sc in next dc, ch 5, skip next 2 dc;
join with slip st in top of beginning ch 37 clusters, 37 sc, and 74 ch-5 spaces.
Fasten off B and weave in ends.
Round 15
With right side facing, draw up a loop of A in any Cl, ch 3 (counts as dc),
(dc, ch 3, 2 dc) in same Cl,
*ch 5, (2 dc, ch 3, 2 dc) in next Cl; repeat from * around, ch 5;
join with slip st in top of beginning ch 37 (2 dc, ch 3, 2 dc) groups and 37 ch-5 spaces (between the groups).
Fasten off A and weave in ends.
Round 16
With right side facing, draw up a loop of D in any ch-3 space,
(beg-Cl, ch 1, Cl, ch 1, Cl) in same ch-3 space,
*ch 3, sc in next ch-5 space, ch 3, (Cl, ch 1, Cl, ch 1, Cl) in next ch-3 space; repeat from * to last ch-5 space, ch 3, sc in last ch-5 space, ch 3;
join with slip st in top of beginning ch 37 (Cl, ch 1, Cl, ch 1, Cl) groups, 37 sc, and 74 ch-3 spaces.
Fasten off D and weave in ends.
Round 17
With right side facing, draw up a loop of E in first ch-1 space of any (Cl, ch 1, Cl, ch 1, Cl) group, ch 3 (counts as dc), picot, 2 dc in same ch-1 space,
(2 dc, picot, 2 dc) in next ch-1 space, dc in next ch-5 space of Round 15,
*(2 dc, picot, 2 dc) in each of next 2 ch-1 spaces of Round 16, dc in next ch-5 space of Round 15; repeat from * around;
join with slip st in top of beginning ch.
Fasten off E and weave in ends.
Finishing
Weave in any remaining ends.
Ways to Display Your Finished Crochet
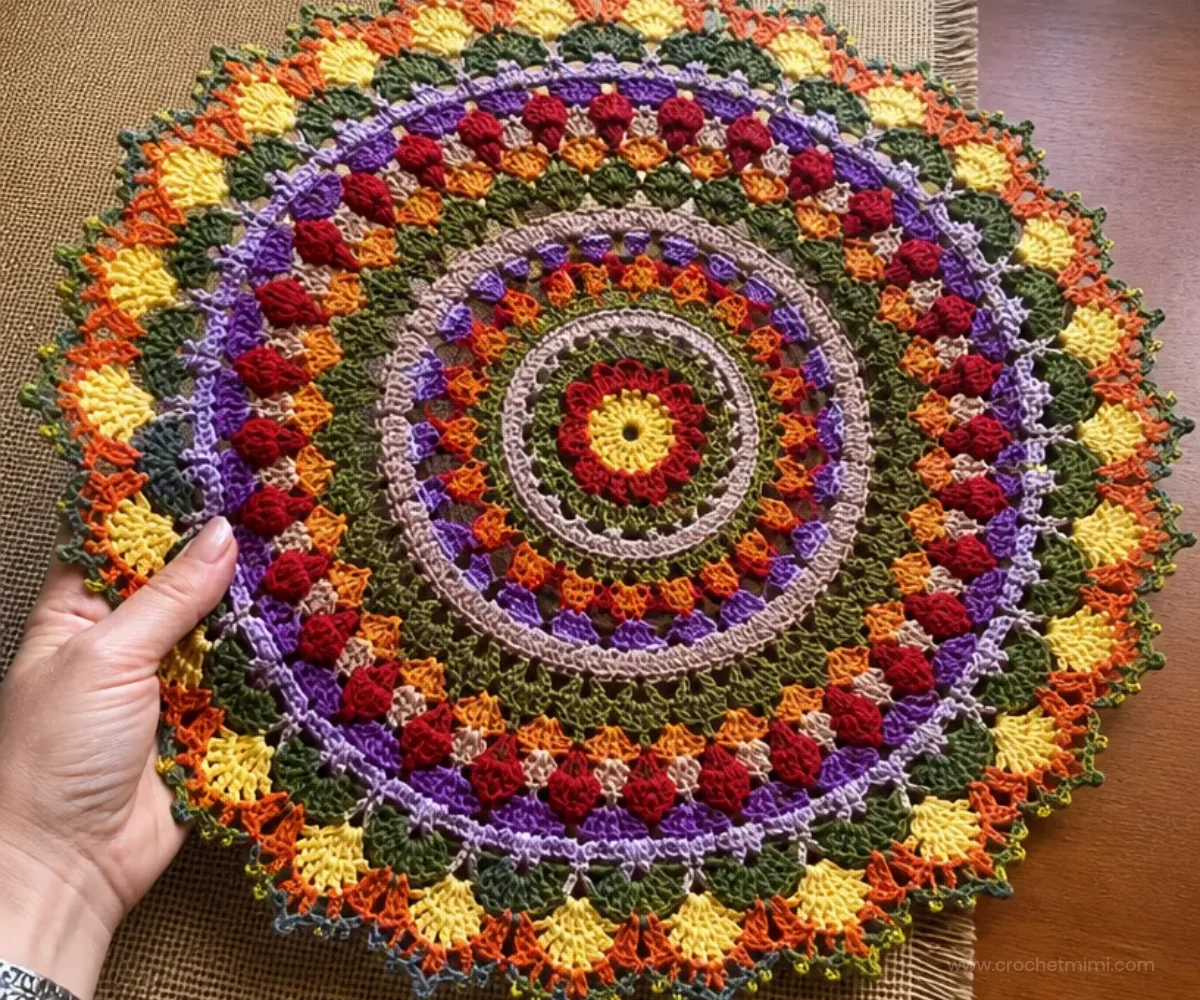
- Table centerpiece: Place the doily beneath a vase, bowl, candleholder, or small decorative arrangement.
- Colorful shelf accent: Lay it on a light-colored shelf or console where the seven shades can stand out.
- Framed textile art: Stretch the finished piece gently and mount it in a deep frame for a decorative wall display.
- Handmade gift: Pair it with a vase, serving dish, or other home accent for a thoughtful housewarming present.
- Seasonal styling: The warm gold, pumpkin, copper, green, violet, and red palette works especially well with autumn or harvest décor.
- Layered crochet display: Use the doily as a base beneath other handmade pieces, such as a crochet floral petal pillow for a coordinated textile arrangement.
Caring for Your Crochet Project
- Dust the doily gently with a soft brush, clean makeup brush, or low-suction vacuum attachment covered with a thin cloth.
- For small marks, use careful spot cleaning rather than soaking the entire piece.
- Avoid wringing, twisting, or pulling the open chain spaces and picot edge.
- Keep the doily away from excessive heat, direct sunlight for prolonged periods, and rough surfaces that could catch the thread.
- Store it flat or loosely rolled with acid-free tissue if it will not be displayed for a while.
- Before displaying it again, reshape the circular edge gently by hand and allow it to rest flat.
Because the design uses fine thread and many open spaces, avoid placing heavy objects on it for extended periods.
Helpful Crochet Tips
- Track every color change. The letters A through G identify the thread shades, so keep the color key beside you while working.
- Count the groups at the end of each round. The stated counts such as 16 popcorns, 37 tr3tog, or 74 clusters are useful checkpoints before beginning the next round.
- Watch the working loops carefully. Round 6 and Round 13 require back-loop work, which changes the texture and helps define the surrounding structure.
- Keep front-post stitches positioned correctly. In Rounds 5 and 9, the Fpdc is worked around a stitch from an earlier round rather than into the top of the current round.
- Use the correct chain space. Several rounds are worked into ch-3, ch-4, or ch-5 spaces. Inserting the hook into the wrong space can quickly affect the circular shape.
- Join rounds neatly. Use the specified slip-stitch location, especially when joining in the top of the beginning chain or the first single crochet.
- Maintain even tension. Tight tension can make the doily cup, while loose tension can leave the outer edge wavy.
- Finish ends as you go. Fastening off and weaving in each color after its designated round keeps the work manageable and prevents tangling.
For another colorful crochet decoration using repeated motifs, the crochet bell flower design inspiration can provide ideas for coordinating handmade displays.
Color and Styling Variations
These ideas are optional and do not change the approved pattern instructions:
- Use a restrained palette: Keep the same seven color assignments but choose shades from one family, such as muted autumns, jewel tones, or soft pastels.
- Highlight the outer edge: A contrasting shade for Round 17 can make the picots especially visible.
- Create a monochromatic mandala: Select several values of one color while preserving the lettered color sequence.
- Coordinate the setting: Display the original warm palette on a cream, natural wood, or deep green surface for contrast.
- Pair it with crochet flowers: A small flower arrangement can echo one or two colors from the doily without competing with its circular design. A crochet daffodil bouquet offers a bright spring-inspired pairing.
- Change the thread or hook only intentionally: Substituting a different thread size or hook can affect the finished diameter, drape, stitch definition, and yarn requirements. Make a sample before changing the approved materials.
For a seasonal display, the doily can also sit beneath themed décor; a crochet Halloween banner provides a separate option for coordinating handmade decorations.
Frequently Asked Questions
Is this pattern made as one piece?
Yes. The doily is worked as one continuous circular piece over 17 rounds, with color changes between rounds.
What size will the finished doily be?
The doily measures about 14 inches [35.5 cm] in diameter.
Which hook size is required?
The pattern specifies a Susan Bates® Steel Crochet Hook: 2.1 mm [US 3].
What type of yarn should I use?
Use Aunt Lydia’s® Classic Crochet Thread, Size 10, with one ball each of the seven specified colors.
Does the pattern use an adjustable ring?
Yes. Round 1 begins with an adjustable ring. The technique is explained before the round instructions.
Which rounds use back-loop crochet?
Round 6 is worked in the back loop of each stitch, and Round 13 is worked in back loops only.
How can I keep track of the stitch count?
Read the stitch count at the end of every round before fastening off. Counts such as 112 dc in Round 6 and 37 tr3tog in Round 7 help confirm that the pattern is progressing correctly.
Can I change the colors?
Yes, color changes are an optional styling choice. Keep the letter sequence organized so you know which shade is assigned to each round. Changing thread size may alter the finished dimensions and texture.
How should I care for the finished doily?
Dust it gently, spot-clean cautiously when necessary, and store it flat or loosely rolled. Avoid pulling the openwork and picot edge.
Conclusion
This Crochet Mandala Doily Pattern combines vivid color, raised texture, openwork, and a delicate picot border in one satisfying circular project. For additional techniques and design ideas, compare it with this mandala doily tutorial or browse these mandala and doily patterns. Display your finished piece proudly, give it as a handmade gift, or customize the palette to suit your home.