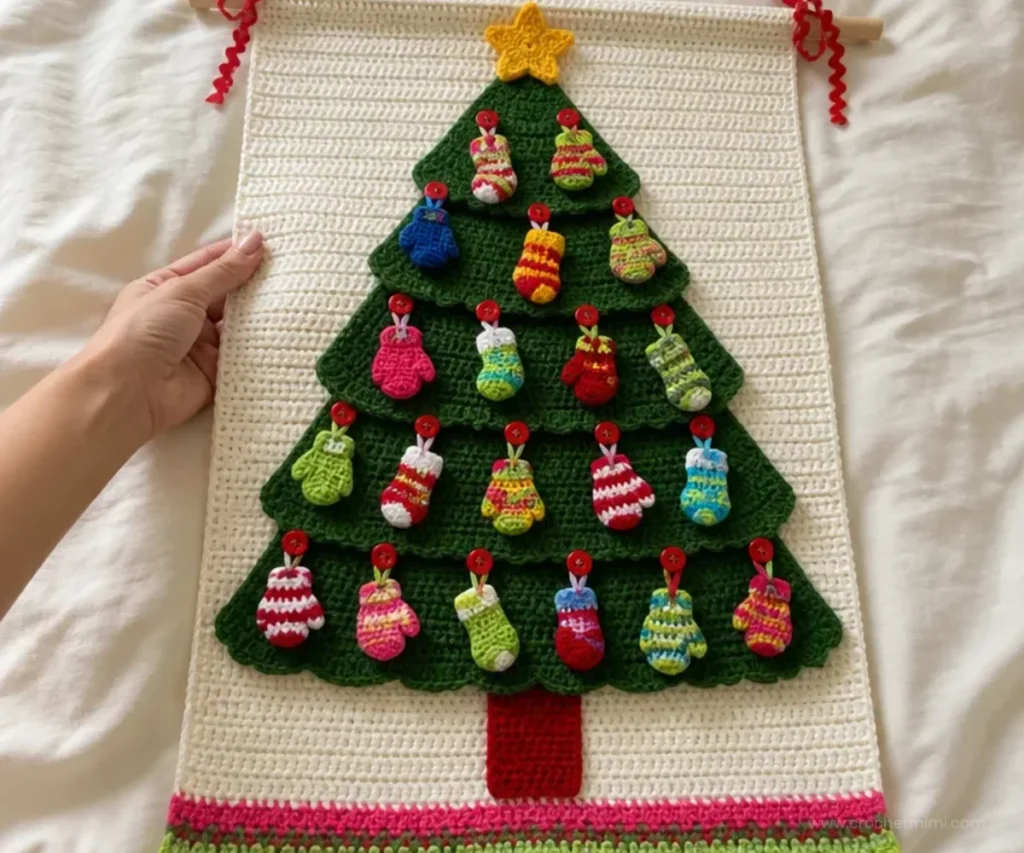
A handmade tree wall hanging brings seasonal warmth to a room without taking up floor space. This Crochet Christmas Tree Wall Hanging Pattern combines a textured white backdrop, a striped green tree, a bright star, and 24 tiny stockings and mittens. It is a detailed project for crocheters who enjoy color changes, shaping, surface assembly, and decorative finishing. Hang it in a family room, entryway, or holiday display, or make it as a memorable handmade gift. For another festive crochet idea, pair it with a crochet bear ornament.
Why You’ll Love This Crochet Project
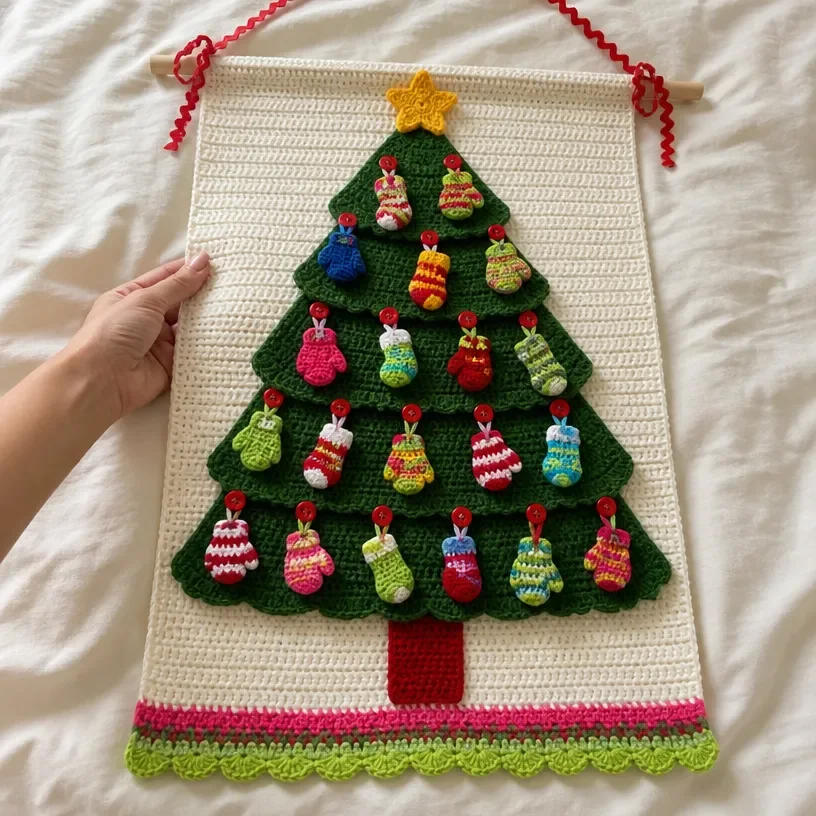
- It creates a complete seasonal display. The finished piece includes a crocheted tree, star, stockings, mittens, and a decorative lower edging.
- It develops useful skills. You will practice double crochet, single crochet, increases, decreases, working in front and back loops, shaping, color changes, and sewing pieces together.
- It has a cheerful color palette. White, green, pink, red, yellow, turquoise, and mistletoe green create a classic Christmas look with a playful handmade feel.
- It is easy to personalize after crocheting. The buttons, stockings, and mittens make the tree especially suitable for family rooms, craft rooms, or children’s holiday spaces.
- It stores flat. Unlike a freestanding tree, this wall hanging can be folded carefully and placed with seasonal decorations when the holidays are over.
Crochet Mimi Tip: Keep the small stockings and mittens grouped by color sequence as you finish them so arranging the tree later is easier.
Before You Start Crocheting
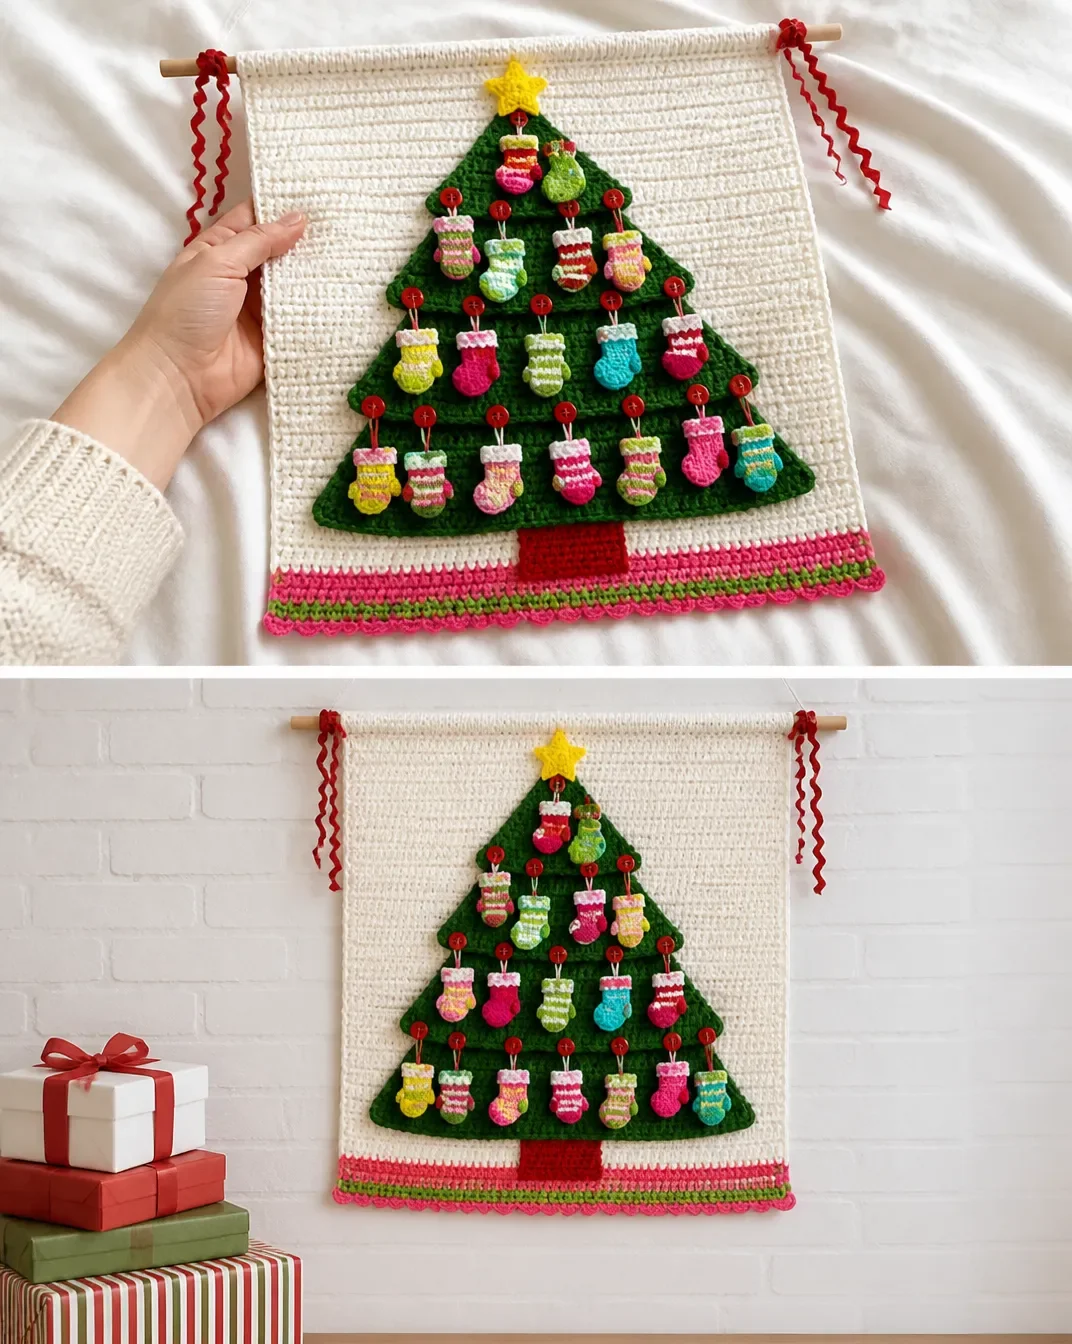
The project is built in stages. First, crochet the white backdrop and its lower edging. Next, make three green tree sections, a red tree base, and a yellow star. Finally, crochet 12 stockings and 12 mittens, sew 24 red buttons to the tree, and assemble everything on the backdrop.
The larger 6 mm [US J-10] hook is used for the backdrop and tree sections, with two strands held together. The smaller 4.25 mm [US G-6] hook is used for the tree base, star, stockings, and mittens. A stitch marker helps track the beginning of the continuous rounds on the small pieces.
The pattern uses US crochet terminology. Common abbreviations include:
- ch: chain
- sc: single crochet
- hdc: half double crochet
- dc: double crochet
- tr: treble crochet
- sl st: slip stitch
- sc2tog: single crochet two together
- sc5tog: single crochet five together
The special joining technique is also important: Join with sc means to place a slip knot on the hook, insert the hook in the indicated stitch, yarn over and draw up a loop, then yarn over and draw through both loops on the hook.
Materials You’ll Need
Yarn
- RED HEART® Super Saver® (Art. E300):
- 4 skeins, 316 Soft White A
- 1 skein, 718 Shocking Pink B
- 1 skein, 672 Spring Green C
- 1 skein, 319 Cherry Red E
- 1 skein, 324 Bright Yellow F
- 1 skein, 512 Turqua G
- 1 skein, 979 Mistletoe H
- RED HEART® Holiday® (Art. E759):
- 2 balls, 6060 Green/Green D
Tools and notions
- Susan Bates® Crochet Hooks: 4.25 mm [US G-6] and 6 mm [US J-10]
- Yarn needle
- Stitch marker
- 24 red ½-inch (12 mm) buttons
- 30-inch wooden rod
- 36 inches (94 cm) of rick rack
Step-by-Step Crochet Instructions
Wall Hanging: Backdrop
With the larger hook and 2 strands of A held together, ch 62.
Row 1 (wrong side): Sc in 2nd ch from hook and each ch across, turn 61 sc.
Row 2 (right side): Ch 3 (counts as first dc here and throughout), dc in each st, turn 62 dc.
Row 3: Ch 1, skip first st, *dc in next st, slip st in next st; repeat from * across working last slip st in top of beginning ch, turn.
Row 4: Ch 3, dc in each st across, turn.
Rows 5–58: Repeat last 2 rows 27 times.
Row 59: Repeat Row 3. Fasten off, leaving a long tail for sewing.
Lower Edging
Row 1 (right side): With right side of Row 1 facing and working in opposite side of foundation ch, join 2 strands of B with sc in first ch, sc in each ch across, turn 61 sts.
Row 2: Ch 3, dc in each st across; change to C, turn.
Row 3: Ch 1, sc in each st across; change to B, turn.
Row 4: Repeat Row 2.
Row 5: Ch 1, sc in first st, *skip next 2 sts, fan in next st, skip next 2 sts, sc in next st; repeat from * across. Fasten off.
Tree: Bottom Section
With the larger hook and 2 strands of D held together, ch 25.
Row 1 (wrong side): Sc in 2nd ch from hook and each ch across, turn 24 sc.
Row 2: Ch 3, 2 dc in next st, *dc in next st, 2 dc in next st; repeat from * across, turn 36 dc.
Rows 3–7: Ch 3, dc in each st across, turn.
Rows 8–11: Ch 3, dc in first st (base of ch 3), dc in each st to beginning ch, 2 dc in top of beginning ch, turn 44 dc.
Row 12: Ch 1, sc in first st, *skip next 2 sts, fan in next st, skip next 2 sts, sc in next st; repeat from * across. Fasten off, leaving a long tail for sewing.
Tree: Middle Section
With the larger hook and 2 strands of D held together, ch 19.
Rows 1–4: Repeat Rows 1–4 of bottom section 27 dc.
Rows 5–12: Repeat Row 8 of bottom section 43 dc.
Row 13: Repeat Row 12 of bottom section. Fasten off, leaving a long tail for sewing.
Tree: Top Section
With the larger hook and 2 strands of D held together, ch 4.
Row 1 (right side): Work 5 dc in 4th ch from hook (beginning ch counts as first dc), turn 6 dc.
Row 2: Ch 3, dc in each st across, turn.
Row 3: Ch 3, dc in next st, 2 dc in next 2 sts, dc in last 2 sts, turn 8 dc.
Row 4: Ch 3, dc in each st across, turn.
Row 5: Ch 3, dc in next 2 sts, 2 dc in next 2 sts, dc in last 3 sts, turn 10 dc.
Row 6: Ch 3, dc in next 3 sts, 2 dc in next 2 sts, dc in last 4 sts, turn 12 dc.
Row 7: Ch 3, dc in next 4 sts, 2 dc in next 2 sts, dc in last 5 sts, turn 14 dc.
Row 8: Ch 3, dc in each st across, turn.
Rows 9–15: Repeat Row 8 of bottom section 28 dc.
Row 16: Repeat Row 12 of bottom section. Fasten off, leaving a long tail for sewing.
Tree Base
With the smaller hook and E, ch 17.
Row 1 (right side): Sc in 2nd ch from hook and in each ch across, turn 16 sc.
Rows 2–22: Ch 1, working in back loops only, sc in each st, turn.
Fasten off, leaving a long tail for sewing.
Star
With the smaller hook and F, ch 2.
Round 1 (right side): Work 5 sc in 2nd ch from hook 5 sc. Do not join.
Round 2: Work 2 sc in each st; join with slip st in first sc 10 sc.
Round 3: Ch 3, dc in same st as join, 2 dc in each remaining st around; join with slip st in first sc 20 sc.
Round 4: *Ch 6, slip st in 2nd ch from hook, sc in next ch, hdc in next ch, dc in next ch, tr in last ch, skip next 3 sts, slip st in next st; repeat from * 4 times; join with slip st in first ch of beginning ch. Fasten off, leaving a long tail for sewing.
Stockings
Make 12 stockings: make 2 stockings in each of the following color sequences.
- Stocking 1: 8 rounds with B, 4 rounds with G
- Stocking 2: 8 rounds with G, 4 rounds with B
- Stocking 3: All rounds with H
- Stocking 4: 9 rounds with C, 3 rounds with A
- Stocking 5: 5 rounds with E, 3 rounds with C, 4 rounds with A
- Stocking 6: [2 rounds with C, 1 round with E] 3 times, 3 rounds with E
With the smaller hook, ch 6.
Round 1 (right side): Sc in 2nd ch from hook and in next 3 ch, 3 sc in last ch; working in opposite side of foundation ch, skip first ch, sc in next 3 ch, 2 sc in last ch 12 sc. Do not join. Place marker for beginning of round and move marker up as each round is completed.
Round 2: Work 2 sc in first st, sc in next 3 sts, 2 sc in next 3 sts, sc in next 3 sts, 2 sc in last 2 sts 18 sc.
Rounds 3 and 4: Sc in each st around.
Round 5: Sc in first 3 sts, [sc2tog] 6 times, sc in last 3 sts 12 sc.
Rounds 6–11: Sc in each st around.
Round 12: Working in front loops only, loosely slip st in each st around, (slip st, ch 6, slip st) in first slip st (hanging loop made). Fasten off tightly.
Mittens
Make 12 mittens: make 2 mittens in each of the following color sequences.
- Mitten 1: All rounds with H
- Mitten 2: [2 rounds with E, 2 rounds with A] 3 times
- Mitten 3: 4 rounds with C, 1 round with B, 1 round with C, 1 round with B, 5 rounds with C
- Mitten 4: 4 rounds with G, 3 rounds with C, 5 rounds with G
- Mitten 5: 5 rounds with E, 3 rounds with C, 4 rounds with A
- Mitten 6: 4 rounds with B, 1 round with A, 1 round with [next 2 sts with B, next st with A] around, 1 round with [next st with B, next 2 sts with A] around, 5 rounds with B
With the smaller hook, ch 2.
Round 1 (right side): Work 6 sc in 2nd ch from hook 6 sc. Do not join. Place marker for beginning of round and move marker up as each round is completed.
Round 2: Work 2 sc in each st around 12 sc.
Round 3: Sc in each st around.
Round 4: *Sc in next 3 sts, 2 sc in next st; repeat from * twice 15 sc.
Rounds 5–7: Sc in each st around.
Round 8: Sc in next 7 sts, 5 dc in front loop of next st, sc in next 7 sts 14 sc and 5 dc.
Round 9: Sc in next 7 sts; working in back loops only, sc5tog (thumb made), sc in next 7 sts 15 sc.
Round 10: Sc in each st around.
Round 11: *Sc in next 3 sts, sc2tog; repeat from * twice 12 sc.
Round 12: Repeat Round 12 of stocking.
Finishing
- Fold the last 3 rows of the backdrop to the wrong side and sew across the long edge to form a rod pocket.
- Use the photograph as a guide for placement of all pieces. Weave in ends.
- Arrange the stockings and mittens on the tree sections as follows: 9 pieces on each of the bottom and middle sections and 6 pieces on the top section.
- Pin a safety pin or marker where each button will be sewn. Sew all buttons in place.
- With the rows positioned vertically, center the lower edge of the tree base on Row 2 of the backdrop and sew in place. Slightly overlap the bottom section of the tree on the top edge of the tree base, pin in place, and sew. Repeat to attach the middle and top sections, overlapping the previously sewn section.
- Sew the star on the top section. Hang the stockings and mittens on the buttons. Weave in any remaining ends.
- Insert the wooden rod and tie on the rick rack for hanging.
Ways to Display Your Finished Crochet

- Hang the wall hanging above a mantel, console table, or entryway bench where the tree can be seen clearly.
- Use it as a handmade advent-style decoration by adding small notes or lightweight surprises near selected stockings, without overloading the buttons.
- Display it in a child’s room or craft space as a colorful seasonal accent.
- Give it as a handmade holiday gift to someone who enjoys traditional Christmas décor.
- Pair it with other seasonal crochet pieces, such as a crochet holiday tree decoration, for a rotating wall-art collection.
- Coordinate the colorful tree with a simple crochet doily, such as a beginner-friendly mandala doily, on a nearby table.
Caring for Your Crochet Project
Dust the wall hanging gently with a soft brush or use a vacuum with a clean, low-suction upholstery attachment. Pay special attention to the small stockings, mittens, buttons, and rick rack, since these details can catch on rough surfaces.
For small marks, spot-clean carefully with a barely damp cloth and allow the piece to dry flat. Avoid soaking the wall hanging or placing it in a washing machine, because the sewn-on components, buttons, rod pocket, and decorative structure may shift.
Store it flat or loosely rolled around a clean tube. Keep it in a dry container away from direct sunlight, sharp objects, and excessive heat. Before storing, ensure the piece is completely dry and that all buttons remain securely sewn.
Tips for Better Results
- Hold both strands evenly. When working with two strands of A or D, keep the strands relaxed and feed them together so the fabric remains consistent.
- Count the foundation stitches. The backdrop begins with 62 chains, while the tree sections begin with 25, 19, and 4 chains. Confirm these counts before starting each piece.
- Mark continuous rounds. The stockings and mittens are worked without joining until the final round, so move the stitch marker after every completed round.
- Watch the loop placement. The tree base is worked in back loops only, the stocking’s final round is worked in front loops only, and the mitten shaping uses both front- and back-loop techniques.
- Leave long sewing tails. The backdrop and tree sections specifically require long tails for sewing. Keeping them intact makes assembly more secure.
- Lay out the pieces before sewing. Position all stockings and mittens first, then mark button locations. This helps maintain the intended arrangement of 9 pieces on each lower section and 6 pieces on the top.
- Overlap the tree sections neatly. Pin each section before sewing so the overlaps remain even and the tree silhouette stays centered.
- Secure buttons firmly. The buttons support the hanging stockings and mittens, so sew them tightly and check them again before displaying the wall hanging.
Creative Ways to Customize Your Project
These are optional changes and do not alter the approved pattern instructions.
- Replace the bright palette with classic red, white, and forest green while keeping the same color-sequence structure.
- Use coordinated seasonal colors for the small pieces, such as icy blue, silver-gray, and white for a winter theme.
- Arrange the stockings and mittens in alternating rows rather than following a mixed layout, provided the buttons remain positioned securely.
- Add a decorative ribbon to the rod or choose a contrasting rick rack color for a stronger border effect.
- Pair the wall hanging with handmade floral-style seasonal décor, such as a crochet flower wreath adapted for winter colors.
- Consider a different yarn only after checking how its thickness and fiber affect the fabric. Changing yarn or hook size can alter the dimensions, stitch definition, drape, and amount of yarn required.
Frequently Asked Questions
Is this project suitable for a beginner?
It is best for a crocheter comfortable with basic stitches and ready to practice shaping, color changes, continuous rounds, and sewing. The small decorative pieces require careful counting.
Which hook makes the backdrop and tree sections?
Use the larger 6 mm [US J-10] hook for the backdrop and tree sections. Use the smaller 4.25 mm [US G-6] hook for the tree base, star, stockings, and mittens.
Why are two strands held together?
The backdrop and tree sections are worked with two strands held together as specified. This creates the required fabric weight and texture for the main wall hanging structure.
How many stockings and mittens are included?
The pattern makes 12 stockings and 12 mittens. Two of each listed color sequence are made.
How are the stockings and mittens attached?
First sew 24 red buttons to the tree sections. The stockings and mittens each have a hanging loop made in Round 12, allowing them to hang from the buttons.
Can I change the colors?
Yes, color changes are an optional customization. Keep the approved color sequences for the written version, or create a new palette while remembering that different yarn colors or yarn types may affect the appearance.
How is the wall hanging assembled?
Sew the rod pocket first, then arrange the small pieces and mark the button locations. Attach the tree base and overlapping tree sections to the backdrop, sew on the star, add the buttons, and hang the stockings and mittens.
How should I care for the finished piece?
Dust it gently and spot-clean only when necessary. Avoid soaking or machine washing because the buttons, sewn components, rod pocket, and decorative edging can shift or become damaged.
Can I display other crochet decorations with it?
Yes. A handmade red rose design, such as this crochet red rose pattern, can complement the Christmas display when used in a separate arrangement or seasonal centerpiece.
Conclusion
This crochet Christmas tree wall hanging combines textured rows, colorful miniature accessories, and a practical rod pocket into one memorable holiday decoration. Follow the stitch counts and assembly order carefully, then personalize the display with your preferred arrangement and palette. For additional inspiration, compare this project with the Christmas tree wall hanging pattern from Fresh Knack or the crochet tree wall hanging available on Etsy.