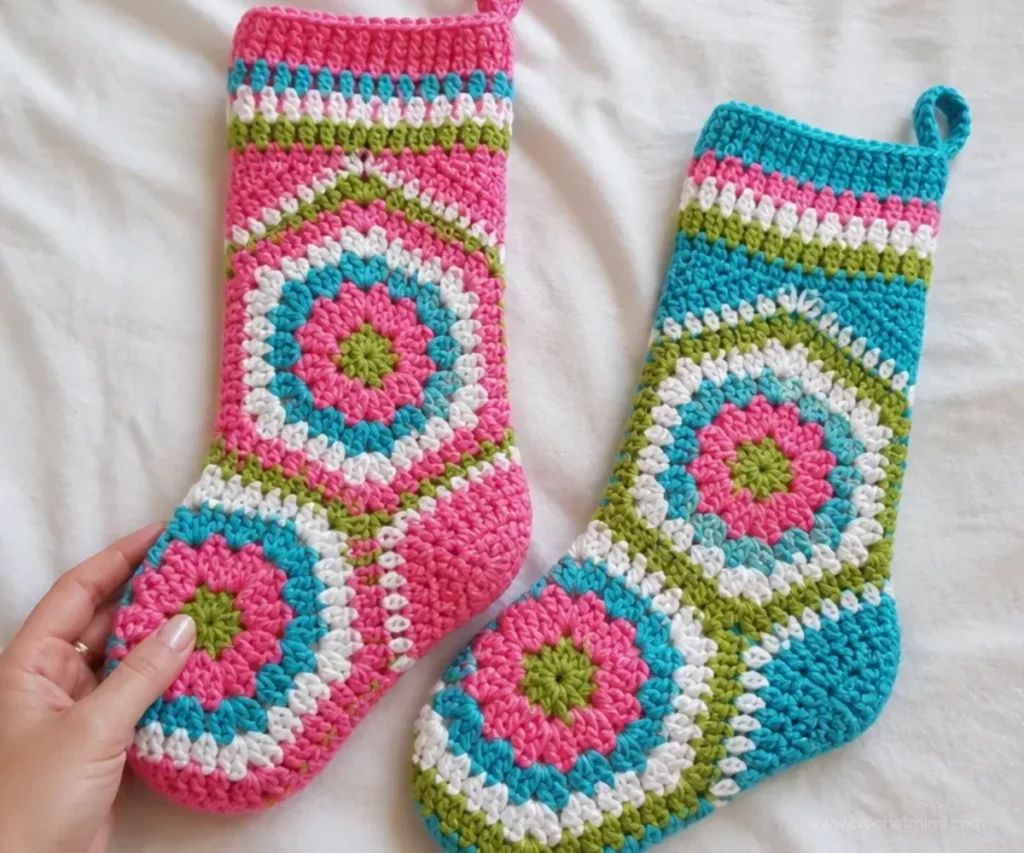
A colorful hexagon-based design gives this Crochet Hexi Christmas Stocking Pattern a cheerful handmade look. Worked in festive shades of Turqua, Pretty n’ Pink, Spring Green, and Soft White, the stocking combines classic granny-style clusters with toe shaping and a decorative reverse single crochet edge. It makes a thoughtful holiday gift, mantel decoration, or personalized stocking for a family member. For another small seasonal project, pair it with this crochet bear Christmas ornament.
Why You’ll Love This Crochet Project
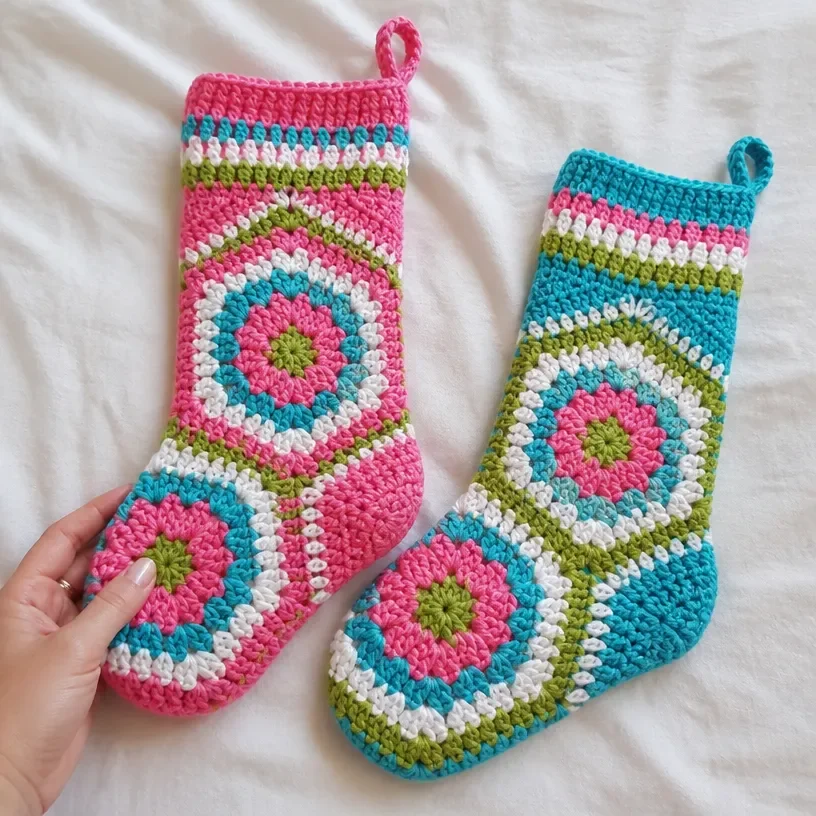
- The hexagon construction is distinctive. Instead of beginning with a traditional cuff or tube, the stocking grows from a colorful hexagon.
- Color changes create built-in decoration. Each round adds a new stripe effect without requiring surface embroidery.
- The toe is shaped directly into the motif. The dc3tog sections turn the flat geometric piece into a stocking silhouette.
- It makes a meaningful handmade gift. Use the two color versions for coordinating family stockings or personalized seasonal décor.
- The edging looks polished. A reverse single crochet border gives the top a firm, textured finish.
Crochet Mimi Tip: Place each stitch marker exactly where instructed. The marked corner spaces guide both the toe shaping and the stocking assembly. You may also find Blooming Bouquet Crochet Blanket Pattern useful.
Before You Start Crocheting
This project begins with one large hexagon, worked in joined rounds of double crochet groups and corner chain spaces. After the tenth round, two sections are shaped with double crochet three together to form the toe. Rows are then worked across selected sides of the hexagon to create the stocking sides and top edge.
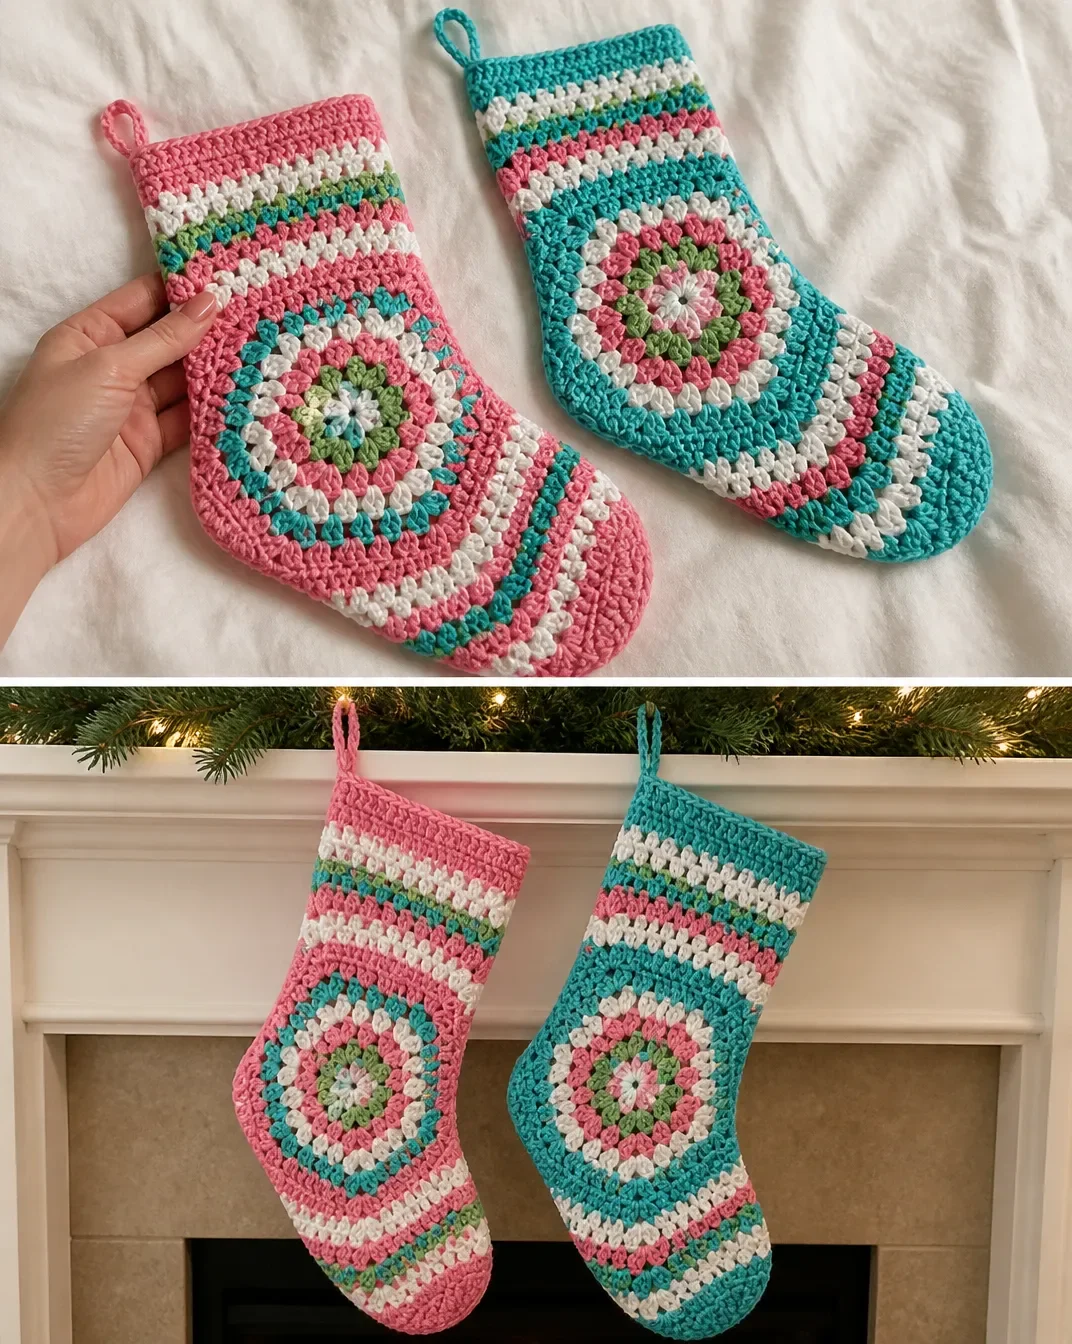
There are two approved color versions:
- Version 1 uses Spring Green for C, Pretty n’ Pink for B, Soft White for D, and Turqua for A.
- Version 2 uses the same four colors with a different contrast assignment and a slightly different round sequence.
Both versions use the same toe shaping and top-edge construction. Version 2 changes the color placement and which shade is used for the stocking sides and hanging loop.
Useful abbreviations include:
- ch: chain
- dc: double crochet
- dc3tog: double crochet three together
- sl st: slip stitch
- sp/sps: space/spaces
- PM: place marker
- RS: right side
- WS: wrong side
- rep: repeat
Materials and Tools
Version 1 yarn
- Red Heart® Super Saver™ (7 oz/198 g; 364 yds/333 m)
- Contrast A, Turqua (0512): 1 ball or 94 yds/85.5 m
- Contrast B, Pretty n’ Pink (0722): 1 ball or 24 yds/22 m
- Contrast C, Spring Green (0672): 1 ball or 32 yds/29 m
- Contrast D, Soft White (0316): 1 ball or 24 yds/22 m
Version 2 yarn
- Red Heart® Super Saver™ (7 oz/198 g; 364 yds/333 m)
- Contrast A, Turqua (0512): 1 ball or 32 yds/29 m
- Contrast B, Spring Green (0672): 1 ball or 32 yds/29 m
- Contrast C, Pretty n’ Pink (0722): 1 ball or 80 yds/73 m
- Contrast D, Soft White (0316): 1 ball or 80 yds/73 m
Tools
- Crochet hook: U.S. H/8 (5 mm) Susan Bates® Silvalume® crochet hook, or size needed to obtain gauge
- Stitch markers: Susan Bates® stitch markers
- Needle: Susan Bates® steel yarn needle
Complete Crochet Pattern Instructions
The instructions below preserve the approved construction for both color versions. Keep the right side facing as directed, and fasten off each color where specified.
Version 1: Hexagon
With C, ch 4. Join with sl st to first ch to form ring.
1st rnd: Ch 3, which counts as dc at the beginning of this and subsequent rounds. 2 dc in ring. (Ch 2. 3 dc) 5 times in ring. Ch 2. Join with sl st to top of ch 3.
Completes: 6 groups of 3 dc and 6 ch-2 sps. Break C.
2nd rnd: Join B with sl st in first ch-2 sp. Ch 3. (2 dc. Ch 2. 3 dc) in same sp as last sl st.
Skip next 3 dc. (3 dc. Ch 2. 3 dc) in next ch-2 sp. Rep from * 4 times more. Join with sl st to top of ch 3. Break B.
3rd rnd: Join D with sl st in first ch-2 sp. Ch 3. (2 dc. Ch 2. 3 dc) in same sp as last sl st.
Skip next 3 dc. 3 dc in sp between next 2 groups of 3-dc. Skip next 3 dc. (3 dc. Ch 2. 3 dc) in next corner ch-2 sp. Rep from * 4 times more. Skip next 3 dc. 3 dc in sp between next 2 groups of 3-dc. Skip last 3 dc. Join with sl st to top of ch 3. Break D.
4th rnd: Join C with sl st in first ch-2 sp. Ch 3. (2 dc. Ch 2. 3 dc) in same sp as last sl st.
*(Skip next 3 dc. 3 dc in sp between next 2 groups of 3-dc) twice. Skip next 3 dc. (3 dc. Ch 2. 3 dc) in next corner ch-2 sp. Rep from * 4 times more. (Skip next 3 dc. 3 dc in sp between next 2 groups of 3-dc) twice. Skip last 3 dc. Join with sl st to top of ch 3. Break C.
5th rnd: Join A with sl st in first ch-2 sp. Ch 3. (2 dc. Ch 2. 3 dc) in same sp as last sl st.
[Skip next 3 dc. 3 dc in sp between next 2 groups of 3-dc.] Rep from * to * to next corner ch-2 sp. Skip next 3 dc. (3 dc. Ch 2. 3 dc) in next corner ch-2 sp. Repeat the bracketed sequence 5 times. Rep from * to * to end of rnd. Skip last 3 dc. Join with sl st to top of ch 3.
6th and 7th rnds: Sl st in each of next 2 dc and next ch-2 sp. Ch 3. (2 dc. Ch 2. 3 dc) in same sp as last sl st.
[Skip next 3 dc. 3 dc in sp between next 2 groups of 3-dc.] Rep from * to * to next corner ch-2 sp. Skip next 3 dc. (3 dc. Ch 2. 3 dc) in next corner ch-2 sp. Repeat the bracketed sequence 5 times. Rep from * to * to end of rnd. Skip last 3 dc. Join with sl st to top of ch 3. Break A at end of 7th rnd.
8th rnd: With C, work as for 5th rnd. Break C.
9th rnd: Join D with sl st in first ch-2 sp. Ch 3. (2 dc. Ch 2. 3 dc) in same sp as last sl st.
*(Skip next 3 dc. 3 dc in sp between next 2 groups of 3-dc) 7 times. Skip next 3 dc. (3 dc. Ch 2. 3 dc) in next corner ch-2 sp PM in ch-2 sp just worked. Rep from * once more. *(Skip next 3 dc. 3 dc in sp between next 2 groups of 3-dc) 7 times. Skip next 3 dc. (3 dc. Ch 2. 3 dc) in next corner ch-2 sp. Rep from * twice more. (Skip next 3 dc. 3 dc in sp between next 2 groups of 3-dc) 7 times. Skip last 3 dc. Join with sl st to top of ch 3. Break D.
Version 1: Toe shaping and marker placement
10th rnd: Join B with sl st in first ch-2 sp. Ch 3. (2 dc. Ch 2. 3 dc) in same sp as last sl st.
*(Skip next 3 dc. 3 dc in sp between next 2 groups of 3-dc) 8 times. (3 dc. Ch 2. 3 dc) in next marked corner ch-2 sp. (Dc3tog in sp between next 2 groups of 3 dc) 8 times. (3 dc. Ch 2. 3 dc) in next marked corner ch-2 sp.
*(Skip next 3 dc. 3 dc in sp between next 2 groups of 3-dc) 8 times. Skip next 3 dc. (3 dc. Ch 2. 3 dc) in next corner ch-2 sp. Rep from * twice more. (Skip next 3 dc. 3 dc in sp between next 2 groups of 3-dc) 8 times. Skip last 3 dc. Join with sl st to top of ch 3. Break B.
PM in 4th corner ch-2 sp of 10th rnd.
Version 1: Stocking sides
With RS of Hexagon facing, join C with sl st in marked 4th corner ch-2 sp.
1st row: Ch 3. 2 dc in same sp.
*(3 dc in sp between next 2 groups of 3-dc) 9 times. (3 dc. Ch 2. 3 dc) in next corner ch-2 sp. Rep from * once more. (3 dc in sp between next 2 groups of 3-dc) 9 times. 3 dc in next corner ch-2 sp. Break C. Leave remaining sts unworked.
2nd row (RS): Join A with sl st in top of ch 3 at beginning of 1st row. Ch 3.
*(3 dc in sp between next 2 groups of 3-dc) 10 times. (3 dc. Ch 2. 3 dc) in next corner ch-2 sp. Rep from * once more. (3 dc in sp between next 2 groups of 3-dc) 10 times. Skip next 2 dc. 1 dc in last dc. Break A.
PM in each of the two ch-2 corner sps of last row.
Version 1: Stocking top edge
With RS of Stocking facing, join A with sl st in first marked corner ch-2 sp.
1st row: Ch 3. 2 dc in same sp. (3 dc in sp between next 2 groups of 3-dc) 11 times. 3 dc in second marked corner ch-2 sp. Turn.
2nd row (WS): Ch 3. (3 dc in sp between next 2 groups of 3-dc) 12 times. Skip next 2 dc. 1 dc in top of ch 3. Turn.
3rd row: Ch 3. 1 dc in each dc to end of row. Do not turn.
4th row: Ch 1. Working from left to right instead of from right to left, as usual, work 1 reverse sc in each dc to end of row. Fasten off.
Version 1: Finishing and assembly
Fold Stocking with sides, bottom and toe edges aligned, as shown in the photo.
Using matching shade, join sides, bottom edge, and toe seams.
Hanging loop: Using 2 strands of A held together, join with sl st to top edge at side seam. Ch 24. Join with sl st in seam. Fasten off.
Version 2: Hexagon
With C, ch 4. Join with sl st to first ch to form ring.
1st rnd: Ch 3, which counts as dc at the beginning of this and subsequent rounds. 2 dc in ring. (Ch 2. 3 dc) 5 times in ring. Ch 2. Join with sl st to top of ch 3.
Completes: 6 groups of 3 dc and 6 ch-2 sps. Break C.
2nd rnd: Join B with sl st in first ch-2 sp. Ch 3. (2 dc. Ch 2. 3 dc) in same sp as last sl st.
Skip next 3 dc. (3 dc. Ch 2. 3 dc) in next ch-2 sp. Rep from * 4 times more. Join with sl st to top of ch 3. Break B.
3rd rnd: Join D with sl st in first ch-2 sp. Ch 3. (2 dc. Ch 2. 3 dc) in same sp as last sl st.
Skip next 3 dc. 3 dc in sp between next 2 groups of 3-dc. Skip next 3 dc. (3 dc. Ch 2. 3 dc) in next corner ch-2 sp. Rep from * 4 times more. Skip next 3 dc. 3 dc in sp between next 2 groups of 3-dc. Skip last 3 dc. Join with sl st to top of ch 3.
4th rnd: Sl st in each of next 2 dc and first ch-2 sp. Ch 3. (2 dc. Ch 2. 3 dc) in same sp as last sl st.
*(Skip next 3 dc. 3 dc in sp between next 2 groups of 3-dc) twice. Skip next 3 dc. (3 dc. Ch 2. 3 dc) in next corner ch-2 sp. Rep from * 4 times more. (Skip next 3 dc. 3 dc in sp between next 2 groups of 3-dc) twice. Skip last 3 dc. Join with sl st to top of ch 3. Break D.
5th rnd: Join A with sl st in first ch-2 sp. Ch 3. (2 dc. Ch 2. 3 dc) in same sp as last sl st.
[Skip next 3 dc. 3 dc in sp between next 2 groups of 3-dc.] Rep from * to * to next corner ch-2 sp. Skip next 3 dc. (3 dc. Ch 2. 3 dc) in next corner ch-2 sp. Repeat the bracketed sequence 5 times. Rep from * to * to end of rnd. Skip last 3 dc. Join with sl st to top of ch 3.
6th rnd: Sl st in each of next 2 dc and next ch-2 sp. Ch 3. (2 dc. Ch 2. 3 dc) in same sp as last sl st.
[Skip next 3 dc. 3 dc in sp between next 2 groups of 3-dc.] Rep from * to * to next corner ch-2 sp. Skip next 3 dc. (3 dc. Ch 2. 3 dc) in next corner ch-2 sp. Repeat 5 times. Rep from * to * to end of rnd. Skip last 3 dc. Join with sl st to top of ch 3. Break A.
7th rnd: Join C with sl st in first ch-2 sp. Ch 3. (2 dc. Ch 2. 3 dc) in same sp as last sl st.
[Skip next 3 dc. 3 dc in sp between next 2 groups of 3-dc.] Rep from * to * to next corner ch-2 sp. Skip next 3 dc. (3 dc. Ch 2. 3 dc) in next corner ch-2 sp. Repeat 5 times. Rep from * to * to end of rnd. Skip last 3 dc. Join with sl st to top of ch 3. Break C.
8th rnd: With D, work as for 7th rnd.
9th rnd: Sl st in each of next 2 dc and first ch-2 sp. Ch 3. (2 dc. Ch 2. 3 dc) in same sp as last sl st.
*(Skip next 3 dc. 3 dc in sp between next 2 groups of 3-dc) 7 times. Skip next 3 dc. (3 dc. Ch 2. 3 dc) in next corner ch-2 sp PM in ch-2 sp just worked. Rep from * once more. *(Skip next 3 dc. 3 dc in sp between next 2 groups of 3-dc) 7 times. Skip next 3 dc. (3 dc. Ch 2. 3 dc) in next corner ch-2 sp. Rep from * twice more. (Skip next 3 dc. 3 dc in sp between next 2 groups of 3-dc) 7 times. Skip last 3 dc. Join with sl st to top of ch 3. Break D.
Version 2: Toe shaping and marker placement
10th rnd: Join B with sl st in first ch-2 sp. Ch 3. (2 dc. Ch 2. 3 dc) in same sp as last sl st.
*(Skip next 3 dc. 3 dc in sp between next 2 groups of 3-dc) 8 times. (3 dc. Ch 2. 3 dc) in next marked corner ch-2 sp. (Dc3tog in sp between next 2 groups of 3 dc) 8 times. (3 dc. Ch 2. 3 dc) in next marked corner ch-2 sp.
*(Skip next 3 dc. 3 dc in sp between next 2 groups of 3-dc) 8 times. Skip next 3 dc. (3 dc. Ch 2. 3 dc) in next corner ch-2 sp. Rep from * twice more. (Skip next 3 dc. 3 dc in sp between next 2 groups of 3-dc) 8 times. Skip last 3 dc. Join with sl st to top of ch 3. Break B.
PM in 4th corner ch-2 sp of 10th rnd.
Version 2: Stocking sides
With RS of Hexagon facing, join D with sl st in marked 4th corner ch-2 sp.
1st row: Ch 3. 2 dc in same sp.
*(3 dc in sp between next 2 groups of 3-dc) 9 times. (3 dc. Ch 2. 3 dc) in next corner ch-2 sp. Rep from * once more. (3 dc in sp between next 2 groups of 3-dc) 9 times. 3 dc in next corner ch-2 sp. Break D. Leave remaining sts unworked.
2nd row (RS): Join C with sl st in top of ch 3 at beginning of 1st row. Ch 3.
*(3 dc in sp between next 2 groups of 3-dc) 10 times. (3 dc. Ch 2. 3 dc) in next corner ch-2 sp. Rep from * once more. (3 dc in sp between next 2 groups of 3-dc) 10 times. Skip next 2 dc. 1 dc in last dc. Break C.
PM in each of the two ch-2 corner sps of last row.
Version 2: Stocking top edge
With C, work as for Version 1.
Version 2: Finishing and assembly
Finishing: Work as for Version 1.
Hanging loop: With C, work as for Version 1.
Ways to Display Your Finished Crochet
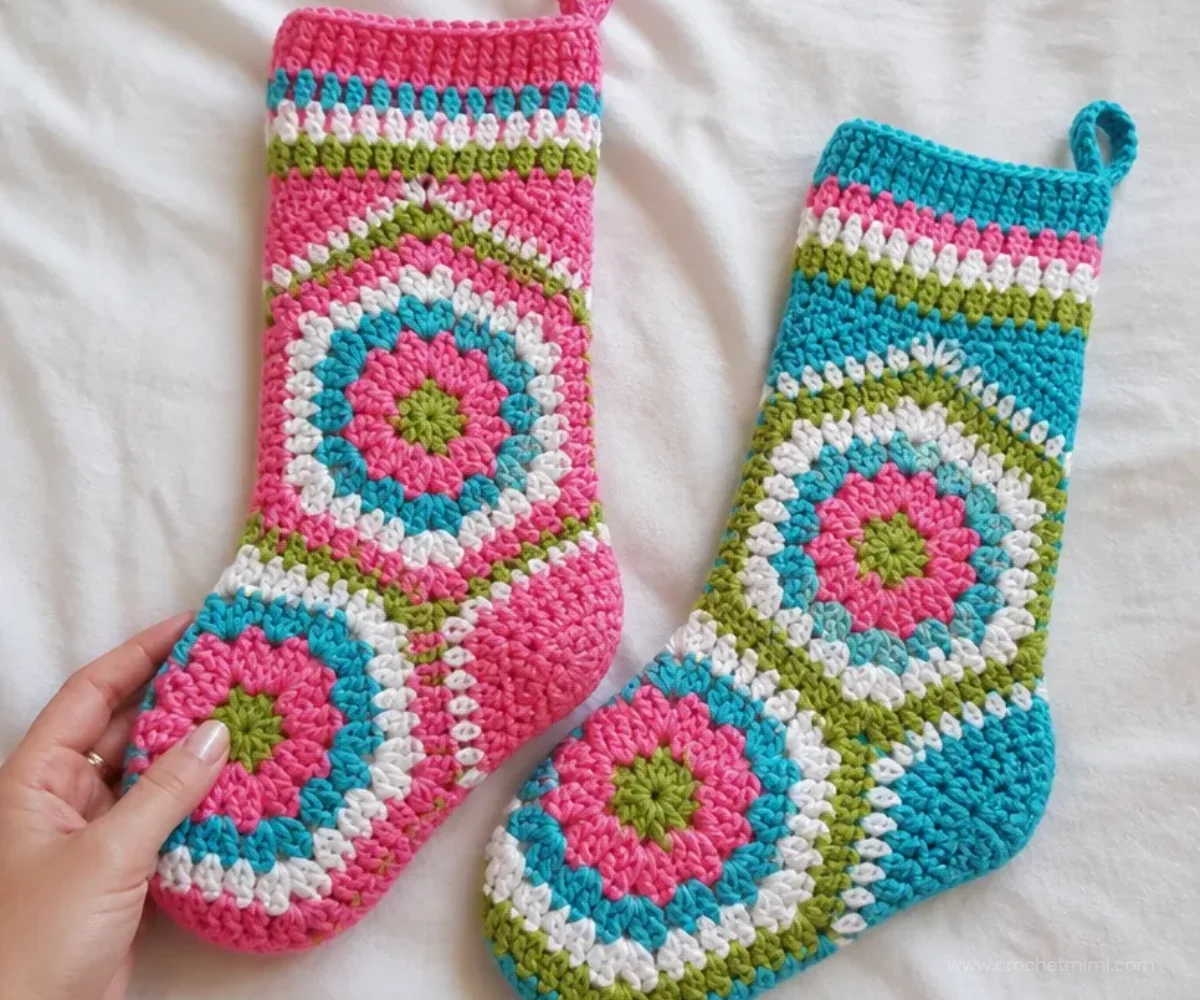
- Hang one stocking from a mantel, staircase railing, or sturdy decorative hook.
- Make matching Version 1 and Version 2 stockings for a coordinated holiday display.
- Use the stocking as a gift container for small wrapped items, cards, or treats.
- Add a name tag or removable ribbon to distinguish stockings without changing the crochet pattern.
- Display the bright hexagon motif alongside other handmade seasonal decorations, such as an easy crochet wreath project adapted for a winter color palette.
Caring for and Storing Your Crochet
- Dust the stocking gently with a soft brush or use a vacuum with a low-suction upholstery attachment.
- For small marks, spot-clean carefully with a slightly damp cloth rather than soaking the finished stocking.
- Avoid excessive heat, which can distort the yarn and change the shape of the hexagon.
- Before storing, make sure the stocking is completely dry.
- Store it flat or loosely folded in a clean container, away from moisture, insects, and direct sunlight.
- Avoid placing heavy objects inside for long periods, since the seams and hanging loop may stretch.
Helpful Crochet Tips for Beginners
- Count the corner spaces. The hexagon should maintain six corner ch-2 spaces throughout the expanding rounds.
- Watch the joining point. Each round joins with a slip stitch to the top of the beginning ch-3 unless the instruction specifically directs a different movement.
- Use the markers carefully. The marked spaces in the 9th and 10th rounds determine where toe shaping and stocking rows begin.
- Keep cluster placement consistent. The 3-dc groups belong in the spaces between groups of 3-dc, while corner increases belong in ch-2 spaces.
- Do not turn where the pattern says not to. The third row of the top edge is worked without turning, while the first two rows include turns.
- Form the reverse single crochet correctly. Work from left to right rather than the usual right-to-left direction for the final edging row.
- Align before seaming. Fold the stocking with the sides, bottom, and toe edges aligned before joining the seams.
- Secure color changes neatly. Break each shade only where specified, then weave the tails into the wrong side after assembly.
For a different geometric crochet study, a beginner-friendly mandala doily pattern can also help you practice joined rounds and consistent corner placement.
Optional Color and Styling Variations
The approved instructions should remain unchanged when making optional variations. You can personalize the finished appearance by:
- Reversing the color emphasis so Soft White forms the main background and Turqua becomes an accent.
- Choosing a traditional palette of red, green, and white while keeping the same A–D assignments.
- Making one version for each family member with a different dominant shade.
- Using a single neutral shade for the top edge while preserving the colorful hexagon.
- Creating a mismatched collection in which each stocking has a different contrast order.
- Coordinating the stocking with other handmade décor, such as red floral motifs from these crochet red rose patterns.
Changing yarn or hook size is optional, but it can alter gauge, finished proportions, stitch definition, and yarn requirements. If substituting yarn, make a gauge swatch and confirm that the fabric is firm enough for a stocking.
Frequently Asked Questions
Is this stocking suitable for a beginner?
It is suitable for a crocheter who is comfortable with double crochet groups, chain spaces, joined rounds, color changes, stitch markers, and basic decreases. The toe shaping and assembly require careful attention to the written instructions.
What yarn does the pattern recommend?
The pattern uses Red Heart® Super Saver™ in four shades. Version 1 and Version 2 use different quantities and contrast assignments, so check the correct materials list before beginning.
What hook size should I use?
Use a U.S. H/8 (5 mm) Susan Bates® Silvalume® crochet hook, or the size needed to obtain gauge.
Do the two versions have different construction?
The two versions use the same general construction: a ten-round hexagon, toe shaping, stocking-side rows, top edge, seams, and hanging loop. Their color assignments and some round color changes differ.
Where are the stitch markers placed?
In the 9th round, place a marker in the ch-2 corner space just worked as directed. After the 10th round, place a marker in the 4th corner ch-2 space. The stocking-side instructions then use that marked space.
How is the toe formed?
The toe is shaped with eight groups of dc3tog worked in the spaces between groups of 3-dc. These decreases occur between two marked corner spaces.
How is the stocking assembled?
Fold the stocking with the sides, bottom, and toe edges aligned. Using the matching shade, join the side, bottom, and toe seams. Finish by adding the 24-chain hanging loop.
Can I change the colors?
Yes. Color changes are an optional customization, but keep the A, B, C, and D labels clear while following the instructions. A different color order changes the appearance but not the approved stitch sequence.
How should I store the finished stocking?
Store it clean and fully dry, either flat or loosely folded in a dry container. Avoid heavy contents and excessive heat so the hexagon, seams, and hanging loop retain their shape.
Conclusion
This Crochet Hexi Christmas Stocking Pattern combines colorful granny-style clusters, shaped toe sections, and a neat textured top edge in one memorable seasonal project. Choose either approved color version, or use the pattern as a starting point for your own holiday palette. For additional stocking inspiration, compare the Red Heart crochet hexi stocking pattern and this granny crochet stocking tutorial.