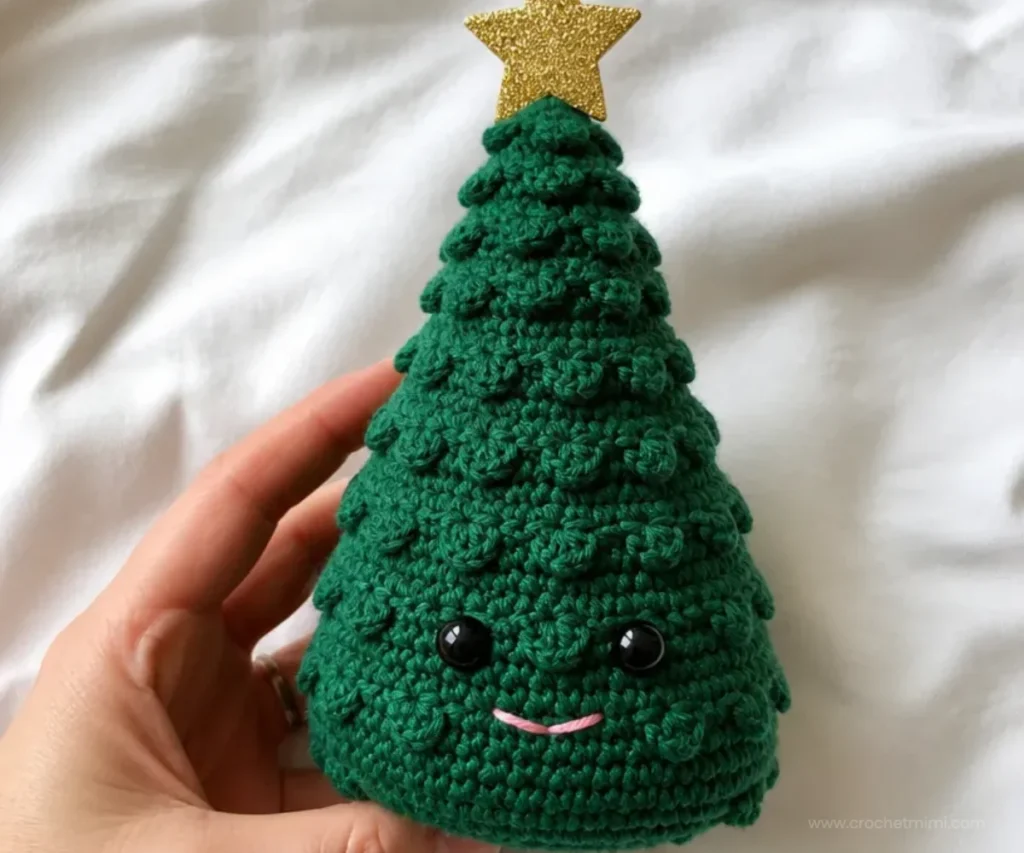
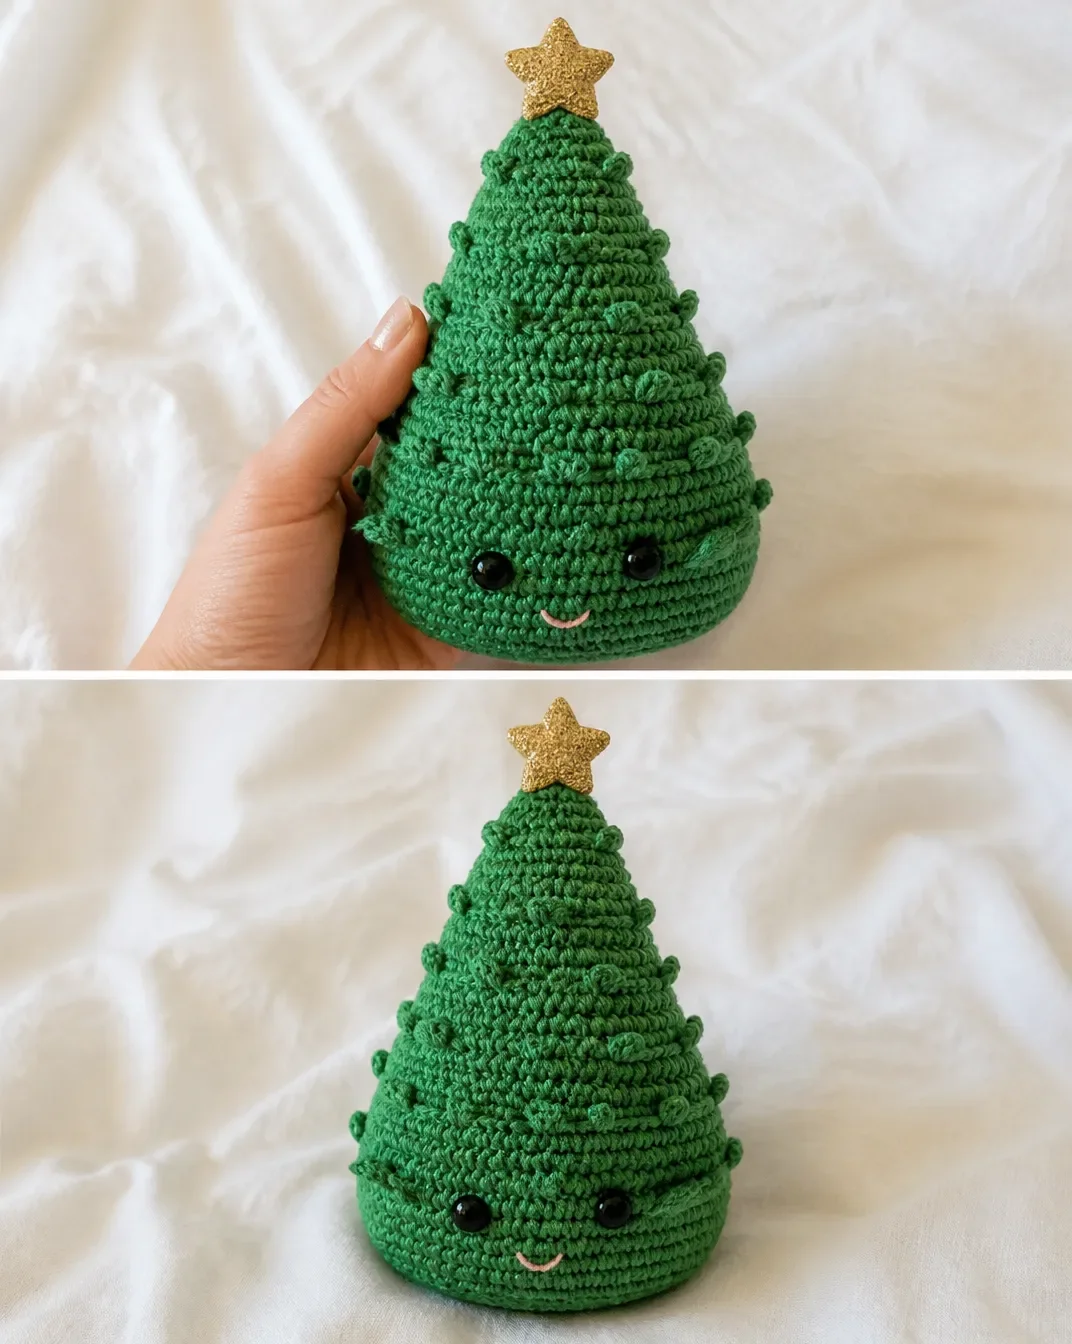
A cheerful amigurumi tree with a friendly face, textured needle rows, and a glittering star topper makes this Crochet Christmas Tree Pattern a delightful seasonal project. It is small enough for a mantel, shelf, or holiday centerpiece, while the weighted base helps it stand securely. Crocheters who enjoy playful decorations may also like this crochet bear ornament pattern for a coordinated handmade display.
Why You’ll Love This Crochet Project
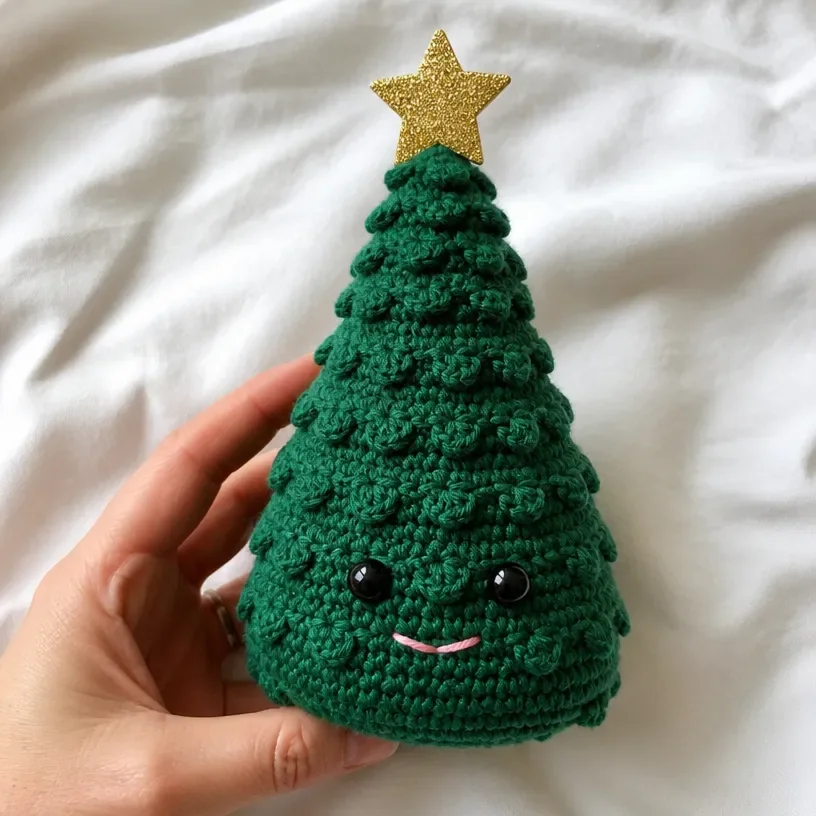
- It creates a complete holiday character. The safety eyes, embroidered smile, layered needles, and star make the tree feel lively without requiring separate limbs or complicated assembly.
- It practices amigurumi shaping. The pattern uses increases at the base and carefully spaced decreases toward the top, making it useful practice for working in continuous rounds.
- The weighted stuffing adds stability. A knee-high stocking filled with aquarium gravel, plastic pellets, or rice gives the tree a firm foundation.
- It makes a thoughtful handmade gift. One green tree can become a desk decoration, stocking stuffer, or part of a larger seasonal arrangement.
- The texture is built into the construction. Back-loop rounds create ridges, while front-loop chains form the tree needles.
Crochet Mimi Tip: Keep the stitch marker in place as you work the continuous rounds. It will make the shaping sequence much easier to track.
Before You Start Crocheting
This project is made as one stuffed tree, followed by six rounds of decorative needles and a small amount of finishing. The tree begins at the base with a chain and single crochet increases, continues upward in continuous rounds, and narrows through several decrease rounds.
You will work in both loops for most of the sides, back loops only for selected ridge rounds, and front loops only when adding the needles. The safety eyes are attached before the upper shaping is complete, and stuffing is added gradually as the tree becomes narrower.
The supplied pattern uses U.S. crochet terminology. Helpful abbreviations include:
- ch: chain
- sc: single crochet
- sc2tog: single crochet two together
- sl st: slip stitch
- PM: place marker
- rep: repeat
- rem: remaining
For another seasonal crochet display idea, see this crochet Halloween tree pattern, which uses a similar small-tree concept with a different theme.
Materials You’ll Need
- Red Heart® Amigurumi™ (3.5 oz/100 g; 239 yds/219 m), Santa (9962), only Green is used for this design: 1 ball
- Size U.S. B/1 (2.25 mm) crochet hook, or size needed to obtain gauge
- Stitch marker
- Fiberfill stuffing
- Two 6 mm safety eyes
- Small amount of pink embroidery floss for the mouth
- Knee-high stocking for weighted stuffing
- Weighted stuffing, such as aquarium gravel, plastic pellets, or rice
- Two 1½-inch [4 cm] self-stick glitter foam stars
- Toothpick for star topper
Use the stocking to contain the weighted material inside the lower part of the tree. Fiberfill fills out the crocheted shape above it, while the safety eyes and embroidery floss create the face. The two foam stars are joined around the toothpick to form a double-sided topper.
Step-by-Step Crochet Instructions
Tree
Begin at the base of the Tree, ch 2.
- 1st rnd: 6 sc in 2nd ch from hook. Do not join. PM for beg of rnd. 6 sc.
- 2nd rnd: 2 sc in each of next 6 sc. 12 sc.
- 3rd rnd: (1 sc next sc. 2 sc in each of next sc) 6 times. 18 sc.
- 4th rnd: (1 sc in each of next 2 sc. 2 sc in next sc) 6 times. 24 sc.
- 5th rnd: (1 sc in each of next 3 sc. 2 sc in next sc) 6 times. 30 sc.
- 6th rnd: (1 sc in each of next 4 sc. 2 sc in next sc) 6 times. 36 sc.
- 7th rnd: (1 sc in each of next 5 sc. 2 sc in next sc) 6 times. 42 sc.
- 8th rnd: (1 sc in each of next 8 sc. 2 sc in next sct) 6 times. 48 sc.
The stitch text “sct” is preserved as supplied.
- 9th rnd, Bottom ridge: Working in back loops only, 1 sc in each sc around. The stitch count is not restated in the supplied pattern; continue to the next section as written.
Sides
- 10th to 12th rnds: Working in both loops, 1 sc in each sc around. The stitch count is not restated for each round in the supplied pattern.
- 13th rnd: Working in back loops only, 1 sc in each sc around.
- 14th rnd: As 10th rnd.
- 15th rnd: (Sc2tog. 1 sc in each of next 14 sts) 3 times. 45 sts.
- 16th rnd: As 10th rnd.
- 17th rnd: As 13th rnd.
- 18th rnd: (Sc2tog. 1 sc in each of next 13 sts) 3 times. 42 sts.
- 19th rnd: As 10th rnd.
- 20th rnd: (Sc2tog. 1 sc in each of next 12 sts) 3 times. 39 sts.
- 21st rnd: As 13th rnd.
- 22nd rnd: As 10th rnd.
Attach the Safety Eyes and Add Stuffing
Attach safety eyes between the 21st and 22nd rnds, approximately 9 sts apart.
Place weighted stuffing in the toe of a knee-high stocking. Start stuffing the piece firmly. Continue stuffing the piece as work progresses.
- 23rd rnd: (Sc2tog. 1 sc in each of next 11 sts) 3 times. 36 sts.
- 24th rnd: As 10th rnd.
- 25th rnd: As 13th rnd.
- 26th rnd: (Sc2tog. 1 sc in each of next 4 sts) 6 times. 30 sts.
- 27th rnd: As 10th rnd.
- 28th rnd: (Sc2tog. 1 sc in each of next 3 sts) 6 times. 24 sts.
- 29th rnd: As 13th rnd.
- 30th rnd: (Sc2tog. 1 sc in each of next 2 sts) 6 times. 18 sts.
- 31st rnd: As 10th rnd.
- 32nd rnd: (Sc2tog. 1 sc in next st) 6 times. 12 sts.
- 33rd rnd: As 13th rnd.
- 34th rnd: (Sc2tog. 1 sc in next st) 4 times. 8 sts.
Finish stuffing the piece.
- 35th rnd: 1 sc in each st around.
Fasten off, leaving a long end. Thread through rem sts. Pull tightly. Fasten securely.
Tree Needles
The needles are worked into the front loops only of the 13th, 17th, 21st, 25th, 29th, and 33rd rnds.
1st rnd: With tree tip facing down, join yarn with sl st to any front loop of the 13th rnd.
Ch 3. Sl st in front loop of next st.
Rep from * around, working last sl st in same sp as first sl st. Fasten off.2nd rnd: With tree tip facing down, join yarn with sl st to any front loop of the 17th rnd. Rep as given for 1st rnd.
In the 21st row, needles are not worked on the “face” of the tree, just along the sides and back.
3rd rnd: Join yarn with sl st in front loop of second st from outside edge of one eye of the 21st rnd. Working around side and back of tree toward the other eye,
Ch 3. Sl st in front loop of next st.
Rep from * to 1 front loop before the second eye. Fasten off.4th, 5th, and 6th rnds: With tree tip facing down, join yarn with sl st to any front loop of the corresponding 25th, 29th, and 33rd rnds. Rep as given for 1st rnd.
Finishing
Smile
Separate 4 of the 6 strands from the pink embroidery floss. Embroider a small upturned arc spanning 5 sts for the mouth.
Star Topper
With glue-side up, place one end of the toothpick in the middle of one star. Place the second star glue-side down on the glue-side of the first star. Press firmly to ensure the bond.
Stick the toothpick of the star topper down into the top of the tree.
Ways to Display Your Finished Crochet
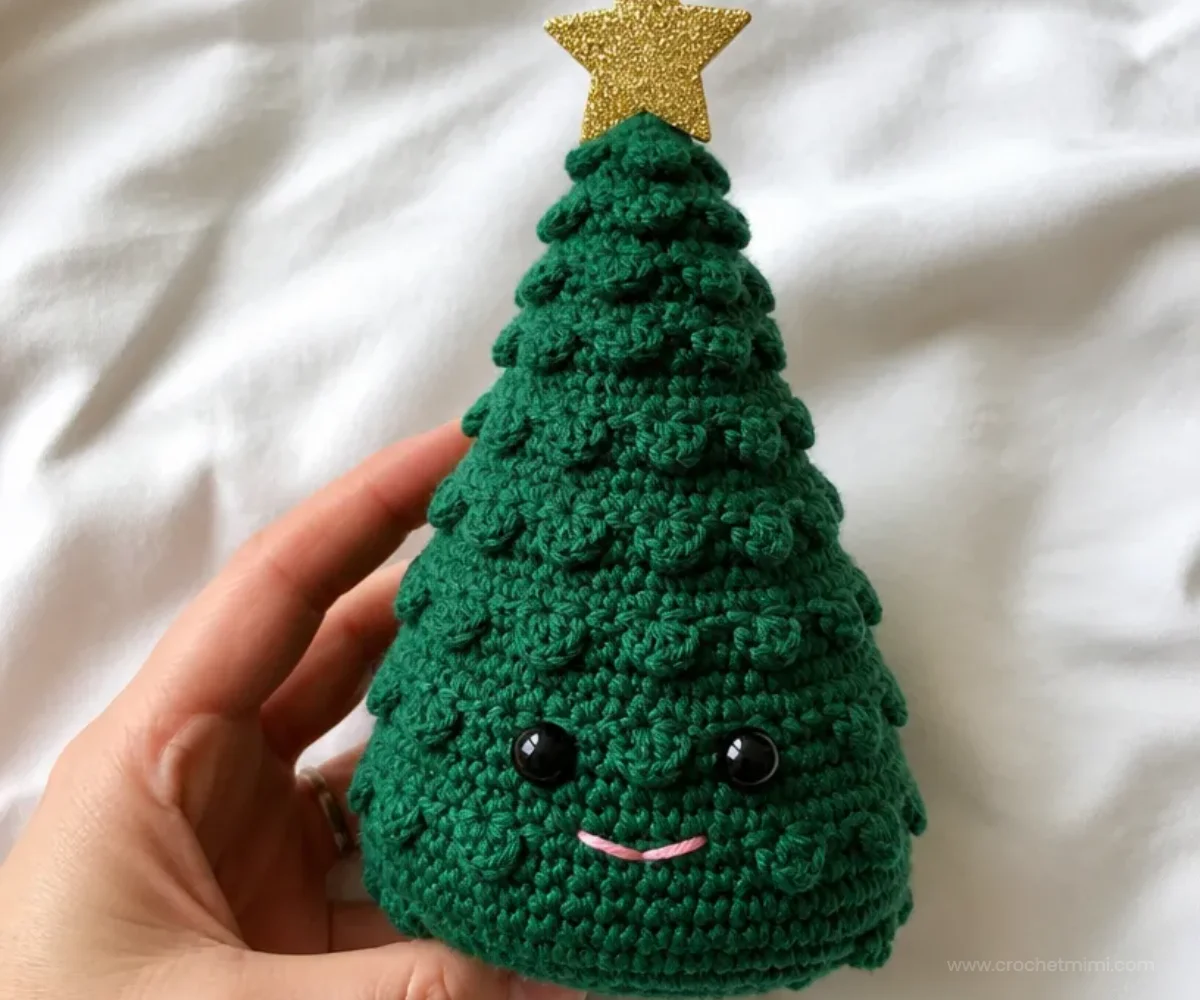
- Create a holiday shelf arrangement: Place the tree beside pinecones, ornaments, or wrapped miniature gifts.
- Use it as a table accent: Set it near the center of a dining table, keeping it away from candles and other heat sources.
- Make a small character collection: Pair several handmade seasonal figures at different heights.
- Give it as a handmade gift: The friendly face and glitter star make it suitable for a coworker, teacher, neighbor, or family member.
- Add it to a mantel display: Arrange it with garland and other soft decorations for a layered Christmas scene.
- Use it as a desk decoration: Its weighted base helps it stand on a work surface, bookshelf, or entry table.
Floral crochet can also complement seasonal decorating. For a different handmade centerpiece style, consider a crochet flowers wreath pattern when planning decorations beyond the Christmas season.
Caring for Your Crochet Project
Dust the finished tree gently with a soft brush, lint roller, or cool air from a distance. Pay special attention to the textured needle rows, where dust may settle.
Because the project contains weighted stuffing, safety eyes, embroidery, and a toothpick star topper, avoid soaking or machine washing it. For a small mark, use a barely damp cloth and spot-clean carefully without saturating the crochet fabric.
Keep the tree away from excessive heat, open flames, and prolonged direct sunlight. Store it upright or in a protective box so the foam star does not bend and the toothpick topper remains secure. Before displaying it each season, check that the eyes, mouth, star, and yarn ends remain firmly attached.
Helpful Crochet Tips
- Mark the beginning of every continuous round. Move the stitch marker after completing each round so the shaping stays aligned.
- Count after increase rounds. Confirm the listed totals 6, 12, 18, 24, 30, 36, 42, and 48 sc before beginning the sides.
- Watch the loop placement. The 9th and 13th rounds are worked in back loops only, while the tree needles use front loops only on specific rounds.
- Keep decreases even. The repeated
Sc2togsections shape the tree. If a decrease is skipped, the upper portion may become too wide. - Attach the eyes before the opening narrows. The pattern places them between the 21st and 22nd rounds, approximately 9 sts apart.
- Add stuffing gradually. Firmly place the weighted stocking at the bottom, then add fiberfill as you work so the shape remains smooth.
- Check the face orientation. When working the third needle round, leave the front area open between the eyes and place needles only along the sides and back.
- Secure the finishing ends carefully. Pull the final opening closed firmly and fasten securely before hiding the yarn end.
For another small handmade gift idea using floral color and shaping techniques, you may enjoy this beginner-friendly crochet red roses pattern.
Creative Ways to Customize Your Project
These are optional styling ideas and do not change the approved pattern instructions:
- Try a different green yarn color: A darker forest green, soft sage, or blue-green can create a different seasonal mood. Changing yarn may affect gauge, texture, dimensions, and yarn requirements.
- Use a different star color: Gold, silver, white, or red foam stars can coordinate with your existing decorations.
- Embroider a different expression: Keep the supplied smile placement, but adjust the arc slightly for a cheerful or surprised look.
- Make a coordinated group: Use the same pattern with different green shades and star colors for a woodland-style display.
- Change the display setting: Place the finished tree in a small dish, on a tray, or beside a crochet doily. A beginner-friendly mandala crochet doily can provide a colorful base for a tabletop arrangement.
- Experiment with hook size only as an optional adaptation: A different hook can change the fabric density and finished size, so it may also change the amount of yarn and stuffing required.
Frequently Asked Questions
Is this crochet Christmas tree pattern worked in rounds?
Yes. The tree begins at the base and is worked in continuous rounds without joining. The stitch marker identifies the beginning of each round.
What yarn color is used?
The supplied design uses only the Green color from Red Heart® Amigurumi™, one ball, listed as Santa (9962).
What hook size is recommended?
Use a U.S. B/1 (2.25 mm) crochet hook, or the size needed to obtain gauge.
When should the safety eyes be attached?
Attach them between the 21st and 22nd rounds, approximately 9 sts apart, before continuing with the upper shaping.
How does the tree stand upright?
Weighted stuffing placed in the toe of a knee-high stocking is added inside the base. Fiberfill is then used to fill the rest of the crocheted tree.
How are the tree needles made?
The needles are worked into front loops only on the 13th, 17th, 21st, 25th, 29th, and 33rd rounds. Most needle rounds use repeated chains and slip stitches.
Can the yarn or hook be changed?
Yes, as an optional modification, but changing yarn or hook size may affect gauge, dimensions, texture, and yarn requirements. The supplied instructions are written for the listed materials.
How should the finished tree be cleaned?
Dust it gently and spot-clean carefully with a barely damp cloth. Avoid soaking or machine washing because of the weighted stuffing, safety eyes, embroidery, toothpick, and foam stars.
Conclusion
This crochet Christmas tree combines simple single crochet shaping with ridged rounds, decorative needles, a friendly embroidered face, and a glittering star topper. Display it on a shelf, give it as a handmade gift, or make several in coordinating colors. For more seasonal inspiration, browse these free crochet Christmas tree patterns and Christmas tree crochet tutorials.