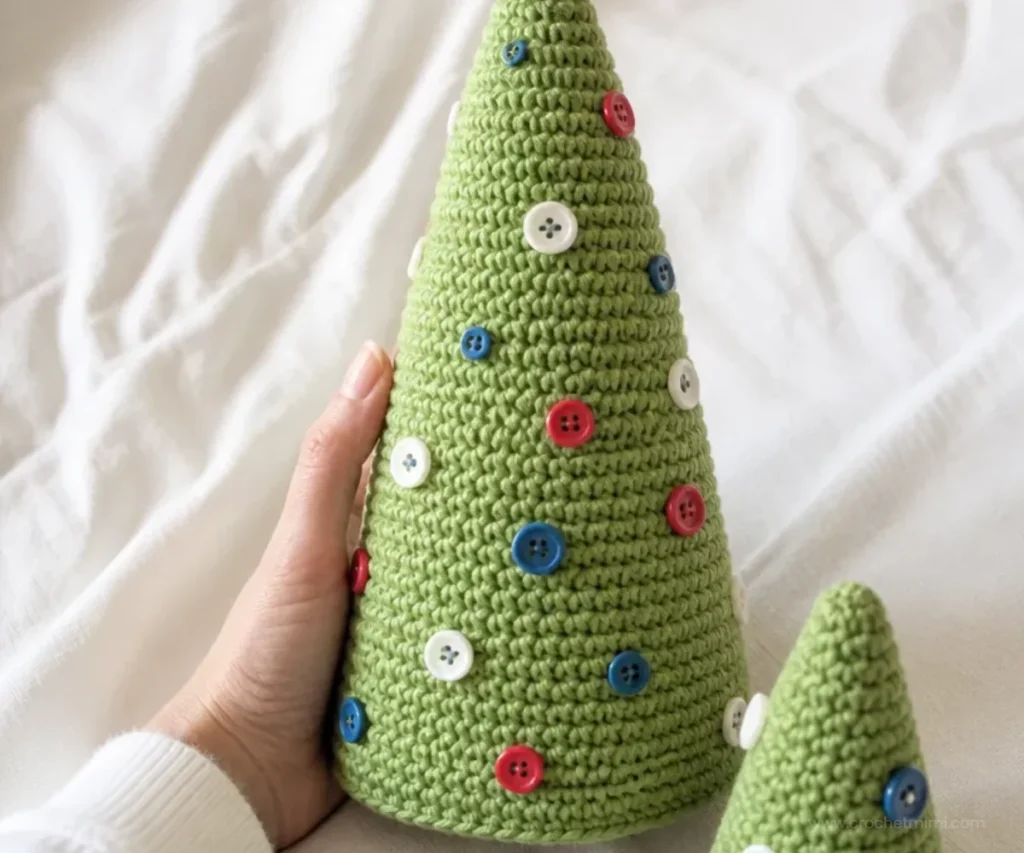
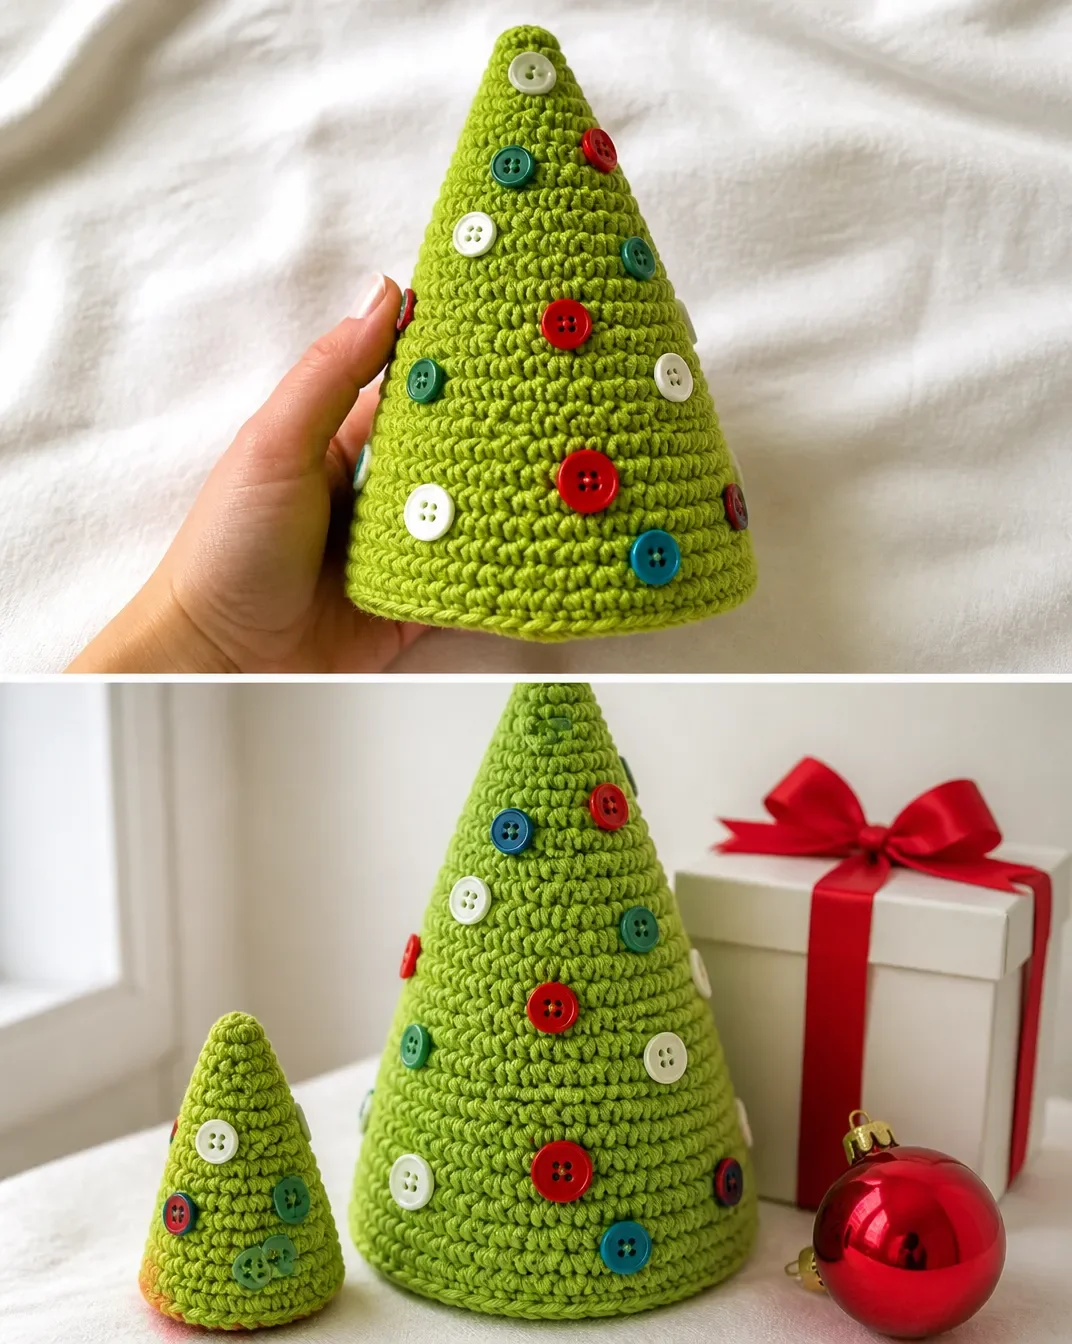
Christmas trees make charming seasonal decorations, and this Christmas Trees Pattern creates two stuffed crochet trees in a rich Hot Green shade. The simple joined rounds, gradual increases, and sturdy felt-and-cardboard base make the project approachable for crocheters building confidence with shaping. Display the finished trees on a mantel, shelf, or holiday table, or pair them with handmade ornaments such as this crochet bear ornament pattern for a coordinated seasonal arrangement.
Why You’ll Love This Crochet Project

- Make two useful sizes. The pattern includes a Large Version and a Small Version, so the trees can be displayed together as a miniature forest.
- Practice controlled increases. Increasing six stitches at regular intervals gradually shapes the crocheted fabric into a tree form.
- Create a freestanding decoration. Stuffing gives the tree body, while felt and cardboard reinforce the bottom.
- Customize the finish. Buttons add colorful decoration and can be arranged to resemble ornaments.
- Use one ball of yarn efficiently. One ball of Lily® Sugar’n Cream® Hot Green makes both the Large and Small Trees.
Crochet Mimi Tip: Keep the larger tree’s stitch counts visible as you work. The increases are the main shaping guide, so checking each completed increase round helps prevent the form from becoming uneven.
Before You Start Crocheting
This project consists of two crocheted tree bodies, a Large Version and a Small Version. Both begin with a small joined round and are worked in single crochet. The Large Version continues with established increase rounds until it reaches 66 sc, then receives two final even rounds. The Small Version is worked from the beginning through the specified stopping point and fastened off.
The construction is worked in joined rounds rather than continuous spirals. Each round begins with ch 1 and ends by joining with a slip stitch to the first single crochet unless the instruction says otherwise. The second round is worked in back loops, which creates a subtle structural detail at the base.
After crocheting, stuff the tree, place cardboard between the stuffing and felt, sew the felt in place, and add buttons for decoration. The supplied hook is a U.S. G/6 (4 mm), or use the size needed to obtain gauge.
Useful abbreviations:
- ch: chain
- sc: single crochet
- sl st: slip stitch
- inc: increase
- rnd: round
- rep: repeat
Materials You’ll Need
- Lily® Sugar’n Cream® (2.5 oz/70.9 g; 120 yds/109 m), Hot Green (01712): 1 ball makes Large and Small Trees
- Large Tree: 24 m / 27 yds
- Small Tree: 17 m / 19 yds
- Size U.S. G/6 (4 mm) crochet hook or size needed to obtain gauge
- Stuffing
- Buttons for decorations
- 12″ [30.5 cm] felt for Base
- Light cardboard for Base
The stuffing fills and supports the crocheted tree body. The felt covers the bottom, while the cardboard gives the base additional stability so the finished decoration can stand securely.
Complete Crochet Tutorial
Large Version
Ch 2.
1st rnd: 6 sc in 2nd ch from hook. Join with sl st to first sc.
Stitch count after join: 6 sc2nd rnd: Ch 1. Working in back loops, 2 sc in each sc around. Join with sl st to first sc.
12 sc3rd and 4th rnds: Ch 1. 1 sc in each sc around. Join with sl st to first sc.
5th rnd: Ch 1. *1 sc in next sc. 2 sc in next sc. Rep from * around. Join with sl st to first sc.
18 sc6th and 7th rnds: As 3rd and 4th rnds.
8th rnd: Ch 1. *1 sc in each of next 2 sc. 2 sc in next sc. Rep from * around. Join with sl st to first sc.
24 sc9th and 10th rnds: As 3rd and 4th rnds.
11th rnd: Ch 1. *1 sc in each of next 3 sc. 2 sc in next sc. Rep from * around. Join with sl st to first sc.
30 sc12th and 13th rnds: As 3rd and 4th rnds.
14th rnd: Ch 1. *1 sc in each of next 4 sc. 2 sc in next sc. Rep from * around. Join with sl st to first sc.
36 sc15th and 16th rnds: As 3rd and 4th rnds.
Continue as established: Increase 6 sts on next and every following 3rd rnd, until there are 66 sc.
Next 2 rnds: Ch 1. 1 sc in each sc around. Join with sl st to first sc. Fasten off at end of last rnd.
Small Version
Work from the beginning through the instructions as given for the Large Version. Fasten off.
Finishing and Assembly
- Cut 1 piece of felt and 1 piece of cardboard to fit circumference of bottom of Tree.
- Stuff Tree.
- Pin felt to bottom of Tree, placing cardboard between felt and stuffing.
- Sew felt in position.
- Sew buttons on Tree as shown in picture.
For additional handmade seasonal decorating inspiration, a crochet flower wreath pattern can help you create a broader handmade display, even though this tree pattern remains the centerpiece of the project.
Handmade Gift and Decoration Ideas

- Create a paired display: Place the Large and Small Trees side by side on a mantel, bookcase, or entryway table.
- Build a holiday centerpiece: Arrange the trees on a tray with other seasonal decorations, leaving enough space around the buttons and felt bases.
- Make a handmade gift set: Give the two trees together as a compact decoration for a friend, host, or family member.
- Use coordinated buttons: Choose button colors that match a room’s holiday palette, such as red and white, gold and cream, or jewel tones.
- Decorate a work area: A small tree can bring seasonal color to a desk, craft room, or open shelf.
- Combine with other crochet décor: Handmade roses can add an unexpected botanical contrast; consider these beginner-friendly crochet red roses for a nontraditional green-and-red arrangement.
Caring for Your Crochet Project
- Dust the tree gently with a soft brush, lint roller, or cool air from a distance.
- Spot-clean small marks carefully with a lightly damp cloth rather than soaking the stuffed decoration.
- Allow any cleaned area to dry completely before storing the tree.
- Keep the finished piece away from excessive heat, which may affect the yarn, stuffing, buttons, felt, or cardboard base.
- Store the tree upright or in a roomy box so the crocheted fabric and buttons are not crushed.
- Keep it in a dry location, especially because the cardboard base can lose its structure if exposed to moisture.
Tips for Better Results
- Count after every increase round. The stitch counts progress to 12, 18, 24, 30, and 36 sc before the later established increases. These checkpoints make it easier to identify a missed increase.
- Work the second round in back loops. This placement is specifically required and should not be replaced with ordinary full-stitch work.
- Mark the first sc if needed. A removable stitch marker can help you locate the first stitch when joining each round.
- Join consistently. Finish each instructed round with a slip stitch to the first sc so the joined construction remains even.
- Keep stuffing moderate. Add enough stuffing to support the tree, but avoid packing it so firmly that the stitches stretch or the shape becomes difficult to close with the base.
- Fit the base carefully. The felt and cardboard should fit the circumference of the bottom without puckering. Trim cautiously so the pieces remain supportive.
- Secure buttons firmly. Sew each button securely and keep decorative details appropriate for the intended display location.
- Use the same tension for both trees. Consistent tension helps the Large and Small Versions look cohesive when displayed together.
A flat decorative project can complement the three-dimensional trees; this beginner-friendly mandala crochet doily pattern offers a useful option for layering beneath a holiday arrangement.
Creative Ways to Customize Your Project
These ideas are optional and do not change the approved pattern instructions:
- Change the button palette: Use contrasting buttons for a traditional ornament effect or tonal green buttons for a subtle design.
- Coordinate the display: Match the buttons to nearby ribbons, ornaments, or table linens.
- Use seasonal arrangements: Group the trees with winter whites, metallic accents, or natural wood décor.
- Make a botanical contrast: A green tree display can be paired with floral crochet pieces, such as a blooming bouquet crochet blanket pattern used as a colorful textile backdrop.
- Try another yarn cautiously: A different yarn may alter gauge, texture, size, stiffness, and yarn requirements. If substituting, use the hook size needed to obtain the intended gauge and expect the finished trees to vary.
- Adjust the button placement: Arrange buttons in evenly spaced rows, scattered ornament-like clusters, or a simple vertical pattern while keeping them securely sewn.
Frequently Asked Questions
Is this Christmas Trees Pattern suitable for beginners?
It can be a useful learning project for crocheters comfortable with basic chains, single crochet, slip stitches, joined rounds, and simple increases. The stitch counts provide helpful checkpoints as the tree expands.
What yarn is recommended?
The supplied pattern uses Lily® Sugar’n Cream® (2.5 oz/70.9 g; 120 yds/109 m) in Hot Green (01712). One ball makes the Large and Small Trees.
What hook size should I use?
Use a U.S. G/6 (4 mm) crochet hook or the size needed to obtain gauge.
How many trees does the pattern make?
The pattern includes a Large Version and a Small Version. The listed yarn quantity states that one ball makes both trees.
Can I change the color?
Yes, changing color is an optional styling choice. A different yarn color may change the appearance, while changing yarn fiber or weight can affect gauge, texture, dimensions, and yarn requirements.
How is the tree given structure?
The tree is stuffed, then finished with felt and light cardboard at the bottom. The cardboard is placed between the felt and stuffing before the felt is pinned and sewn in position.
How are the decorations attached?
Buttons are sewn onto the Tree as shown in the picture. Sew them securely and choose their placement according to the desired finished appearance.
How should the finished tree be cleaned?
Use gentle dusting and careful spot cleaning. Avoid soaking the stuffed tree because the felt and cardboard base may be affected by moisture.
Conclusion
This Christmas Trees Pattern combines straightforward joined rounds with gradual shaping and a supportive finished base. The Large and Small Trees can stand together as a coordinated holiday display, while buttons make each one easy to personalize. For more tree-themed inspiration, compare it with the Crazy Christmas Trees PDF pattern or the Aunties Two Christmas Trees pattern.