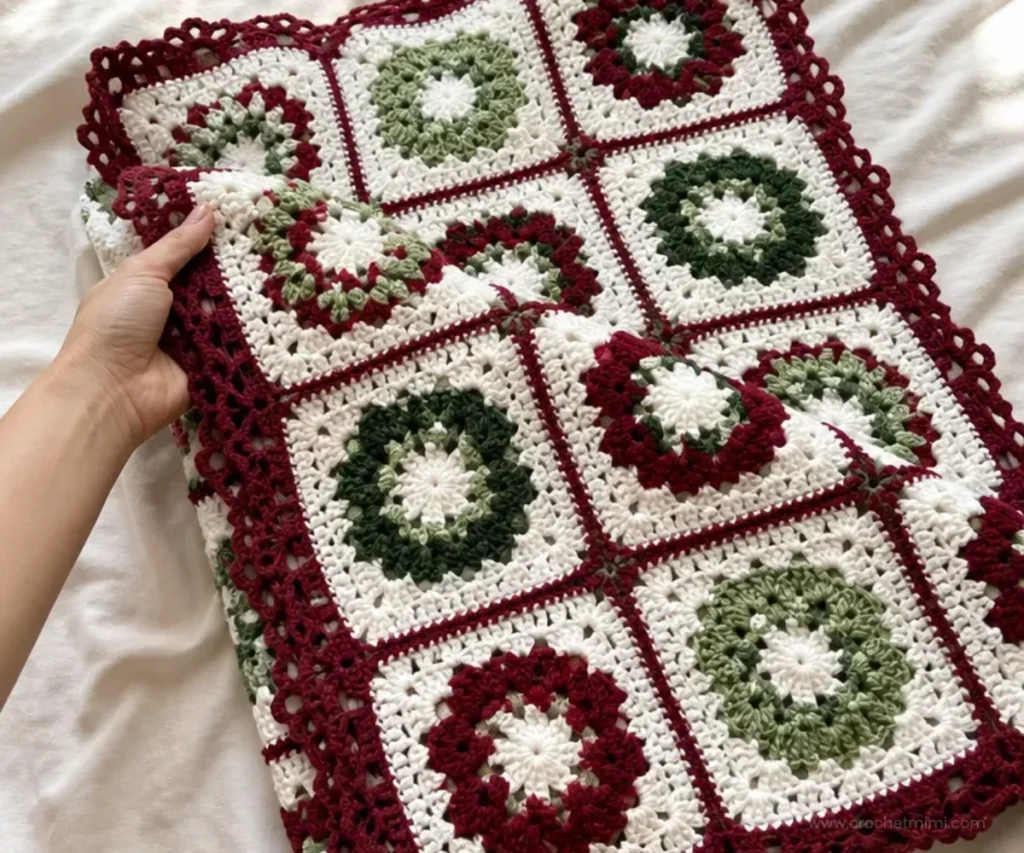
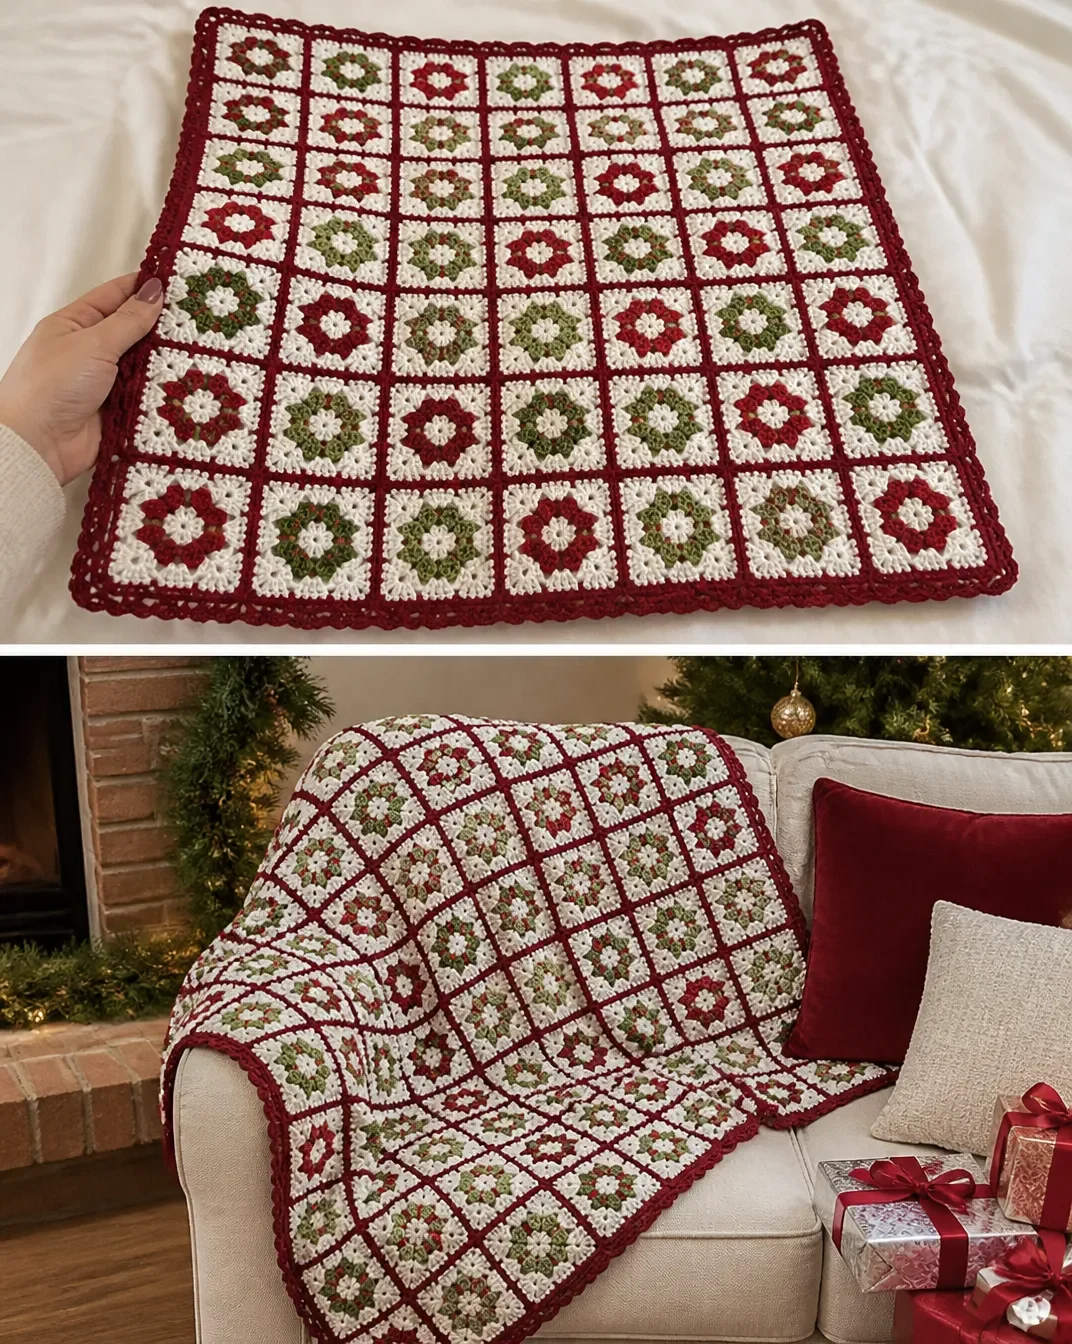
A festive patchwork of soft white, burgundy, thyme, and sage squares creates this eye-catching Crochet Christmas Wreath Throw Pattern. The wreath-inspired color arrangement makes the finished throw especially attractive for holiday decorating, seasonal gifting, or adding warmth to a sofa or guest room. Although the project includes many squares, each individual motif uses simple double crochet groups and chain spaces, making it a satisfying way to practice consistent tension and careful assembly. For another seasonal decorating idea, compare its traditional palette with this spring crochet wreath project.
Why You’ll Love This Crochet Project
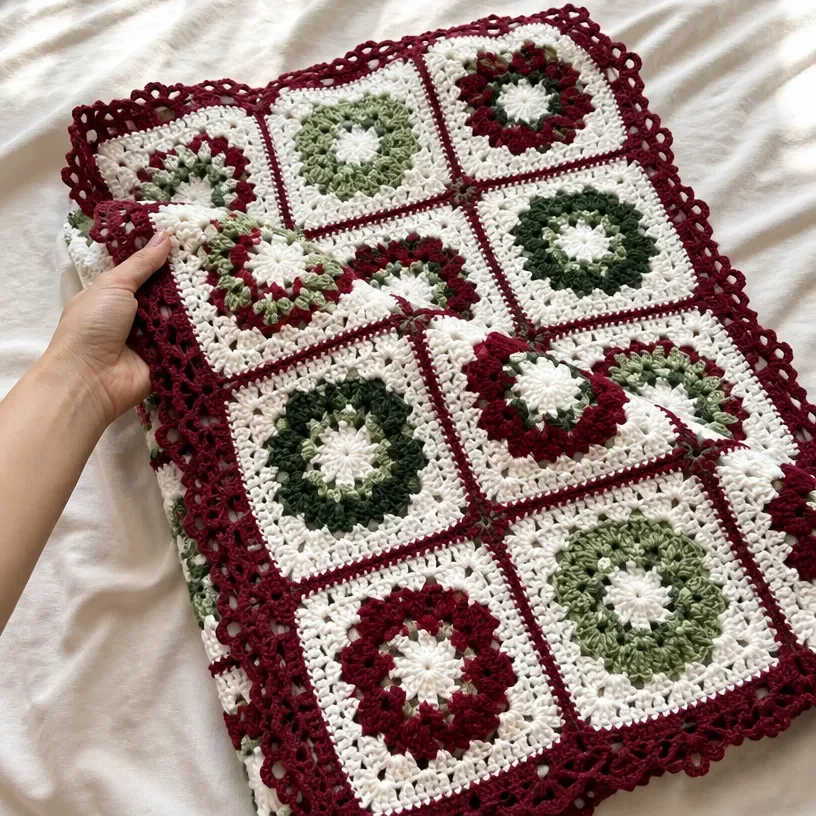
- Festive colorwork: Soft White A forms the main background, while Burgundy, Medium Thyme, and Light Sage create the wreath-like seasonal design.
- Useful construction practice: Making many small squares helps you build consistency with chain spaces, corner shaping, color changes, and joining.
- A substantial handmade gift: Once assembled and bordered, the throw becomes a thoughtful holiday gift for someone who enjoys cozy home décor.
- Flexible display: Use it as a sofa throw, seasonal bed accent, reading blanket, or decorative layer during Christmas gatherings.
- A polished border: The two-round Burgundy border frames the patchwork and gives the finished piece a unified edge.
Crochet Mimi Tip: Make a few squares first and place them beside one another before producing the entire set. This lets you check color contrast and become comfortable with the square construction.
Before You Start Crocheting
This project is made from two types of two-round squares:
- 303 one-color squares: 211 with A, 68 with B, and 8 with C.
- 188 two-color squares: 108 using A and B, 48 using C and D, 24 using A and C, and 8 using B and C.
The squares are sewn together according to the assembly diagram, ends are woven in, and a two-round Burgundy border is worked around the outside. The pattern uses US crochet terminology and includes wrong-side and right-side rounds, color changes, chain spaces, double crochet groups, slip stitches, half double crochet joins, and sewing.
The approved pattern does not specify a skill level, so work at a pace that allows you to count each group and identify every corner space clearly.
Abbreviations
- ch: chain
- dc: double crochet
- hdc: half double crochet
- sc: single crochet
- sl st: slip stitch
Materials You’ll Need
- 5 skeins RED HEART® Super Saver®, color 316 Soft White, A
- 2 skeins RED HEART® Super Saver®, color 376 Burgundy, B
- 1 skein RED HEART® Super Saver®, color 406 Medium Thyme, C
- 1 skein RED HEART® Super Saver®, color 631 Light Sage, D
- 5.5 mm [US I-9] crochet hook
- Yarn needle
Use the yarn labels to confirm the color names and codes before beginning. The yarn needle is needed for sewing the completed squares together and weaving in ends.
Complete Crochet Pattern Instructions
Square Types and Quantities
One-Color Square
Make 287: 211 with A, 68 with B, and 8 with C.
With the selected color, ch 4; join with slip st in first ch to form a ring.
Round 1 (Wrong Side)
Ch 3 (counts as first dc here and throughout),
2 dc in ring,
[ch 2, 3 dc in ring] 3 times
join with hdc in top of beginning ch (joining hdc counts as a ch-2 space), turn
Four 3-dc groups and 4 ch-2 spaces.
Round 2 (Right Side)
Ch 3,
2 dc in first ch-space (around the post of the joining hdc),
ch 1,
[(3 dc, ch 2, 3 dc) in next ch-2 space, ch 1] 3 times,
3 dc in first ch-space (around the post of the joining hdc),
ch 2;
join with slip st in top of beginning ch
Eight 3-dc groups, 4 ch-1 spaces, and 4 ch-2 spaces.
Fasten off, leaving a long tail for sewing squares together.
Two-Color Square
Make 188: 108 using A and B, 48 using C and D, 24 using A and C, and 8 using B and C.
All two-color squares are worked using the darker of the two colors as the first color and the lighter of the two colors as the second color.
With first color, ch 4; join with slip st in first ch to form a ring.
Round 1 (Wrong Side)
Ch 3 (counts as first dc here and throughout),
(2 dc, ch 2, 3 dc) in ring;
change to second color, do not fasten off first color,
ch 2,
(3 dc, ch 2, 3 dc) in ring;
join with hdc in top of beginning ch (joining hdc counts as a ch-2 space), turn
Four 3-dc groups and 4 ch-2 spaces.
Round 2 (Right Side)
Continuing with second color,
ch 5,
slip st in 3rd ch from hook.
2 dc in first ch-space (around the post of the joining hdc),
ch 1,
(3 dc, ch 2, 3 dc) in next ch-2 space, ch 1,
3 dc in next ch-2 space;
change to first color,
ch 2, 3 dc in same ch-2 space, ch 1,
(3 dc, ch 2, 3 dc) in next ch-2 space, ch 1,
3 dc in first ch-space (around the post of the joining hdc);
join with slip st in ch-2 space at beginning of round.
Fasten off, leaving a long tail for sewing squares together.
Assembly
Arrange squares as shown in the assembly diagram and sew together.
Weave in ends.
When organizing the pieces, keep the right sides facing consistently and follow the placement shown in the diagram. The long tails left on each square are intended for sewing, so avoid trimming them until the joins are complete.
Border
With Right Side facing, join B with slip st in any corner ch-2 space.
Round 1 (Right Side)
Ch 1,
beginning in same ch-2 space as join,
**(sc, ch 2, sc) in corner ch-2 space, ch 1,
- [sc in next dc, ch 1, skip next dc, sc in next dc, ch 1, skip next ch-space] twice, sc in seam between squares, ch 1;
repeat from * across to next corner ch-2 space;
repeat from ** around;
join with slip st in first sc.
Round 2
Slip st in first corner ch-2 space, ch 1,
beginning in same ch-2 space,
(sc, ch 3, sc) in each ch-space around;
join with slip st in first sc.
Fasten off.
Finished Project Ideas
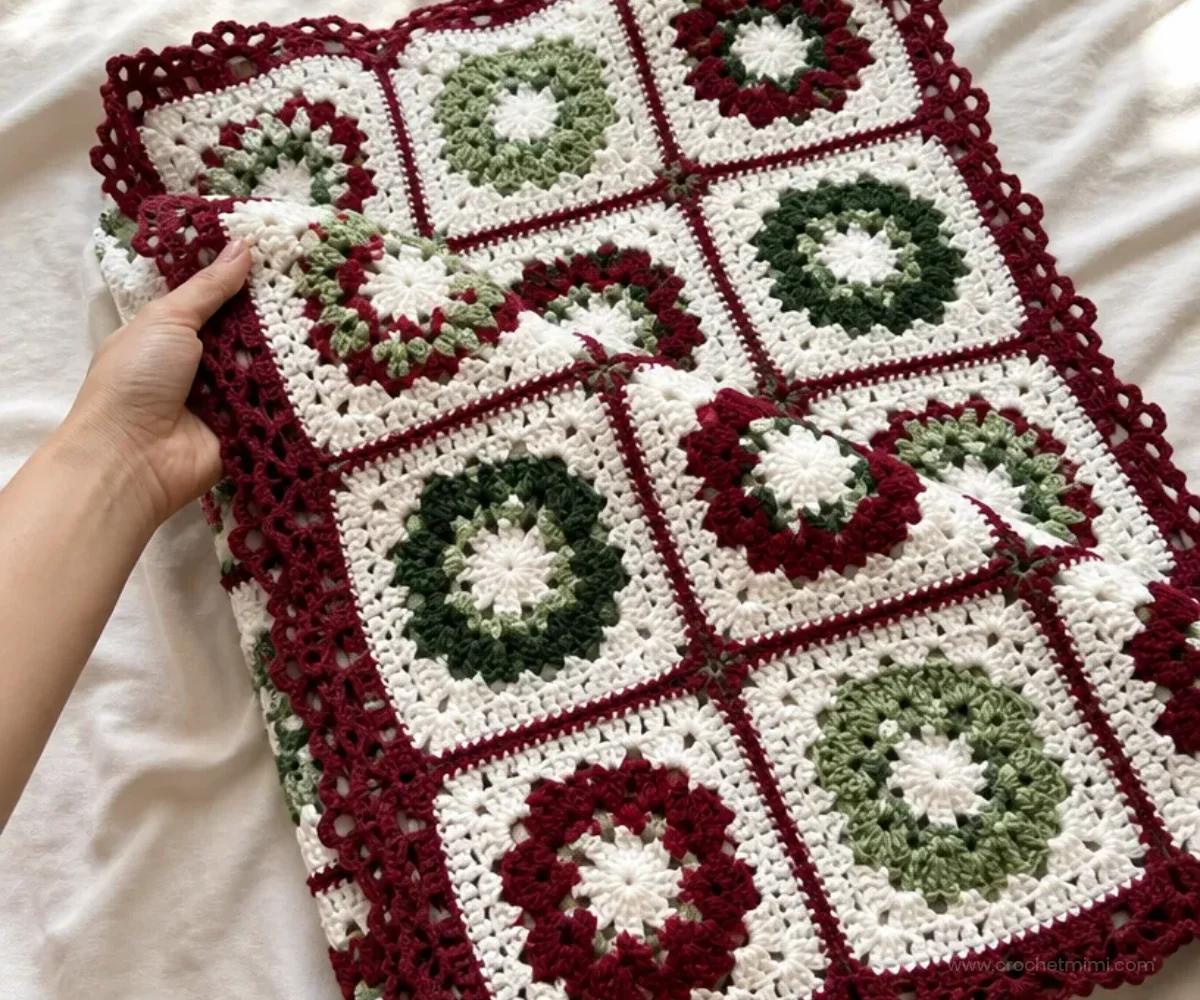
- Drape the throw over a sofa or accent chair as a seasonal Christmas decoration.
- Fold it at the foot of a bed for a warm holiday bedroom accent.
- Give it as a handmade present to someone who enjoys traditional red-and-green décor.
- Use it as a cozy layer during holiday movie nights or family gatherings.
- Display it with neutral furnishings so the Burgundy and green tones become the focal point.
- Pair it with other handmade seasonal decorations, such as a crochet bear ornament, for a coordinated gift or holiday display.
Caring for and Storing Your Crochet
Treat the completed throw gently so the sewn seams, border, and square shapes remain neat.
- Follow the care instructions provided on the yarn labels.
- Remove surface dust with gentle shaking or a soft brush rather than pulling at the stitches.
- For a small mark, spot-clean carefully and avoid aggressive rubbing.
- Do not use excessive heat, which can affect the shape and surface of the crochet fabric.
- Reshape the throw while it is damp only if the yarn-care instructions support that method.
- Store it clean and completely dry, folded loosely in a breathable container.
- Avoid storing heavy objects on top of it for long periods, as this may flatten the border or distort the patchwork.
Helpful Crochet Tips
- Keep the wrong and right sides clear. Mark the right side of a completed sample square if you find it difficult to identify during assembly.
- Count the corner spaces. Each completed square should have four ch-2 spaces, which are essential for the corner shaping and later border.
- Watch the first ch-space. The pattern specifically works around the post of the joining hdc when beginning Round 2; do not substitute a different space.
- Manage two colors carefully. In the two-color square, do not fasten off the first color after changing to the second color in Round 1.
- Leave long sewing tails. Fasten off the squares with enough yarn remaining to sew them together securely.
- Check color placement regularly. Arrange small groups of completed squares before sewing so the wreath design develops consistently across the throw.
- Sew seams evenly. A steady sewing rhythm helps keep the square edges aligned and prevents puckering.
- Take extra care at the border. In Round 1, work the stated stitches at seams and around the ch-spaces so the outer edge remains even.
For a different autumn palette and another example of a seasonal crocheted wreath design, see this crochet fall wreath pattern.
Color and Styling Variations
The approved color arrangement creates the intended Christmas wreath effect, but you can use these optional ideas for future versions:
- Replace the traditional palette with silver, icy blue, and white for a winter-themed throw.
- Try cream, cranberry, and forest green for a softer rustic holiday look.
- Use the same square structure in coordinated colors for a non-holiday blanket.
- Emphasize one color by using it for the border and a second contrasting color for the accent squares.
- Pair the throw with handmade red floral décor, such as these crochet red roses, for a romantic seasonal arrangement.
Any change to yarn or hook size is optional and may affect the square dimensions, fabric texture, finished proportions, and yarn requirements. If you make a substitution, keep the yarn weight and fiber characteristics as close as possible and make a sample square before producing the full quantity.
Frequently Asked Questions
Is this pattern suitable for a beginner?
The individual squares use repeated double crochet groups and chain spaces, but the project requires careful color organization, a large number of components, sewing, and border work. Beginners may prefer to complete and understand one sample of each square type before making the full set.
What hook size should I use?
Use a 5.5 mm [US I-9] crochet hook, as specified in the pattern.
Which yarn colors are required?
The pattern uses RED HEART® Super Saver® in 316 Soft White, 376 Burgundy, 406 Medium Thyme, and 631 Light Sage. These are labeled A, B, C, and D respectively.
How many squares are made?
Make 287 one-color squares and 188 two-color squares, for a total of 475 squares.
How are the two-color squares arranged?
The two-color quantities are 108 using A and B, 48 using C and D, 24 using A and C, and 8 using B and C. The darker color is worked first and the lighter color second.
How are the squares joined?
Arrange the squares as shown in the assembly diagram and sew them together using the long tails left during fastening off. Then weave in the ends.
Can I change the colors?
Yes, color changes are an optional customization, but they may alter the wreath-like appearance. Plan the replacement palette carefully and maintain a clear distinction between background, accent, and border colors.
How is the border made?
Join B in any corner ch-2 space with the right side facing. Work the specified single crochet and chain-space pattern around the throw for Round 1, then work single crochet, chain 3, single crochet in each chain space for Round 2.
Can I use another yarn?
You may substitute yarn as an optional modification, but yarn differences can affect tension, square size, drape, texture, finished dimensions, and the amount required. Make a sample square before committing to the full project.
Are there other seasonal crochet decorations to coordinate with the throw?
Yes. You could create a broader seasonal display with a crochet spiderweb wreath for autumn or Halloween décor, then reserve this throw for the Christmas season.
Conclusion
This Crochet Christmas Wreath Throw Pattern combines manageable two-round squares with a striking seasonal color plan and a neat finished border. Careful counting, organized color placement, and patient sewing will help the patchwork come together beautifully. For additional inspiration, compare the project with this Red Heart Christmas wreath throw pattern and this Christmas wreath throw tutorial before choosing your preferred approach.