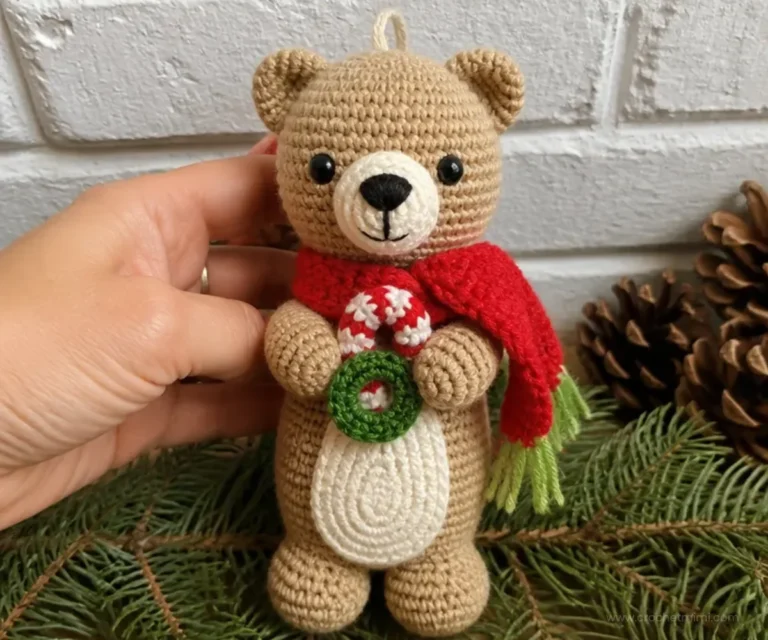

A crochet Christmas star ornament adds a handmade touch to a tree, gift package, wreath, or seasonal centerpiece. This five-pointed design uses Autumn Red for the star’s foundation and Dark Sage for the final round, creating a traditional holiday color combination with a subtle botanical feel. The Crochet Christmas Star Ornament Pattern is compact, portable, and useful for practicing chains, single crochet, slip-stitch joins, color changes, and corner shaping. For another festive handmade decoration, pair it with this easy crochet bear ornament.
Why You’ll Love This Crochet Project

- It creates a recognizable holiday shape. Five corner spaces form the star points, while the contrasting final round gives the outline more definition.
- It uses a small amount of yarn. The project is a practical way to use coordinated colors from your yarn collection without committing to a large project.
- It builds useful crochet skills. You will practice working into a ring, forming chain spaces, shaping corners, joining rounds, and changing colors.
- It works beyond the Christmas tree. Finished stars can decorate wrapped gifts, garlands, table settings, wreaths, or seasonal displays.
- It makes a thoughtful handmade gift. A small ornament is easy to personalize by changing the color combination or pairing several stars together.
Crochet Mimi Tip: Keep the first three rounds relaxed. Tight tension can make the center ring and chain spaces difficult to work into, especially when shaping the star points.
How This Crochet Project Comes Together
The project includes one crocheted star made in four rounds. The first three rounds use Contrast A, Autumn Red, to create the central ring and five corner spaces. Contrast B, Dark Sage, is then joined for the final round, which adds additional single crochet sections and defined chain-3 corners.
The construction sequence is:
- Form a five-chain ring.
- Work 10 single crochet stitches into the ring.
- Create five chain-6 spaces.
- Shape each space with a [3 sc, ch 5, 3 sc] sequence.
- Change colors and complete the final round.
- Fasten off and weave in all ends.
The pattern uses US crochet terminology. Helpful abbreviations include:
- ch: chain
- sc: single crochet
- sl st: slip stitch
The approved instructions refer to “the center of the ring (see photo)” in Round 4. Follow that placement exactly as written in the pattern instructions below rather than substituting a different location.
Materials You’ll Need
- Simply Soft, 170 g/6. oz; 288 m/315 yds
- Contrast A Autumn Red (9730): 1
- Contrast B Dark Sage (9707): 1
- Yarn needle
The yarn needle is used for weaving in the ends after the star is complete. Keep both yarn colors accessible before beginning so the color transition can be made cleanly after Round 3.
Step-by-Step Crochet Instructions

Instructions (STAR)
Setup
Using A, chain 5; join with slip stitch to form ring.
Make sure the chain does not twist before joining. The center opening should remain large enough to accommodate the stitches worked into the ring.
Round 1
- Ch 1.
- Work 10 sc in ring.
- Join with slip stitch to first sc.
Stitch count: 10 sc
The chain-1 begins the round and is not identified as a counted stitch in the supplied instructions. After joining, check that all 10 single crochet stitches are positioned around the ring.
Round 2
- Ch 6, skip next sc, slip st in next sc; repeat from * 4 times.
- Join with a slip stitch in the base of beginning ch-6.
Stitch/space result: five ch-6 spaces
Each chain-6 section creates a foundation space for one of the five star points. Keep the chain lengths consistent so the points remain balanced around the center.
Round 3
- Ch 1.
- Work [3 sc, ch 5, 3 sc] in each ch-6 space.
- Join with slip stitch to first sc.
Stitch/space result: five ch-5 corner spaces
The corner sequence [3 sc, ch 5, 3 sc] is worked in each of the five ch-6 spaces.
Work the same sequence in all five spaces. The chain-5 sections become the corner spaces used for the color change and final round.
Color Change / Transition to B
- Fasten off A.
- Join B with a sc in any ch-5 corner space. This counts as the first sc.
Choose any one of the five ch-5 corner spaces for joining Contrast B. The selected space becomes the starting point for Round 4.
Round 4
- Work [2 sc ch 3, 3 sc] in same space as joining.
- sc in next 2 sc, sc in center of ring (see photo), skip 2 sc, + sc in next 2 sc, work [3 sc, ch 3, 3 sc) in next corner space; repeat from * 4 times, end last repeat at +, sc in last two sc, join with a slip st to first sc.
- Fasten off.
Round 4 includes the bracketed and symbol instructions exactly as written, including the reference “see photo,” the symbol +, and “skip 2 sc.” Preserve those placements while working the round. Do not reinterpret the symbols or change the stated stitch sequence.
Finishing
Using yarn needle, weave in all ends.
Work the ends securely through the wrong side of the stitches, keeping the star flat as you finish. Avoid pulling the yarn too tightly, since excessive tension can distort the points.
Ways to Display Your Finished Crochet

- Hang it on a Christmas tree. Add a separate hanging loop if desired, or use the upper point as the ornament’s natural hanging position while keeping the star flat.
- Decorate wrapped gifts. Tie a finished star onto ribbon or twine for a reusable handmade package embellishment.
- Create a star garland. Make several stars in coordinated or alternating colors and attach them along a length of ribbon.
- Use it as a table accent. Place stars around a centerpiece, on napkins, or beside place settings for a small festive detail.
- Add it to a wreath or greenery display. The Autumn Red and Dark Sage palette works well with evergreen-inspired decorations. For a spring-focused crochet display later in the year, consider this crochet flowers wreath pattern.
- Give a small set as a handmade present. Package several ornaments together with different color arrangements for a thoughtful seasonal gift.
Caring for Your Crochet Project
Handle the ornament gently when moving it between storage and display. Since the pattern is a small, shaped decoration, gentle dusting with a soft cloth or soft brush is a practical way to remove surface dust.
For a small mark, use careful spot cleaning rather than soaking the entire ornament. Avoid excessive moisture and heat, which may cause the crocheted shape to lose definition. Allow any cleaned area to dry completely before storing or displaying it.
Store the star flat in a dry container or place it between sheets of acid-free tissue paper if you want to help protect the shape. Keep it away from sharp objects, heavy items, and prolonged direct sunlight. If the points become slightly uneven, reshape them gently by hand while the ornament is dry.
Helpful Crochet Tips
- Count the first round carefully. Round 1 must contain 10 sc. Losing or adding a stitch here can affect the spacing of every later round.
- Keep the chain spaces even. Consistent tension across the ch-6 spaces in Round 2 helps the five points develop evenly.
- Mark the beginning if needed. A removable stitch marker can help you identify the first sc and the base of the beginning ch-6.
- Work fully into each space. In Round 3, place [3 sc, ch 5, 3 sc] in every ch-6 space rather than working into the surrounding stitches.
- Check the corner count. At the end of Round 3, there should be five ch-5 corner spaces ready for the transition to Contrast B.
- Join the new color securely. When joining B with a sc, make sure the yarn is anchored in the chosen ch-5 corner space and remember that this sc counts as the first sc.
- Read Round 4 slowly. The round includes “sc in center of ring (see photo),” “skip 2 sc,” and the symbol “+.” Keep the original wording beside you as you work.
- Avoid over-tightening joins. Slip-stitch joins should close the round without puckering the center or pulling the star points inward.
- Shape before storing. Once the ends are woven in, gently flatten and arrange the five points so the ornament has a clear star outline.
- Secure ends discreetly. Weave each end through several stitches on the wrong side, then trim only after it feels secure.
For a floral-inspired companion project, the beginner-friendly crochet red roses can provide a contrasting handmade accent for a winter or botanical display.
Color and Styling Variations
The approved pattern uses Autumn Red for Contrast A and Dark Sage for Contrast B. These colors create a classic seasonal combination, but the color arrangement can be adapted as an optional styling choice.
- Traditional holiday palette: Use red and green tones to emphasize the Christmas theme.
- Winter neutrals: Try a light main color with a darker outline for a snowy, graphic appearance.
- Metallic-inspired colors: Pair a deep jewel tone with a pale contrasting shade for an elegant tree decoration.
- Coordinated gift wrapping: Match Contrast A to wrapping paper and Contrast B to ribbon for a unified package.
- Mixed star collection: Make several ornaments with different color pairings while keeping the same four-round construction.
- Botanical display: Combine dark green-inspired stars with red, cream, or muted gold shades beside greenery.
These are optional color changes only. If you substitute yarn or alter the hook size, the tension, texture, yarn requirements, and finished dimensions may change. Work consistently with the selected materials and expect the ornament’s size and stitch definition to vary.
For a larger decorative crochet theme, a beginner-friendly mandala crochet doily can complement stars used in table displays, although it is a separate project with its own instructions.
Frequently Asked Questions
Is this crochet star ornament beginner-friendly?
The star uses basic stitches chains, single crochet, and slip stitches but Round 4 requires careful reading. Beginners should count each round and refer to the supplied wording when working the center-of-ring placement and symbols.
How many components does the pattern include?
The pattern creates one crocheted star. It is worked as a single piece through four rounds, followed by weaving in the ends.
Which colors are used?
Contrast A is Autumn Red (9730), and Contrast B is Dark Sage (9707). Autumn Red is used for the first three rounds, and Dark Sage is joined for Round 4.
When does the color change happen?
Fasten off Contrast A after Round 3. Join Contrast B with a single crochet in any ch-5 corner space, with that single crochet counting as the first sc.
Can I change the colors?
Yes. Color changes are an optional styling choice. Keep the approved round structure the same, and remember that different yarns or colors may affect the appearance and stitch definition.
What should I do if my star points look uneven?
Check that the five ch-6 spaces in Round 2 and the five ch-5 corner spaces in Round 3 are evenly formed. Also verify that the corner sequence is worked in every ch-6 space.
How should I finish the ornament?
Fasten off after Round 4, then use a yarn needle to weave in all ends. Arrange the points gently so the star lies neatly before displaying or storing it.
Can I use the star with other handmade decorations?
Yes. It can be displayed with ornaments, wreaths, gift wrapping, greenery, or other crochet pieces. A floral blanket project such as this blooming bouquet crochet blanket can also inspire a broader handmade botanical and seasonal collection.
Conclusion
This Crochet Christmas Star Ornament Pattern makes a compact, colorful decoration while providing practice with rings, chain spaces, corner shaping, and a clean color change. Display the finished star on your tree, attach it to a gift, or make several for a coordinated collection. For more star-making inspiration, compare this crochet star ornament pattern and this free crochet star pattern.