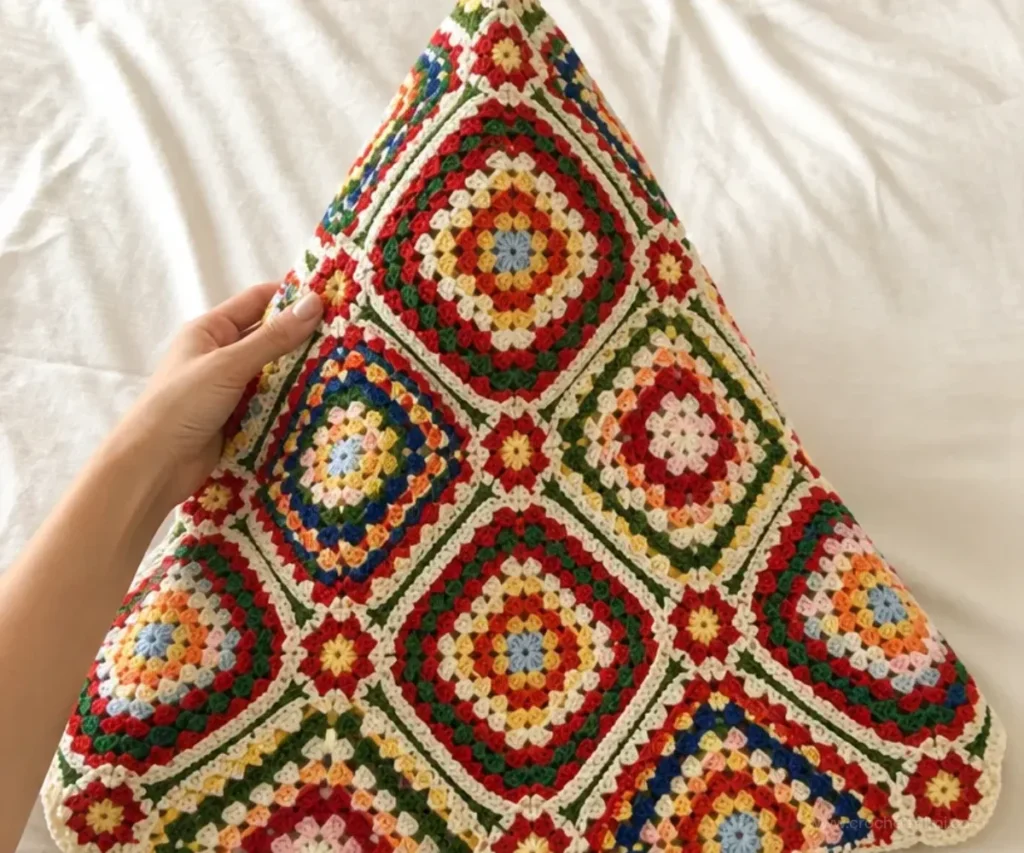
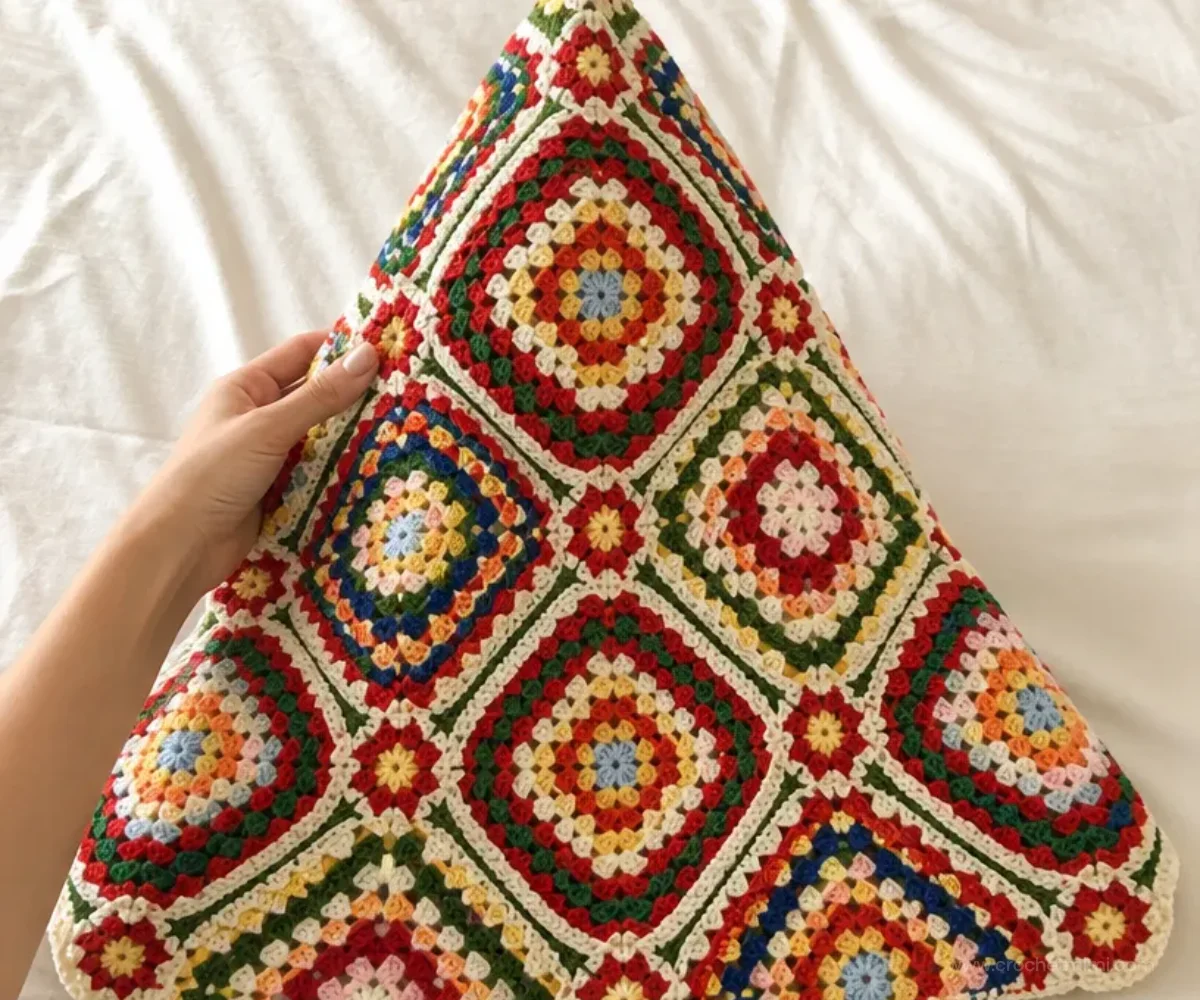
The Let it Granny X-mas Tree to Crochet Pattern creates a festive, dimensional tree from colorful granny-style motifs. Petite, standard, and Grande motifs build the tiers, while self-striping yarn gives each piece lively seasonal color without constant color changes. This project is a satisfying choice for crocheters who enjoy repeating motifs and careful assembly, and the finished tree can decorate a mantel, tabletop, holiday shelf, or gift display. For another handmade seasonal arrangement idea, explore this crochet nosegay pattern for inspiration.
Why You’ll Love This Crochet Project
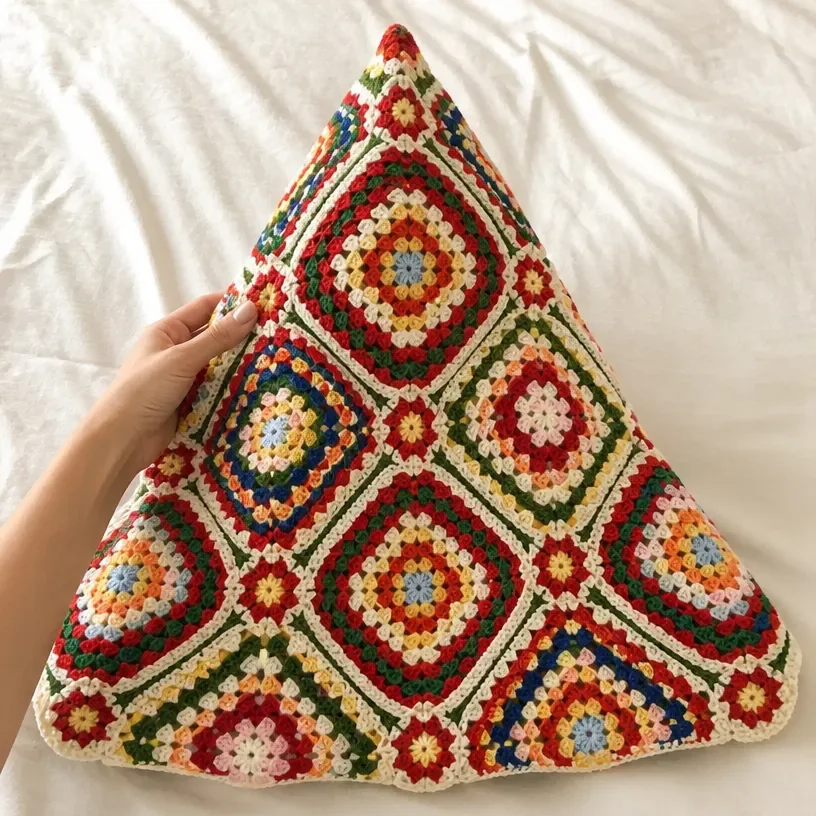
- It uses classic granny construction. The motifs rely on chains, slip stitches, and double crochet, making the project a practical way to strengthen foundational skills.
- The three motif sizes create dimension. Petite, Granny Square, and Grande motifs are assembled into clusters that form the tree’s tapered shape.
- The yarn does much of the color work. Red Heart® All in One™ yarn changes color across the rounds, producing coordinated stripes and visual variety.
- It makes seasonal home décor. Display the completed tree on a table, mantel, entryway shelf, or holiday decorating vignette.
- It offers plenty of organized repetition. Making motifs in batches lets you work steadily while keeping the project easy to track.
Crochet Mimi Tip: Make and label the motif groups as you go. Separating A through H before assembly will make the cluster instructions much easier to follow. You may also find Crochet Floral Hair Comb Pattern Tutorial useful.
Before You Start Crocheting
This design is made from 72 motifs in three sizes:
- 48 Petite Motifs: 27 with A and 21 with B
- 36 Granny Square Motifs: 13 with C, 10 with D, and 13 with E
- 12 Grande Motifs: 4 each with F, G, and H
The motif construction begins with a four-chain ring. Each round is worked into chain spaces and corner spaces using double-crochet groups. The Petite Motif has three rounds, the Granny Square Motif has five rounds, and the Grande Motif has ten rounds.
After the motifs are crocheted, they are joined with Whip Stitch in a prescribed sequence. Overlapping and intentionally leaving some 3-dc groups unsewn creates the stepped clusters and tapered tree form.
The supplied materials specify a U.S. I/9 (5.5 mm) Susan Bates® Silvalume® crochet hook, or the size needed to obtain gauge. Work consistently so motifs made from different yarn sections remain compatible in assembly.
Useful abbreviations include ch for chain, sl st for slip stitch, dc for double crochet, rnd for round, rep for repeat, and RS for right side.
Materials You’ll Need
- Red Heart® All in One™ Granny Square Petite™, 8.8 oz / 250 g; 402 m / 440 yds
- Note: 1 ball makes 36 Motifs
- Contrast A Foxy (0003): 1 ball
- Contrast B Snazzy (0007): 1 ball
- Red Heart® All in One™ Granny Square™, 8.8 oz / 250 g; 417 yds / 381 m
- Note: 1 ball makes 14 Motifs
- Contrast C Soft-White Citrus Twist (2002): 1 ball
- Contrast D Aran Lily Pad (2014): 1 ball
- Contrast E Soft-White Hot Stuff (2000): 1 ball
- Red Heart® All in One™ Granny Square Grande™, 8.8 oz / 250 g; 402 m / 440 yds
- Note: 1 ball makes 4 Motifs
- Contrast F Humdinger (0003): 1 ball
- Contrast G Fantabulous (0002): 1 ball
- Contrast H Topnotch (0004): 1 ball
- U.S. I/9 (5.5 mm) Susan Bates® Silvalume® crochet hook, or size needed to obtain gauge
- Susan Bates® yarn needle
Complete Crochet Tutorial
Petite Motif
With A, make 27.
With B, make 21.
Motifs begin with Color 1, the shortest color repeat, from the center of the pull-skein. Leave a 4″ [10 cm] tail to weave in.
Each color aligns with 1 rnd in the Motif with 3 colors in total. If too much color is left at the end of a rnd, pull back some sts and slightly loosen your gauge to re-work the sts and finish at the color change. If too little color is left, pull back some sts and slightly tighten your gauge to re-work the sts and finish at the color change.
When the Motif is complete, cut the yarn where Color 3, the longest color repeat, ends, leaving approximately 24″ [61 cm] for seaming. Begin the next Motif with Color 1 and repeat the 3 rnds for each Motif.
With Color 1, ch 4. Join with sl st to first ch to form ring.
1st rnd: (RS). Ch 6. (3 dc. Ch 3) 3 times in ring. 2 dc in ring. Join.
2nd rnd: Sl st in next ch-3 sp. Ch 6. 3 dc in same sp as last sl st.
*Ch 1. (3 dc. Ch 3. 3 dc) in next ch-3 sp. Rep from * twice more.
Ch 1. 2 dc in first ch-3 sp. Join.
3rd rnd: Sl st in next ch-3 sp. Ch 6. 3 dc in same sp as last sl st.
*Ch 1. 3 dc in next ch-1 sp. Ch 1. (3 dc. Ch 3. 3 dc) in next ch-3 sp. Rep from * twice more.
Ch 1. 3 dc in last ch-1 sp. Ch 1. 2 dc in first ch-3 sp. Join.
Fasten off, leaving 24″ [61 cm] tail.
Stitch key used for Motifs:
1 = chain (ch)
2 = slip stitch (sl st)
3 = double crochet (dc)
Granny Square Motif
With C, make 13.
With D, make 10.
With E, make 13.
Motifs begin with Color 1, the shortest color repeat, from the center of the pull-skein. Leave a 4″ [10 cm] tail to weave in.
Each color aligns with 1 rnd in the Motif with 5 colors in total. If too much color is left at the end of a rnd, pull back some sts and slightly loosen your gauge to re-work the sts and finish at the color change. If too little color is left, pull back some sts and slightly tighten your gauge to re-work the sts and finish at the color change.
When the Motif is complete, cut the yarn where Color 5, the longest color repeat, ends, leaving a tail for weaving in. Begin the next Motif with Color 1 and repeat the 5 rnds for each Motif.
With Color 1, ch 4. Join with sl st to first ch to form ring.
1st rnd: (RS). Ch 6. (3 dc. Ch 3) 3 times in ring. 2 dc in ring. Join.
2nd rnd: Sl st in next ch-3 sp. Ch 6. 3 dc in same sp as last sl st.
*Ch 1. (3 dc. Ch 3. 3 dc) in next ch-3 sp. Rep from * twice more.
Ch 1. 2 dc in first ch-3 sp. Join.
3rd rnd: Sl st in next ch-3 sp. Ch 6. 3 dc in same sp as last sl st.
*Ch 1. 3 dc in next ch-1 sp. Ch 1. (3 dc. Ch 3. 3 dc) in next ch-3 sp. Rep from * twice more.
Ch 1. 3 dc in last ch-1 sp. Ch 1. 2 dc in first ch-3 sp. Join.
4th and 5th rnds: Sl st in next ch-3 sp. Ch 6. 3 dc in same sp as last sl st.
(Ch 1. 3 dc) in each ch-1 sp to next ch-3 sp. Ch 1.*
(3 dc. Ch 3. 3 dc) in next ch-3 sp. Rep from * twice more, then from * to once.
2 dc in first ch-3 sp. Join.
Fasten off.
Stitch key used for Motif Illustration:
1 = chain (ch)
2 = slip stitch (sl st)
3 = double crochet (dc)
The illustration key also shows 4 and 5; the written instructions above define those rounds.
Grande Motif
With F, make 4.
With G, make 4.
With H, make 4.
Motifs begin with Color 1, the shortest color repeat, from the center of the pull-skein. Leave a 4″ [10 cm] tail to weave in.
- 1st and 2nd rnds are worked in Color 1.
- 3rd and 4th rnds are worked in Color 2.
- 5th rnd is worked in Color 3.
- 6th and 7th rnds are worked in Color 4.
- 8th and 9th rnds are worked in Color 5.
- 10th rnd is worked in Color 6.
If too much color is left at the end of a rnd, pull back some sts and slightly loosen your gauge to re-work the sts and finish at the color change. If too little color is left, pull back some sts and slightly tighten your gauge to re-work the sts and finish at the color change.
When the Motif is complete, cut the yarn where Color 6, the final color repeat, ends, leaving approximately 42″ [106.5 cm] at the end of the Motif for seaming. Begin the next Motif with Color 1 and repeat the 10 rnds for each Motif.
With Color 1, ch 4. Join with sl st to first ch to form ring.
1st rnd: (RS). Ch 6. (3 dc. Ch 3) 3 times in ring. 2 dc in ring. Join.
2nd rnd: Sl st in next ch-3 sp. Ch 6. 3 dc in same sp as last sl st.
*Ch 1. (3 dc. Ch 3. 3 dc) in next ch-3 sp. Rep from * twice more.
Ch 1. 2 dc in first ch-3 sp. Join.
3rd rnd: Sl st in next ch-3 sp. Ch 6. 3 dc in same sp as last sl st.
*Ch 1. 3 dc in next ch-1 sp. Ch 1. (3 dc. Ch 3. 3 dc) in next ch-3 sp. Rep from * twice more.
Ch 1. 3 dc in last ch-1 sp. Ch 1. 2 dc in first ch-3 sp. Join.
4th to 10th rnds: Sl st in next ch-3 sp. Ch 6. 3 dc in same sp as last sl st.
*(Ch 1. 3 dc) in each ch-1 sp to next ch-3 sp. Ch 1.
(3 dc. Ch 3. 3 dc) in next ch-3 sp. Rep from * twice more, then from * to once.
2 dc in first ch-3 sp. Join.
Fasten off, leaving 42″ [106.5 cm] tail.
Stitch key for assembly diagrams:
- Double crochet (dc)
- Chain (ch)
- Slip stitch (sl st)
Whip Stitch Assembly
Following the Assembly Diagram, sew the Motifs together using Whip Stitch.
Step 1: Join 12 Grande Motifs, 6 Granny Motifs, and 12 Petite Motifs as shown in Step 1.
Step 2: Following the diagram, make 6 A-Clusters, overlapping Granny Motifs at the center to make squares. Note that there are two 3-dc groups at each side of the overlapping corner.
Cluster key for A-Clusters:
- A = Petite Motif with A
- C = Granny Motif with C
- B = Petite Motif with B
- D = Granny Motif with D
- E = Granny Motif with E
- F = Grande Motif with F
- G = Grande Motif with G
- H = Grande Motif with H
Step 3: Following the diagram, make 6 B-Clusters, leaving two 3-dc groups unsewn on the side edges of Granny Motifs.
Cluster key for B-Clusters:
- A = Petite Motif with A
- C = Granny Motif with C
- B = Petite Motif with B
- D = Granny Motif with D
- E = Granny Motif with E
- F = Grande Motif with F
- G = Grande Motif with G
- H = Grande Motif with H
Step 4: To make C-Cluster, 6 pieces, sew Petite Motif under B-Cluster, leaving two 3-dc groups unsewn at each side of the top corner. Make D-Cluster by sewing Granny Motif between C-Cluster.
Step 5: To make E-Cluster, 6 pieces, sew Granny Motif under D-Cluster, leaving three 3-dc groups unsewn at each side of the top corner. For F-Cluster, sew Petite Motif under E-Cluster, leaving two 3-dc groups unsewn at each side of the top corner.
Step 6: Sew the edges of F-Cluster together to close the top of the Tree.
Finishing
Use the leftover tails as follows:
- Petite Motif: Use the 24″ [61 cm] tail for seaming after cutting where Color 3 ends.
- Granny Square Motif: Use the tail for weaving in after cutting where Color 5 ends.
- Grande Motif: Use the approximately 42″ [106.5 cm] tail at the end of the Motif for seaming after cutting where Color 6 ends.
For additional decorative crochet inspiration, a small crochet flower appliqué project can help you practice compact granny-style motifs before tackling a larger assembly.
Ways to Display Your Finished Crochet
- Place the finished tree on a holiday mantel beside candles, garlands, or framed seasonal artwork.
- Use it as a tabletop centerpiece on a dining table, console, or entryway cabinet.
- Display it on a bookshelf with other handmade ornaments and winter décor.
- Make it part of a layered Christmas village or miniature seasonal scene.
- Give it as a handmade holiday gift to someone who enjoys colorful crochet décor.
- Pair it with coordinated crochet accessories, such as a crochet aviator hat pattern, for a playful handmade gift theme.
Caring for Your Crochet Project
Treat the assembled tree gently because it is built from many stitched motifs and exposed seams. Keep it away from excessive heat, open flames, and areas where it may be pulled or crushed.
For routine maintenance, use a soft brush or gentle dusting method to remove surface lint. If a spot needs attention, use careful spot cleaning rather than soaking the entire structure. Avoid wringing or aggressively rubbing the fabric, which can distort the clusters and seams.
Store the tree fully dry in a clean, dry container. Support its shape with soft, clean packing material instead of compressing it under heavy decorations. Keep it protected from prolonged direct sunlight when stored or displayed.
Tips for Better Results
- Sort motifs before sewing. Keep Petite, Granny Square, and Grande motifs in separate groups, then divide each group by letter and color.
- Monitor color changes. The pattern is designed for color changes to align with rounds. Adjust gauge slightly when necessary so a color ends at the intended round.
- Leave the specified tails. The 24″ [61 cm] Petite tails and 42″ [106.5 cm] Grande tails are important for seaming.
- Count corner spaces carefully. The repeated corner structure depends on working each
(3 dc. Ch 3. 3 dc)in the correct ch-3 space. - Keep the right side consistent. Check the RS before beginning each motif round so the pieces have a uniform appearance.
- Follow the unsewn sections exactly. The two or three unsewn 3-dc groups in the cluster steps are intentional and help create the tree’s shape.
- Whip stitch evenly. Use steady, moderate tension so seams hold securely without puckering the motif edges.
- Weave in tails after checking placement. Confirm each cluster’s orientation before trimming or securing leftover ends.
For a different small-scale seasonal accessory, the crochet Halloween necklace pattern offers another example of how color and repeated motifs can create a festive finished piece.
Color and Styling Variations
The approved pattern uses the specified A through H color arrangement, but you can make optional styling changes while keeping the construction intact.
- Substitute a coordinated holiday palette for the supplied colors, such as deep green, cream, cranberry, and gold.
- Use one consistent color family for all Petite Motifs and a contrasting family for the larger motifs to emphasize the tree’s tiers.
- Create a winter-white version with icy blue or silver-toned contrast colors.
- Choose warmer colors, such as rust, mustard, and evergreen, for an autumn-to-winter display.
- Display the finished tree in a simple ceramic, wood, or metal setting that complements the yarn colors.
If you change yarn type, yarn weight, or hook size, motif dimensions, drape, texture, and yarn requirements may change. Make a test motif before producing the full set, and check that the different motif sizes still fit together during assembly.
Frequently Asked Questions
Is this project suitable for a crocheter learning granny motifs?
It can be a useful practice project for someone comfortable with chain, slip stitch, double crochet, working into chain spaces, and joining rounds. The large number of motifs and detailed assembly make careful organization especially important.
How many Petite Motifs are required?
Make 27 Petite Motifs with A and 21 Petite Motifs with B, for a total of 48 Petite Motifs.
How many Granny Square Motifs are required?
Make 13 with C, 10 with D, and 13 with E, for a total of 36 Granny Square Motifs.
How many Grande Motifs are required?
Make 4 with F, 4 with G, and 4 with H, for a total of 12 Grande Motifs.
Can the colors be changed?
Yes, color changes are an optional customization. Preserve the motif quantities and assembly labels, and remember that changing yarn or colors may alter the visual balance and the point at which self-striping colors align with rounds.
What hook size does the pattern use?
Use a U.S. I/9 (5.5 mm) Susan Bates® Silvalume® crochet hook, or the size needed to obtain gauge.
How are the motifs joined?
They are sewn together with Whip Stitch following the Assembly Diagram. The sequence begins with Grande, Granny, and Petite Motifs, then continues through A-, B-, C-, D-, E-, and F-Clusters.
Why are some 3-dc groups left unsewn?
Those unsewn groups are part of the approved assembly instructions. They allow the clusters to overlap and form the tapered tree shape.
How should the finished tree be cleaned?
Use gentle dusting and careful spot cleaning. Avoid soaking, wringing, or rough handling because the tree is assembled from many sewn motifs.
Conclusion
This Let it Granny X-mas Tree to Crochet Pattern combines familiar granny construction with a striking three-tiered form. The colorful motifs make it engaging to crochet in batches, while the finished piece brings handmade character to seasonal decorating. For the original yarn-based reference, see the Red Heart Let it Granny X-mas Tree crochet pattern and this related Christmas tree granny square blanket resource.