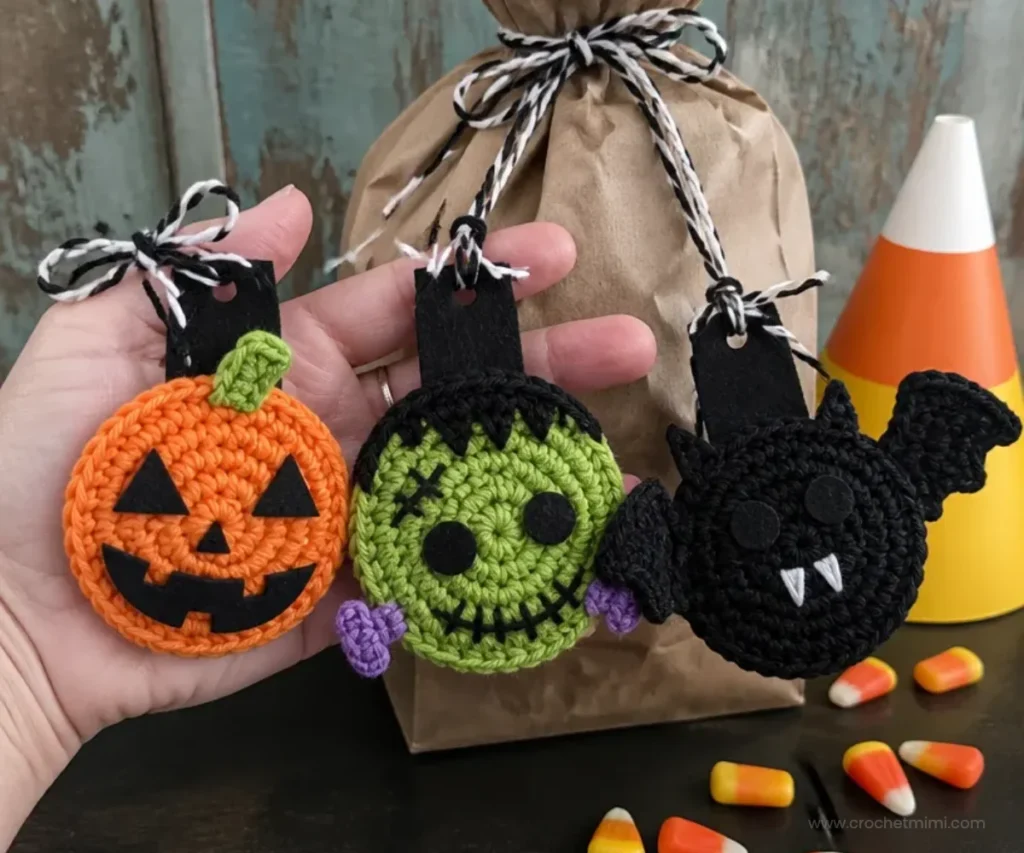
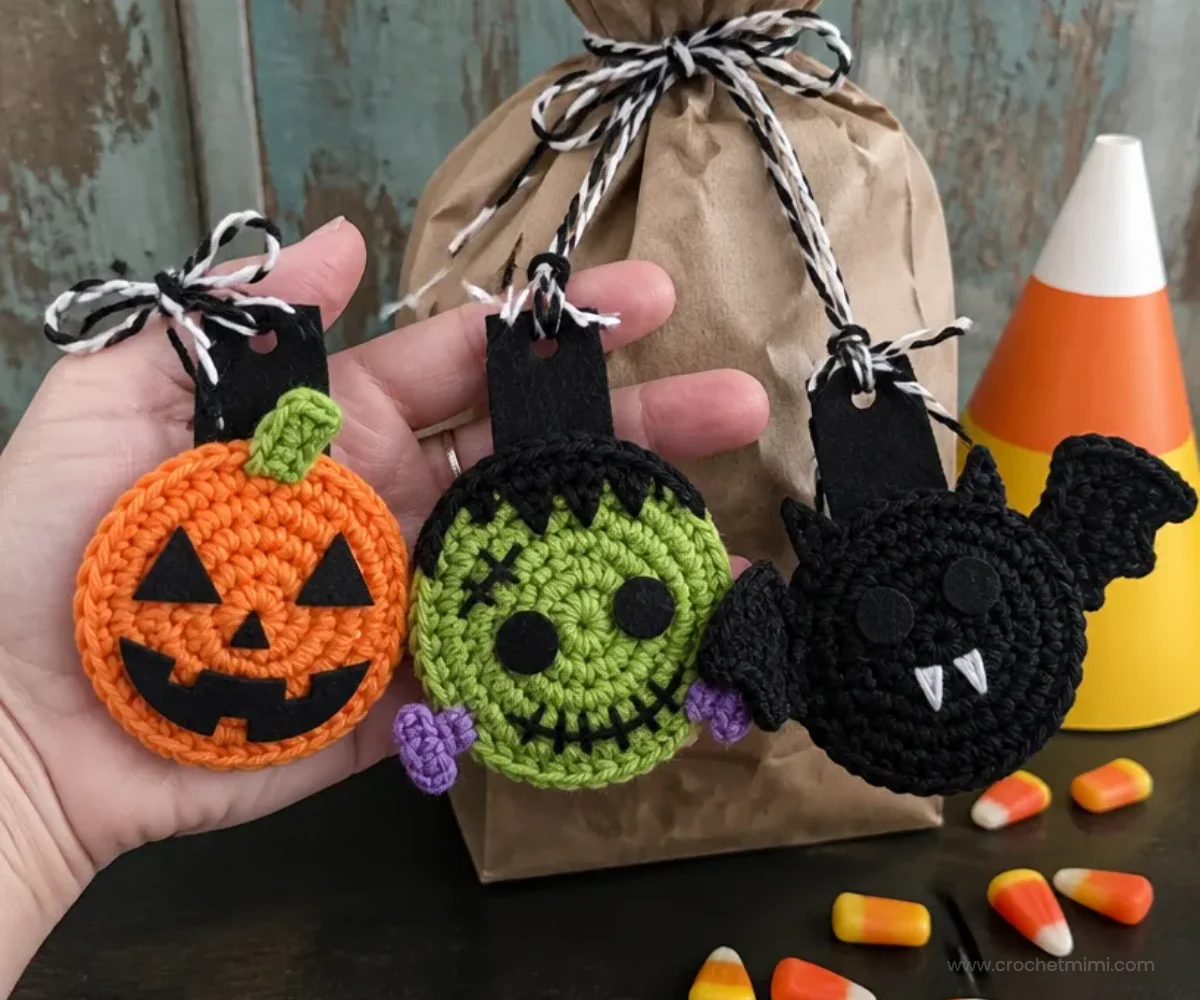
Crochet Halloween Gift Trims Pattern turns a few small rounds of yarn into three playful decorations: a pumpkin, Frankenstein, and bat. Each trim combines bold Halloween colors with simple felt details, making it useful for gift bags, treat packages, party favors, and seasonal displays. Beginners can practice magic rings, increases, small embellishments, and simple finishing techniques without committing to a large project. For another colorful handmade-gift idea, compare these beginner-friendly crochet roses for inspiration.
Why You’ll Love This Crochet Project
You may also find Crochet Daffodil Bouquet Pattern Easy Diy Flowers useful.
- Three recognizable Halloween motifs: The pumpkin, Frankenstein, and bat offer different shapes and finishing details while working as a coordinated set.
- Small, manageable components: Each character is made from compact crochet pieces, so the project is easy to organize and work on one section at a time.
- Useful handmade decorations: The finished trims can be tied onto gift bags, treat bags, or wrapped presents.
- Good stitch practice: You will work magic rings, half double crochet increases, double crochet, single crochet, a decrease, picots, and surface-style stitched details.
- Easy color coordination: Pumpkin, black, spring green, amethyst, and soft white create a classic Halloween palette.
Crochet Mimi Tip: Keep each completed character with its matching felt pieces until assembly so small components do not get mixed together.
How This Crochet Project Comes Together
This pattern includes three crochet trims: one pumpkin, one Frankenstein, and one bat. The pumpkin and Frankenstein each use two rounds for the main shape. The bat also uses two rounds, plus two separately crocheted wings.
The pumpkin receives a spring green stem and black felt face. Frankenstein is decorated with black hair, amethyst bolts, black stitched details, and black felt eyes. The bat receives two black wings and soft white teeth.
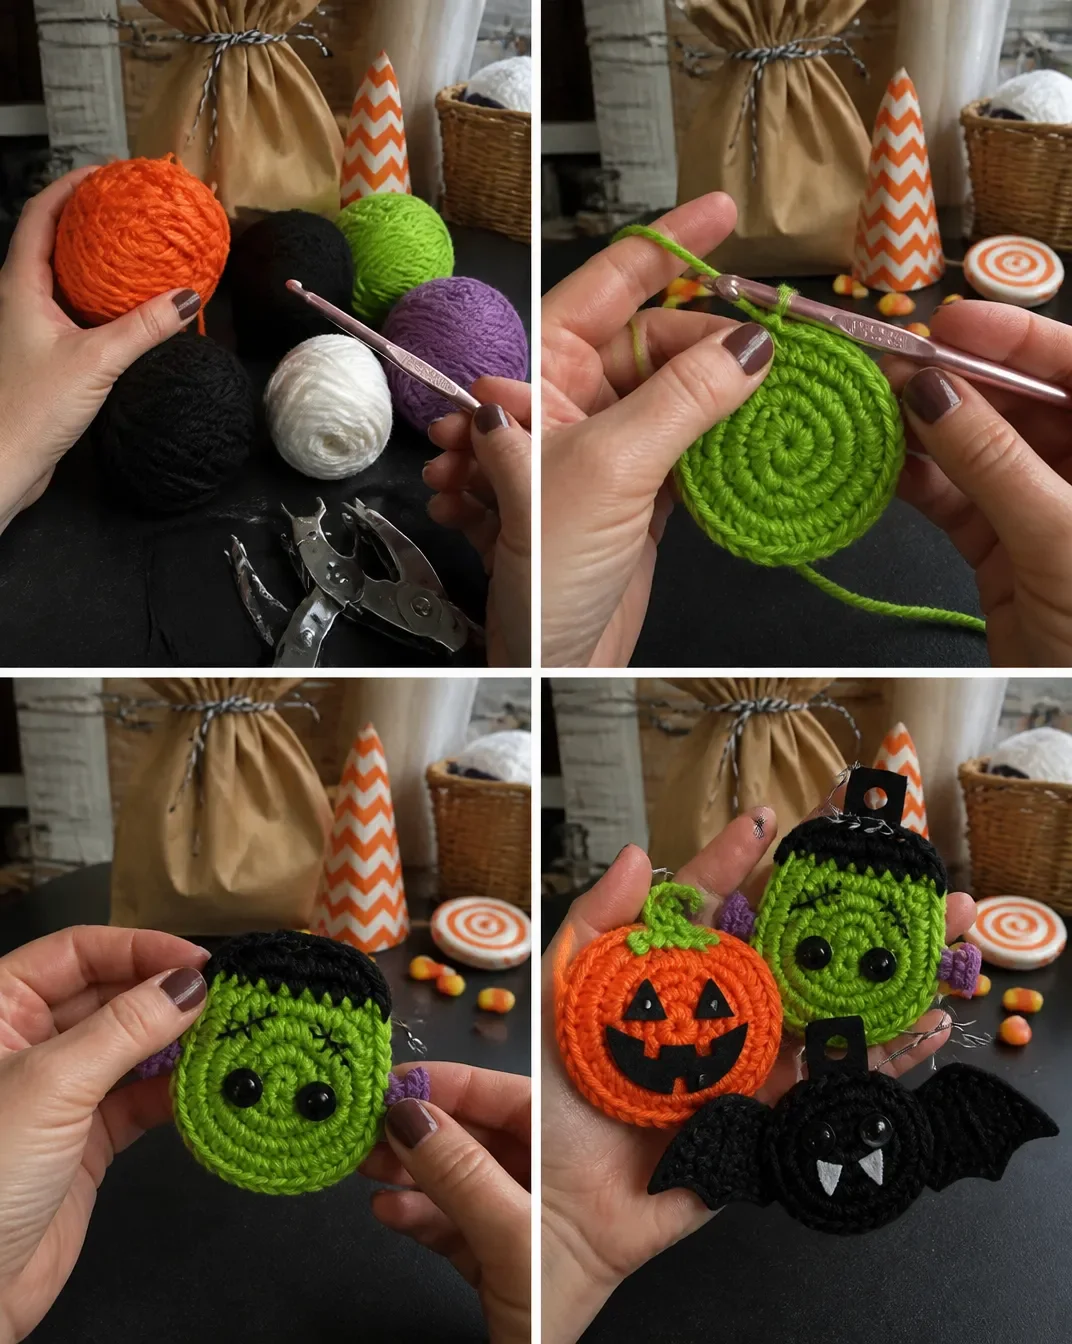
After the crochet and character details are complete, cut a felt backing and hanger for each trim. The hanger is placed between the backing and crochet piece, then the layers are secured with hot glue. Finally, black and soft white yarn are tied through the hanger to create a gift-bag tie.
The pattern uses US crochet terminology. Common abbreviations include ch for chain, sc for single crochet, hdc for half double crochet, dc for double crochet, slip st for slip stitch, and sc2tog for single crochet two together.
Materials You’ll Need
Yarn
- 1 skein RED HEART® Super Saver® 254 Pumpkin, color A
- 1 skein RED HEART® Super Saver® 312 Black, color B
- 1 skein RED HEART® Super Saver® 672 Spring Green, color C
- 1 skein RED HEART® Super Saver® 356 Amethyst, color D
- 1 skein RED HEART® Super Saver® 316 Soft White, color E
Hook and Other Supplies
- Susan Bates® crochet hook: 5.5 mm [US I-9]
- Yarn needle
- 1 sheet black felt
- Hand-held hole punch
- Fabric scissors
- Hot glue gun, used with adult supervision
Color use is specific: A is used for the pumpkin, C for the pumpkin stem and Frankenstein, B for black details and the bat, D for Frankenstein’s bolts, and E for the bat’s teeth and finishing tie. Black felt is cut into facial features and the backing and hanger shapes.
Step-by-Step Crochet Instructions
Special Instructions Used in Rounds
For magic-ring rounds where indicated, ch 2 counts as the first hdc now and throughout, or as specified in the individual round.
For Pumpkin Round 2, ch 1 does not count as a stitch.
For Frankenstein Round 2, work ch 2, hdc in the same stitch.
Where a join is stated, slip stitch in the top of the specified chain to join, then fasten off.
Pumpkin
Pumpkin Round Instructions
Round 1 (Right Side): With A, form a magic ring.
Ch 2, counting as the first hdc, and work 9 hdc in the ring.
Slip st in the top of ch-2 to join 10 hdc.
Round 2: Ch 1; this does not count as a stitch.
Work 2 sc into each of the next 2 sts.
Work 2 dc into each of the next 8 sts.
Slip st in the top of ch-1 to join; fasten off 20 sts.
Pumpkin Stem
With C, leave a 6-inch (15 cm) tail.
Ch 6, hdc into the second ch from the hook, and sc into the next 4 sts.
Fasten off, leaving a 6-inch (15 cm) tail.
Use the tail ends to fasten the stem to the pumpkin, attaching the sc portion on Round 2 with the Right Side facing.
Pumpkin Face
Use fabric scissors to cut two triangle eyes and one jack-o-lantern mouth from the black felt.
Referring to the photograph for placement, arrange the felt pieces.
Using the hot glue gun, carefully fasten each piece into place.
Frankenstein
Frankenstein Round Instructions
Round 1 (Right Side): With C, form a magic ring.
Ch 2, counting as the first hdc now and throughout, and work 9 hdc in the ring.
Slip st in the top of ch-2 to join 10 hdc.
Round 2: Ch 2, hdc in the same st.
Work 2 hdc in each st around.
Slip st in the top of ch-2 to join; fasten off 20 hdc.
Frankenstein Hair
With the Right Side facing, attach B in any st from Round 2.
Ch 2, counting as the first dc.
Dc in the next st.
Hdc in the next 4 sts.
Dc into the next st.
Ch 2 and slip st in the next st.
Fasten off 8 sts.
Frankenstein Bolt
With the Right Side facing, attach D 2 sts below the right side of the hair.
Ch 4, slip st into the same space, and fasten off.
With the Right Side facing, attach D 2 sts below the left side of the hair.
Ch 4, slip st into the same space, and fasten off.
Frankenstein Stitches
With the Right Side facing, attach B and cut 12 inches (30.5 cm) of yarn.
Referring to the photograph for placement, use a crochet hook or yarn needle to add Frankenstein stitches.
Fasten off on the Wrong Side.
Frankenstein Eyes
Use fabric scissors and the hole punch to cut two flat-topped circles from the black felt.
Referring to the photograph for placement, arrange the felt pieces.
Using the hot glue gun, carefully fasten each piece into place.
Bat
Bat Round Instructions
Round 1 (Right Side): With B, form a magic ring.
Ch 2, counting as the first hdc now and throughout, and work 9 hdc in the ring.
Slip st in the top of ch-2 to join 10 hdc.
Round 2: Ch 2, hdc in the same st.
Work 2 hdc in each st around.
Slip st in the top of ch-2 to join.
Fasten off 20 hdc.
Bat Wings Make 2
With B, leave a 6-inch (15 cm) tail.
Ch 7, turn.
Row 1: Skip 1 ch.
Sc2tog over the next 2 ch.
Work (hdc, picot, hdc) in the next ch.
Sc in the next ch.
Work (hdc, picot, hdc) in the next ch.
Sc in the last ch.
Fasten off.
Attach Bat Wings
With the Right Side facing and referring to the photograph for placement, use the end tail to fasten the Left Wing to Round 2 of the bat.
Flip the Right Wing over so it mirrors the Left Wing, skip 5 sts on the bottom, and fasten the Right Wing to the bat.
Bat Teeth
With E, cut 24 inches (61 cm) of yarn.
With the Right Side of the bat facing and referring to the photograph for placement, use a crochet hook or yarn needle to add the teeth.
Fasten off on the Wrong Side.
Finishing All Trims
Cut Felt Shapes for Each Trim
Use fabric scissors to cut the following shapes from the black felt for each trim:
- Backing: 2-inch (5 cm) circle
- Hanger: 1.25-inch (3 cm) long by ¾-inch (2 cm) wide rounded-top rectangle
Use the hole punch to cut a circle out of the rounded-top end of the hanger.
Assemble the Felt Backing, Hanger, and Trim
Arrange the backing and hanger so the hanger is between the backing and trim, with the punched hole exposed on top.
Using the hot glue gun, carefully fasten the trim to the felt pieces.
Tie Onto a Gift Bag
Cut 15 inches (38 cm) of B and E.
Hold the two strands together and knot them evenly through the punched hole.
Use the tails to tie the trim onto a gift bag.
Finished Project Inspiration
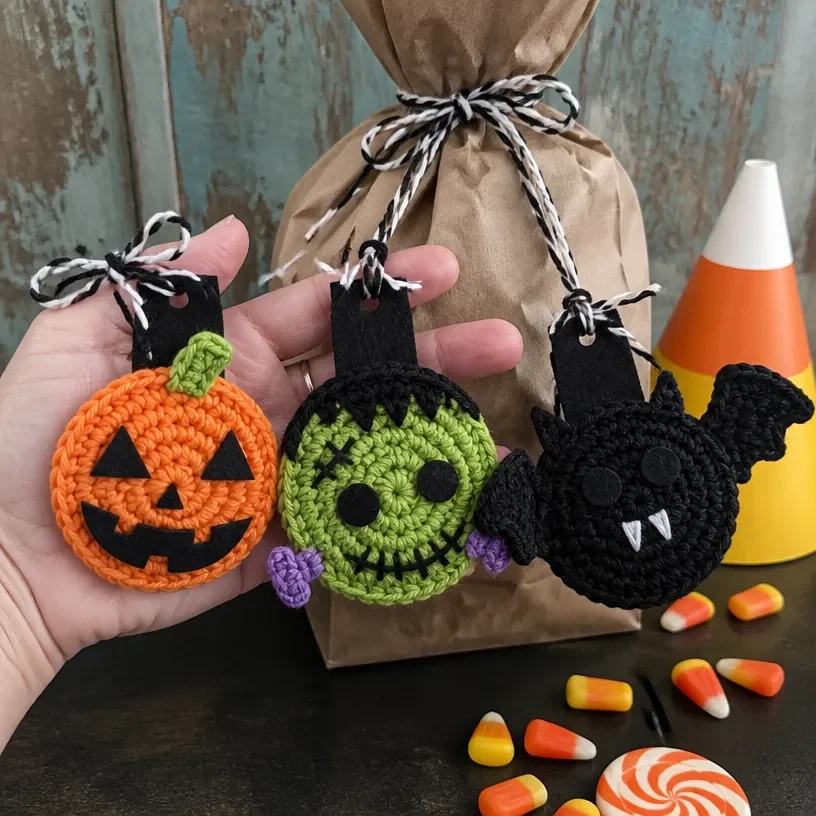
- Tie one pumpkin onto an orange, black, or kraft-paper gift bag for a simple Halloween favor.
- Use Frankenstein trims on treat bags for a playful monster-themed party.
- Attach bat trims to wrapped presents, candy bags, or a seasonal garland.
- Place several finished trims in a small bowl as a tabletop Halloween accent.
- Coordinate all three designs across a group of party favors so each guest receives a different character.
- Combine the trims with purchased ribbon or plain gift tags, keeping the crochet piece as the main decoration.
Caring for Your Crochet Project
These trims include felt pieces and hot-glued layers, so handle them gently. Dust them with a soft, dry cloth or use a soft brush to remove surface lint.
For a small mark, spot-clean carefully with a barely damp cloth and avoid saturating the crochet, felt, or adhesive. Do not soak the trims or place them in a washing machine.
Keep them away from excessive heat, including hot cars, radiators, and direct heat sources, since the glue and felt hanger can soften or distort. Store the trims flat or loosely arranged in a dry container, with tissue paper between pieces if needed to protect the facial details.
Helpful Crochet Tips
- Count Round 1 carefully. Each main character begins with 10 stitches, so checking the first round makes the increase rounds easier to follow.
- Keep the Right Side facing during embellishment. This is especially important for the pumpkin stem, Frankenstein details, and bat teeth.
- Mark the beginning if needed. A removable stitch marker can help you identify the first stitch of a magic-ring round.
- Watch the different chain roles. The ch-2 counts as the first hdc in the specified magic-ring rounds, while the pumpkin’s ch-1 does not count as a stitch.
- Leave the stated tails. The 6-inch tails on the pumpkin stem and bat wings are used for fastening, so avoid trimming them prematurely.
- Mirror the bat wings. Flip the Right Wing before attaching it and skip 5 stitches on the bottom as directed.
- Arrange felt before gluing. Place the pumpkin face and Frankenstein eyes first, then check alignment before using the hot glue gun.
- Secure ends on the Wrong Side where directed. This keeps the visible front of the trims neat and prevents loose decorative yarn from showing.
For more ideas about using small crochet motifs in seasonal displays, these crochet bell flower designs offer useful inspiration for arranging handmade decorations.
Creative Ways to Customize Your Project
The approved pattern uses a coordinated Halloween palette, but you can make optional styling changes after understanding that different yarns or hook sizes may affect the finished shape, stitch size, texture, and yarn requirements.
- Use a brighter green for Frankenstein’s face or a deeper orange for the pumpkin while keeping the construction unchanged.
- Replace amethyst bolts with a metallic-look purple or a contrasting yellow if your chosen yarn provides a similar workable texture.
- Make the felt facial features slightly larger or smaller for a different expression, while keeping the pieces flat enough to attach securely.
- Use the three motifs in a repeating color theme across several gift bags.
- Add a contrasting yarn bow to the hanger area, provided it does not cover the punched hole or interfere with tying the trim.
- Create a monochromatic collection in black, white, and gray for a more understated Halloween display.
These are optional design choices only; the approved rounds, rows, stitch counts, and assembly sequence remain as written.
Frequently Asked Questions
Is this project suitable for a beginner?
It includes small, clearly divided components and basic increases, making it approachable for a crocheter who is comfortable with magic rings and common US stitches. The felt cutting, gluing, and small embellishments require careful finishing.
What yarn and hook are recommended?
The pattern specifies RED HEART® Super Saver® in Pumpkin A, Black B, Spring Green C, Amethyst D, and Soft White E, along with a Susan Bates® 5.5 mm [US I-9] crochet hook.
How many crochet designs are included?
The project includes three trims: one pumpkin, one Frankenstein, and one bat. The bat also requires two wings.
Can the colors be changed?
Yes, color changes are optional. Keep the original color assignments if you want the stated Halloween look, or substitute comparable yarn colors while remembering that a different yarn or hook can change the texture and dimensions.
How are the trims attached to gift bags?
Each trim is assembled with a 2-inch felt backing and a rounded-top felt hanger. After the hanger is secured between the backing and trim, B and E are cut to 15 inches, held together, knotted through the punched hole, and tied onto the gift bag.
What is the black felt used for?
Black felt creates the pumpkin’s triangle eyes and jack-o-lantern mouth, Frankenstein’s flat-topped eyes, and the finishing backing and hanger for each trim.
How should the facial pieces be attached?
Arrange each felt piece by referring to the photograph for placement, then carefully fasten it with the hot glue gun. Use adult supervision when working with hot glue.
Can the finished trims be washed?
Because the trims contain felt and hot-glued components, avoid soaking and machine washing. Dust gently and spot-clean only when necessary.
Conclusion
These pumpkin, Frankenstein, and bat trims make small gifts feel distinctly handmade while giving you practice with useful crochet techniques and decorative finishing. Display them on gift bags, party favors, or seasonal arrangements, and adjust the colors or felt details to suit your theme. For related Halloween inspiration, browse the Red Heart Halloween gift trims pattern and these crochet Halloween costume ideas.