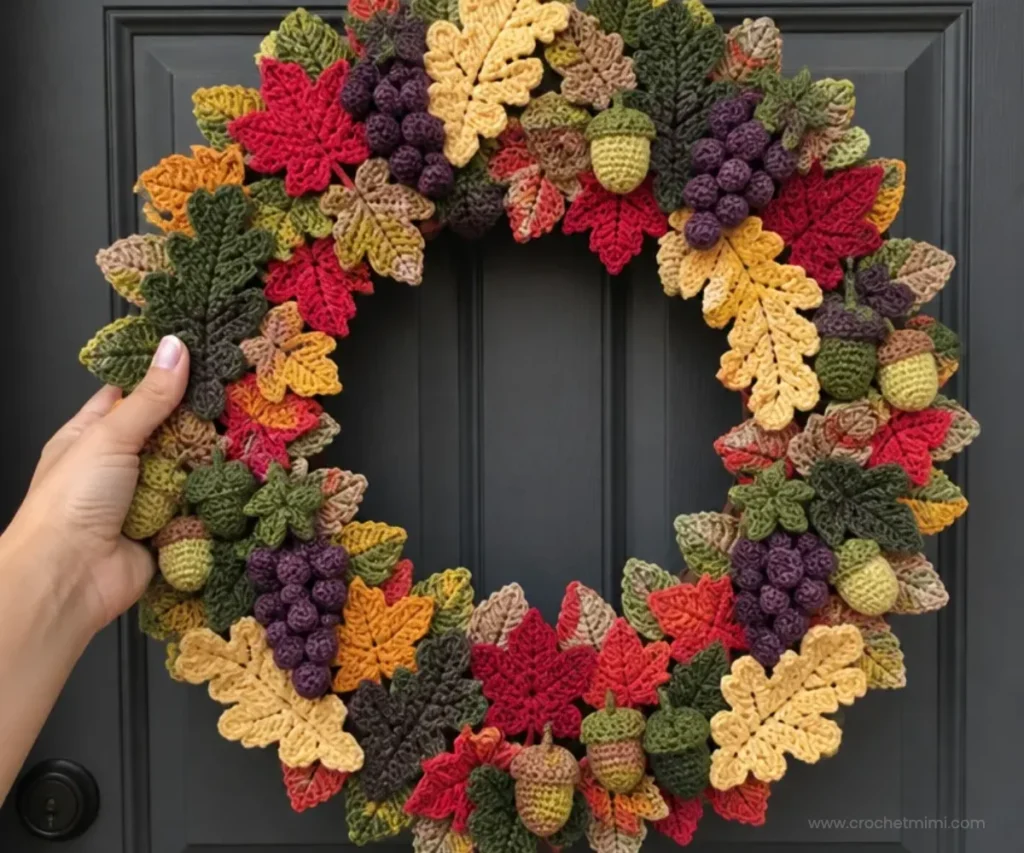
This Crochet Fabulous Fall Wreath Pattern combines textured leaves, plump grapes, acorns, and rich autumn colors on an 18-inch wreath form. The finished design brings Cornsilk, Tan, Aubergine, Lettuce, Evergreen, Berry Red, and Papaya together for a harvest-inspired decoration that works beautifully on a front door or inside your home. Crocheters who enjoy botanical details and seasonal projects will appreciate the variety of shapes and techniques. For another seasonal wreath idea, compare the structure with this crochet spiderweb wreath pattern.
Why You’ll Love This Crochet Project
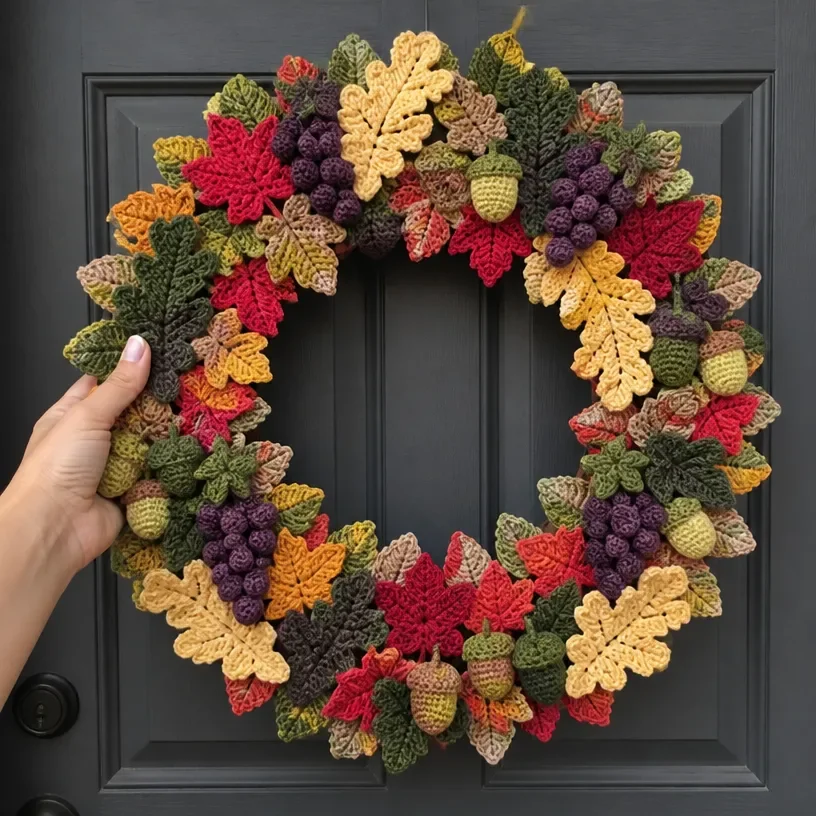
- It creates a complete seasonal display. Instead of making one motif, you’ll build a layered wreath with foliage, fruit, and acorns.
- It practices useful shaping techniques. The pattern includes flat leaves, pointed details, circular pieces, increases, decreases, stuffing, and assembled clusters.
- The palette feels unmistakably autumnal. Evergreen and Lettuce balance warm Cornsilk, Tan, Aubergine, Berry Red, and Papaya.
- It makes a thoughtful handmade gift. A finished wreath can be given for a housewarming, autumn birthday, or seasonal celebration.
- It offers flexible placement. The burlap-wrapped wreath can decorate a door, wall, entryway, mantel, or covered porch.
Crochet Mimi Tip: Make and label each component as you go. The pattern requires many small pieces, and sorting them by color will make assembly much easier. You may also find Crochet Floral Petal Pillow Pattern useful.
How This Crochet Project Comes Together
The wreath is built from several types of crocheted components:
- 50 Single-Point Leaves: 25 in Tan B and 25 in Lettuce D
- 18 Five-Point Leaves: 12 in Berry Red F and 6 in Papaya G
- 6 Oak Leaves in Cornsilk A
- 6 Grape Leaves in Evergreen E
- 3 Large Grapes and 9 Small Grapes in Aubergine C
- 9 Acorn Bottoms: 6 in Lettuce D and 3 in Evergreen E
- 9 Acorn Caps in Tan B
You’ll crochet the flat pieces first, then make the stuffed grapes and acorns. During finishing, greening pins secure the leaves, grape clusters, and acorn clusters to the wreath form. Floral wire creates the hanger.
The magic ring is used for the round motifs. A stitch marker helps identify the first stitch in several circular components. The instructions use US crochet terminology.
Helpful Abbreviations
- ch: chain
- sc: single crochet
- hdc: half double crochet
- dc: double crochet
- tr: treble crochet
- sl st: slip stitch
- sc2tog: single crochet two together
Materials You’ll Need
- RED HEART® With Love® (1 skein each):
- 1207 Cornsilk A
- 1308 Tan B
- 1542 Aubergine C
- 1601 Lettuce D
- 1621 Evergreen E
- 1914 Berry Red F
- 1939 Papaya G
- Susan Bates® Crochet Hook: 4mm [US G-6]
- Susan Bates® Split lock stitch markers
- 18″ (45.5 cm) burlap-wrapped straw wreath
- Approximately 100 greening pins
- Floral wire, found in the floral department of most craft stores
- Small amounts of plush stuffing
- Yarn needle
The greening pins attach crocheted elements directly to the straw wreath while keeping the front of the leaves clean. Floral wire provides a sturdy hanger, and stuffing gives the grapes and acorns their rounded shape.
Complete Crochet Tutorial
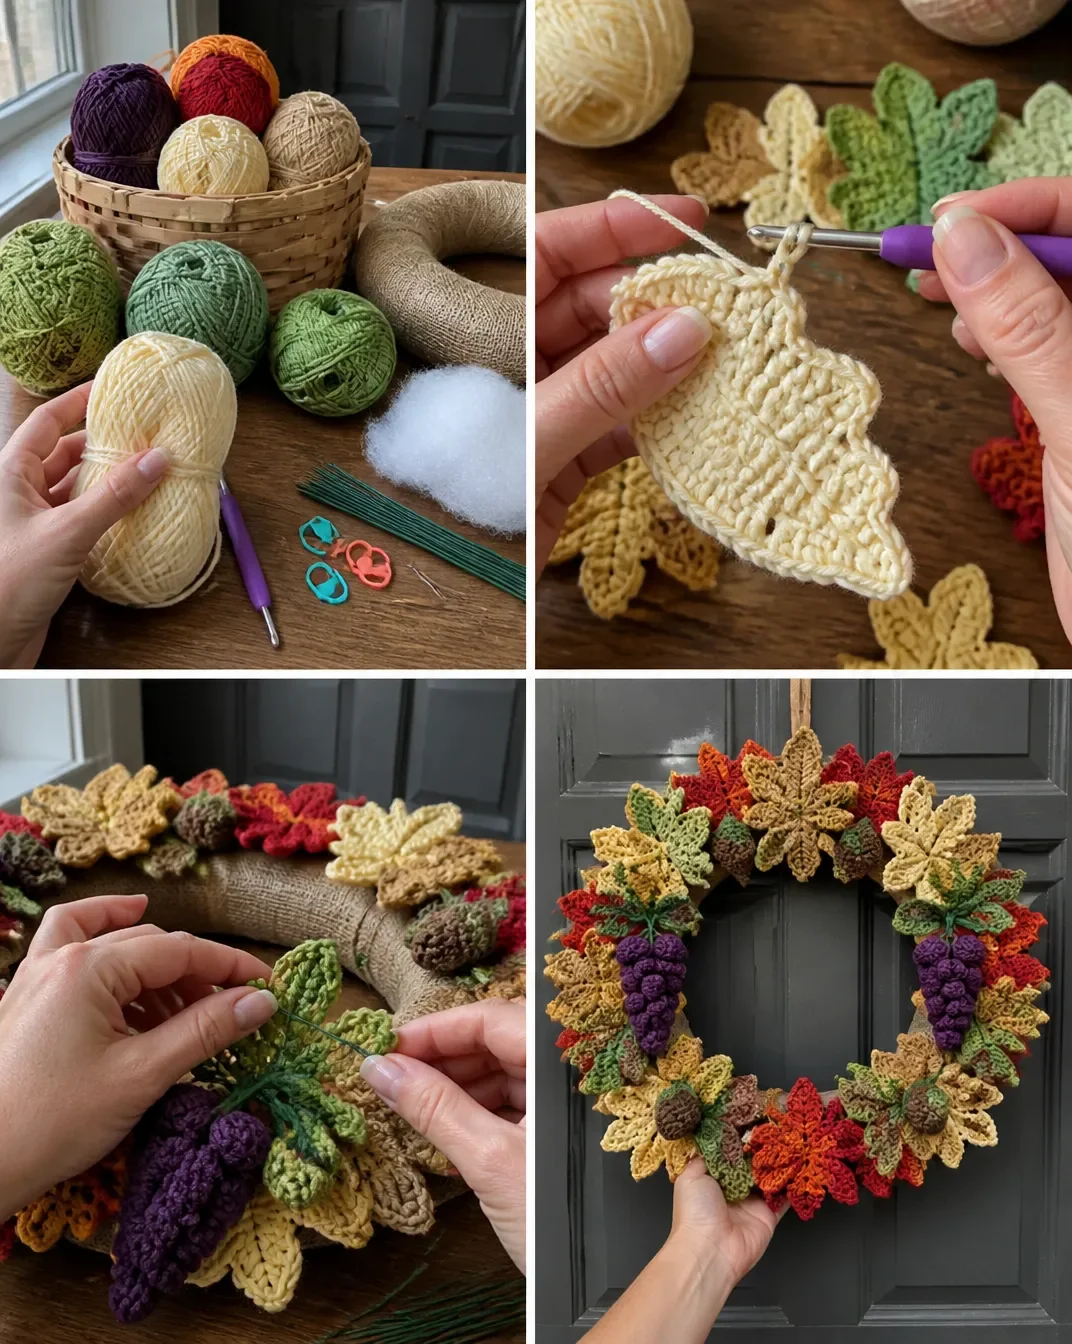
Special Technique: Magic Ring
Wrap yarn around your left middle finger twice, leaving a 6″ (15 cm) tail. Insert hook under both strands, and pull up a loop. Ch 1, and begin working directly into center of ring. This ring can be tightened later by pulling on the yarn tail.
Single-Point Leaf
Make 25 with each B and D.
- Ch 12.
- Round 1: Sc in 2nd ch from hook, hdc in next ch, dc in each of next 3 ch, tr in each of next 2 ch, dc in each of next 3 ch, 4 sc in last ch, rotate piece to work across unused loops at opposite side of foundation ch, dc in each of next 3 ch, tr in each of next 2 ch, dc in each of next 3 ch, hdc in next ch, sc in next ch, slip st in last ch.
- Round 2: Sc in each of first 12 sts, ch 2, slip st in 2nd ch from hook (leaf point made), sc in each of next 12 sts, slip st in base of leaf, ch 4, slip st in 2nd ch from hook and in each of next 2 ch, slip st in base of leaf (stem made).
- Fasten off and weave in ends.
Five-Point Leaf
Make 12 with F and 6 with G.
- Create a Magic Ring.
- Round 1: Ch 3 (counts as 1 dc), 11 dc in ring, join with slip st in 3rd of beginning ch-3 – 12 dc.
- Round 2: Ch 3 (counts as 1 dc), picot, dc in first dc, 2 dc in each of next 2 dc, dc in next dc, ch 5, sc in 2nd ch from hook and in each of next 3 ch (stem made), dc in same dc as last dc, 2 dc in each of next 2 dc, (dc, picot, dc) in next dc, (sc, hdc) in next dc, (dc, picot, sc) in next dc, (hdc, dc, tr, picot, tr, dc, hdc) in next dc, (sc, picot, dc) in next dc, (hdc, sc) in last st, join with a slip st in 3rd of beginning ch-6.
- Fasten off and weave in ends.
Oak Leaf
Make 6 with A.
- With A, ch 13.
- Round 1: Sc in 2nd ch from hook and in next ch, hdc in each of next 3 ch, dc in each of next 3 ch, tr in each of next 4 ch, 6 tr in last ch, rotate piece to work across unused loops at opposite side of foundation ch, tr in each of next 4 ch, dc in each of next 3 ch, hdc in each of next 3 ch, sc in each of next 2 ch, slip st in last ch.
- Round 2: Hdc in 1st st, skip next st, (3 dc, ch 3, slip st) in next st, slip st in next st, sc in next st, hdc in next st, dc in next st, (3 tr, ch 4, slip st) in next st, slip st in next st, sc in next st, hdc in next st, dc in next st, (2 tr, ch 4, slip st) in next st, slip st in next st, (hdc, dc, tr) in next st, (tr, dc, hdc) in next st, slip st in next st, (slip st, ch 4, 2 tr) in next st, dc in next st, hdc in next st, sc in next st, slip st in next st, (slip st, ch 4, 3 tr) in next st, dc in next st, hdc in next st, sc in next st, slip st in next st, (slip st, ch 3, 3 dc) in next st, skip next st, hdc in next st, sl in base of leaf, ch 5, sc in 2nd ch from hook, slip st in each of next 3 ch, slip st in base of leaf (stem made).
- Fasten off and weave in ends.
Grape Leaf
Make 6 with E.
- Create a magic ring.
- Round 1: 5 sc in ring. Mark first st, and move marker up as each round is completed.
- Round 2: 2 sc in each sc around – 10 sc.
- Round 3: 2 sc in each sc around, join with slip st in first sc – 20 sc.
- Round 4: * Ch 2, hdc in next st, (dc, ch 1, tr, ch 1, dc) in next st, hdc in next st, ch 2, sc in next st; repeat from * 4 more times, slip st base of leaf, ch 5, sc in 2nd ch from hook and in each of next 3 ch, slip st in base of leaf (stem made).
- Fasten off and weave in ends.
Large Grape
Make 3 with C.
- Create a magic ring.
- Round 1: 5 sc in ring. Mark first st, and move marker up as each round is completed.
- Round 2: 2 sc in each sc around – 10 sc.
- Round 3: * 2 sc in next sc, sc in next sc; repeat from * around – 15 sc.
- Rounds 4–6: Sc in each sc around.
- Round 7: * Sc2tog over next 2 sc, sc in next st; repeat from * around – 10 sc. Pause here and stuff grape.
- Round 8: * Sc2tog over next 2 sc, repeat from * around – 5 sts.
- Fasten off, leaving a 12″ (30.5 cm) tail. Weave tail through remaining 5 sts and pull tight to close hole. Leave remaining tail to attach to smaller grapes.
Small Grape
Make 9 with C.
- Create a magic ring.
- Round 1: 5 sc in ring. Mark first st, and move marker up as each round is completed.
- Round 2: 2 sc in each sc around – 10 sc.
- Rounds 3 and 4: Sc in each sc around.
- Pause here and stuff grape.
- Round 5: * Sc2tog over next 2 sc; repeat from * around – 5 sc.
- Fasten off, leaving a 6″ (15 cm) tail. Weave tail through remaining 5 sts and pull tight to close hole.
- Weave in ends to inside of Grape.
Acorn Bottom
Make 6 with D and 3 with E.
- Create a magic ring.
- Work Rounds 1-6 same as Large Grape.
- Round 7: * Sc2tog over next 2 sts, sc in each of next 3 sc; repeat from * around, join with slip st in first sc – 12 sc.
- Fasten off.
Acorn Cap
Make 9 with B.
- Create a magic ring, leaving a 12″ (30.5 cm) tail to create stem after cap is made.
- Round 1: 5 sc in ring. Mark first st, and move marker up as each round is completed.
- Round 2: 2 sc in each sc around – 10 sc.
- Round 3: * 2 sc in next sc, sc in next sc; repeat from * around – 15 sc.
- Round 4: * 2 sc in next sc, sc in each of next 2 sc; repeat from * around – 20 sc.
- Round 5: * Sc in each of next 2 sc, sc2tog over next 2 sc; repeat from * around, join with slip st in first sc – 15 sc.
- Fasten off, leaving a 12″ (30.5 cm) tail to sew to Acorn Bottom.
- Weave beginning tail to inside through center top of Cap.
- From the outside, insert hook in center top and pull a loop up to create first st of stem, ch 4, sc in 2nd ch from hook and in each of next 2 ch, slip st in top of Cap (stem made).
- Fasten off.
Lightly stuff acorn and sew Cap to Bottom. Weave in ends to inside of Acorn.
Finishing and Assembly
- Thread greening pins through back of each leaf so that it does not to show on front of leaf.
- Referring to photo for placement, attach 3 pairs of Grape Leaves to Wreath, evenly spaced.
- Attach 3 pairs of Oak Leaves, 1 centered between each pair of Grape Leaves.
- Use yarn tail on each Large Grape to attach 3 Small Grapes and create a bunch. Attach a bunch with greening pin to each pair of Grape Leaves.
- Thread stems of 3 Acorns onto greening pin to create a bunch. Attach a bunch to each pair of Oak Leaves.
- Attach Single-Point Leaves, in alternating colors, around inner and outer edges of Wreath.
- Attach 3 Five-Point Leaves in a row, in colors F, then G, then F, to front of Wreath in each space between grape and acorn bunches.
- Use floral wire to create hanger for wreath.
Ways to Display Your Finished Crochet
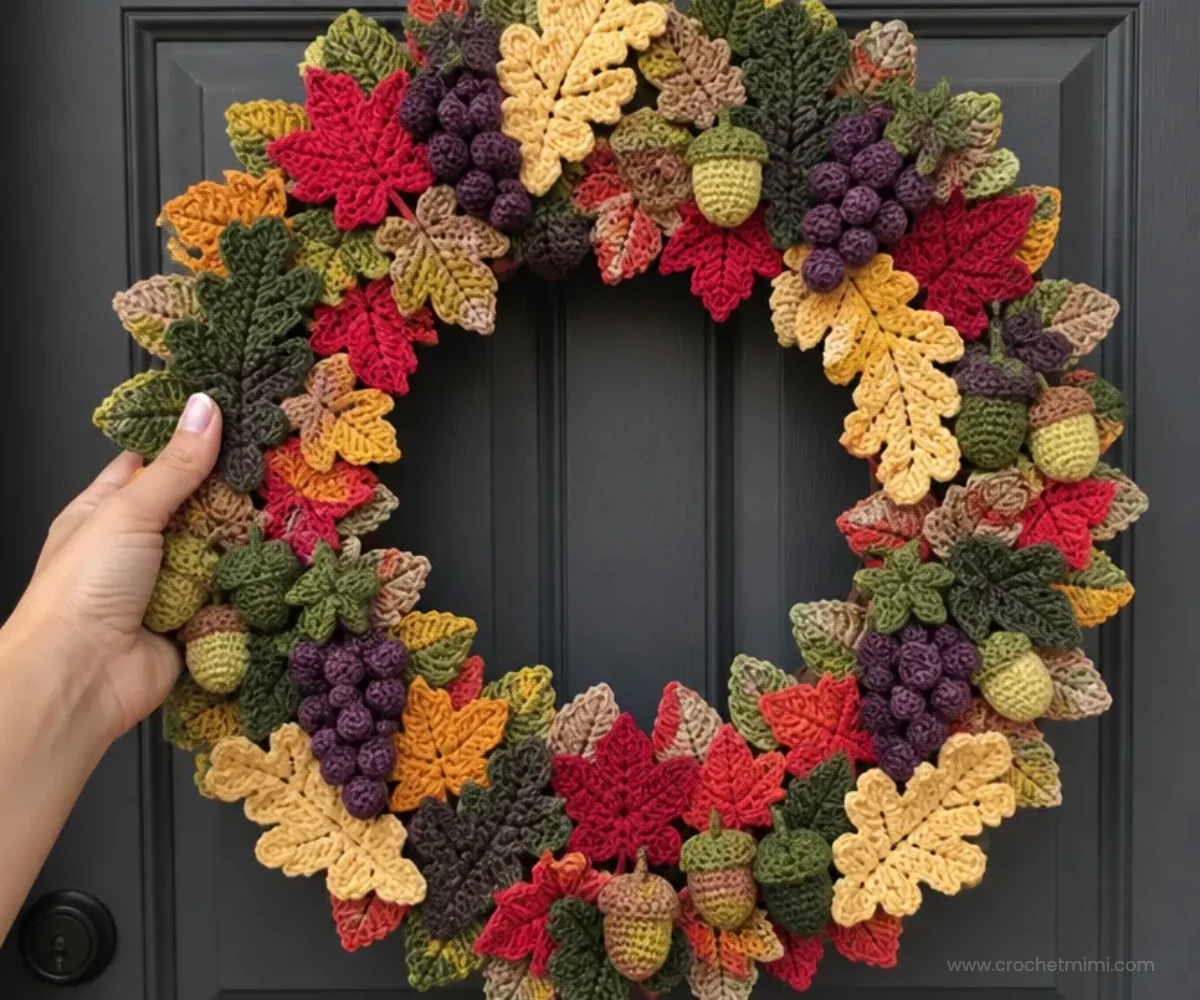
- Hang it on an interior door where the layered leaves and fruit can be seen clearly.
- Use it as an autumn focal point above a mantel or entryway table.
- Display it on a wall as part of a seasonal gallery of handmade decorations.
- Give it as a housewarming or autumn hostess gift.
- Place it on a covered porch, protected from rain and prolonged exposure to moisture.
- Pair it with warm-toned textiles, such as cream, rust, olive, or deep plum accents.
For additional botanical inspiration, browse these crochet bell flower designs when planning complementary handmade décor.
Caring for Your Crochet Project
Dust the wreath gently with a soft brush, microfiber cloth, or the lowest setting of a handheld vacuum held slightly away from the surface. Avoid pulling on the leaves, stems, greening pins, or grape clusters.
Because the wreath includes a straw form, greening pins, and floral wire, do not machine wash, soak, or submerge it. For a small mark, use a barely damp cloth and test carefully in an inconspicuous area first. Allow any spot-cleaned area to dry completely.
Store the wreath flat or upright in a sturdy container with enough room to prevent crushing the leaves and acorns. Keep it away from excessive heat, damp storage areas, and direct sunlight that could affect the yarn colors or burlap wrapping.
Tips for Better Results
- Sort the yarn before beginning. Keep the seven colors separated and label them A through G so the color assignments remain clear.
- Mark circular work promptly. Move the stitch marker up as each round is completed in the grape and acorn pieces.
- Count increases carefully. The round motifs depend on the specified increases to create the correct shape.
- Stuff lightly. Add enough plush stuffing to make grapes and acorns rounded, but avoid overfilling them so the stitches stretch.
- Leave the specified tails. Large grape tails attach the smaller grapes, and the acorn cap tails sew the caps to the bottoms.
- Hide pins behind the leaves. Thread greening pins through the back of each leaf so they do not show on the front.
- Arrange before securing. Place the leaf pairs, grape bunches, and acorn bunches around the wreath before pressing the pins fully into the form.
- Handle floral wire carefully. Bend the hanger ends inward and keep sharp points away from the display surface.
If you enjoy expanding a handmade botanical collection, a beginner-friendly crochet rose pattern can provide another floral project with shaped petals and layered color.
Color and Styling Variations
The approved pattern uses a coordinated fall palette, but you can make optional color changes while keeping the component counts and instructions unchanged.
- Replace the warm Berry Red and Papaya accents with rust, gold, or burnt orange for a softer harvest effect.
- Use deeper greens for both leaf shades to create a woodland-inspired wreath.
- Try cream or muted gold for the Five-Point Leaves if you prefer less contrast against the burlap.
- Coordinate the wreath with your home by choosing one dominant accent color and keeping the remaining shades neutral.
- Make a second wreath with winter colors, such as icy blue, white, and evergreen, while preserving the same construction.
If substituting yarn, remember that a different yarn type or hook size can affect stitch size, texture, component dimensions, and the amount of yarn required. Test a small motif before committing to a full color change.
For a spring-oriented project using a different botanical arrangement, these crochet daffodil bouquet ideas offer useful color-planning inspiration.
Frequently Asked Questions
Is this pattern suitable for a newer crocheter?
It is manageable for a crocheter comfortable with basic stitches, magic rings, increases, decreases, working in rounds, and fastening off. The Oak Leaf and Five-Point Leaf instructions require careful counting and attention to stitch placement.
What hook size does the pattern use?
Use a Susan Bates® 4mm [US G-6] crochet hook.
How many Single-Point Leaves are required?
Make 25 with Tan B and 25 with Lettuce D, for a total of 50 Single-Point Leaves.
How are the grapes attached?
Use the yarn tail on each Large Grape to attach 3 Small Grapes and create a bunch. Attach each bunch with a greening pin to a pair of Grape Leaves.
How are the acorns assembled?
Make the Acorn Bottoms and Caps separately. Lightly stuff each acorn, sew the Cap to the Bottom, and weave the ends inside. During assembly, thread the stems of 3 Acorns onto a greening pin to create a bunch.
Can the colors be changed?
Yes. Color changes are optional, but keep track of the letter assignments because the approved instructions identify colors as A through G. Changing yarn can also affect the look and size of the motifs.
Can the wreath be washed?
Do not machine wash, soak, or submerge the completed wreath. Its straw form, burlap wrapping, greening pins, and floral wire require gentle dusting and careful spot cleaning instead.
How can I use the finished wreath indoors?
Hang it on an interior door, wall, mantel area, or entryway. It can also be displayed as a seasonal centerpiece when supported securely and kept away from moisture.
Conclusion
This Crochet Fabulous Fall Wreath Pattern turns simple crochet shapes into a richly layered harvest decoration. Leaves, grapes, and acorns create dimension, while the burlap-wrapped form provides a warm rustic foundation. For another version of this seasonal project, see the Red Heart Fabulous Fall Wreath pattern and the Fabulous Fall Crochet Wreath inspiration.