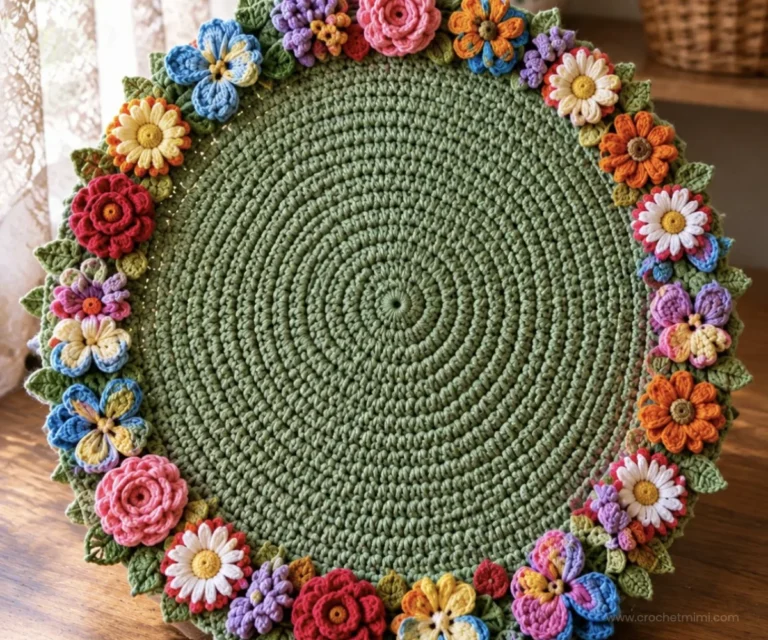
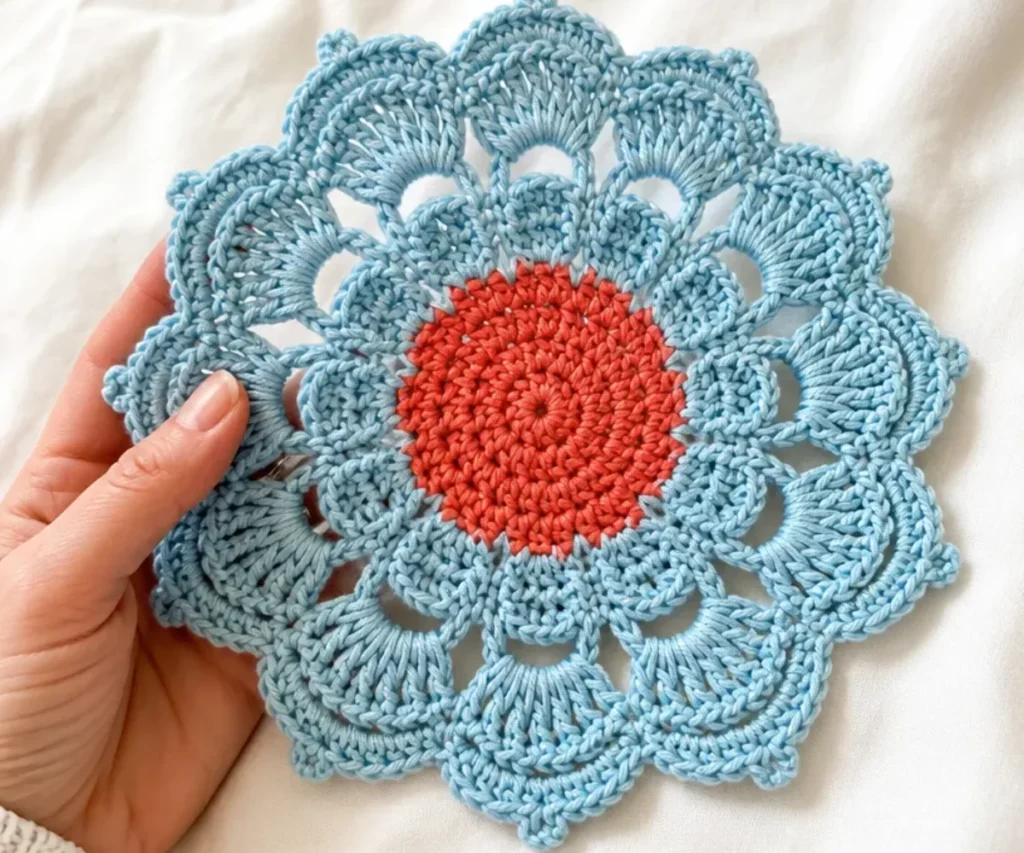
A Crochet Spring Flower Coaster Pattern makes a cheerful floral accent for a coffee table, breakfast nook, or handmade gift basket. The design begins with a flat, circular center and grows into layered petals in bright Tangerine and Robin’s Egg. Its repeatable rounds are useful for practicing increases, color changes, chain spaces, and picot edging. If you enjoy botanical crochet, you can also pair this coaster with ideas from these crochet bell flower designs for a coordinated seasonal display.
Why You’ll Love This Crochet Project
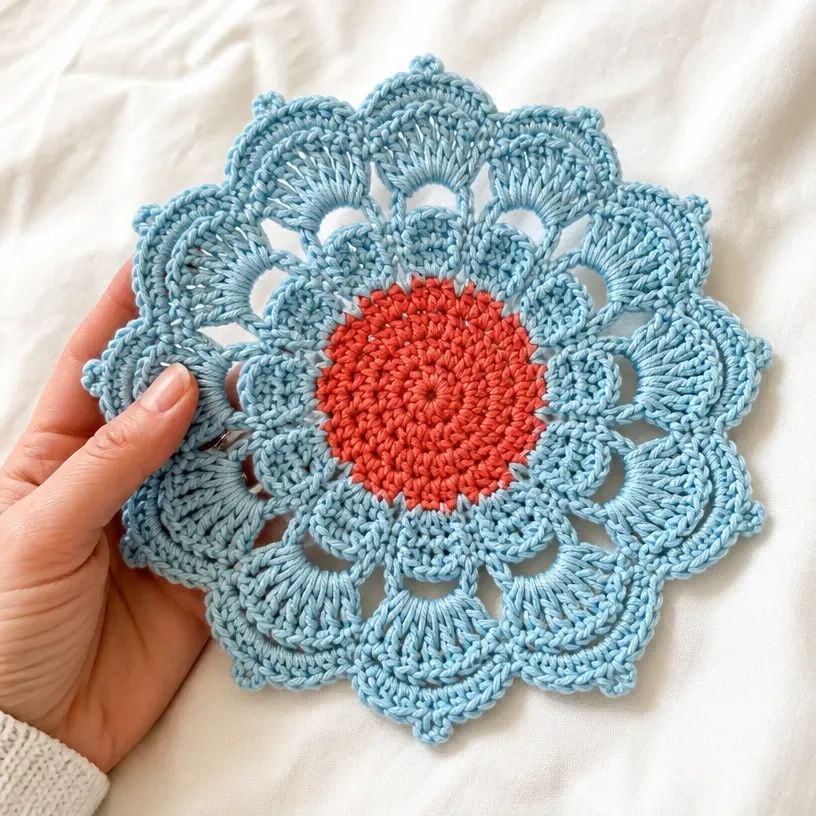
- It creates a practical floral accent. The finished piece can protect a tabletop while adding color and texture.
- The shape develops gradually. The first rounds use evenly spaced single-crochet increases, making the growth easy to follow.
- It introduces layered petals. Working behind the first petal round creates a second and third floral layer without separate assembly.
- The color change is simple but effective. Contrast B begins at Round 8, giving the flower a defined outer section.
- It makes a thoughtful handmade gift. A set of coordinating coasters can be bundled for birthdays, housewarmings, or spring celebrations.
Crochet Mimi Tip: Place a stitch marker in the first stitch of each round while you work the expanding center. It makes counting and joining more reliable. You may also find Blooming Bouquet Crochet Blanket Pattern useful.
Pattern Overview
This pattern creates one circular flower coaster worked in joined rounds. The center is built from single crochet, increasing from 8 stitches in the first round to 64 stitches at the end of Round 8. Contrast B is then used to form chain spaces and three decorative layers of petals.
The construction sequence is:
- Work the expanding single-crochet center in Contrast A.
- Join Contrast B at the end of Round 8.
- Create 16 chain-4 spaces for the first petal round.
- Work 16 petals into those spaces.
- Build a second set of chain spaces behind the first petals.
- Work larger petals into the chain-5 spaces.
- Create a final set of chain-7 spaces.
- Finish with pointed petals and picots.
No separate components or additional assembly are required. The rounds are joined as specified, and the project is finished by fastening off.
Stitch Key
- ch: chain
- hdc: half double crochet
- sl st: slip stitch
- dc: double crochet
- sc: single crochet
Materials You’ll Need
- Bernat® Handicrafter® Cotton (1.75 oz/50 g; 80 yds/73 m)
- Contrast A Tangerine (01699): 33 yds/30 m or 1 ball
- Contrast B Robin’s Egg (01215): 66 yds/60 m or 1 ball
- Crochet hook: Size U.S. H/8 (5 mm) or size needed to obtain gauge
The cotton yarn gives the coaster a practical fabric with enough structure for the circular shape and petal details. Keep both colors nearby before beginning so the color change at the end of Round 8 is easy to manage.
Step-by-Step Crochet Instructions
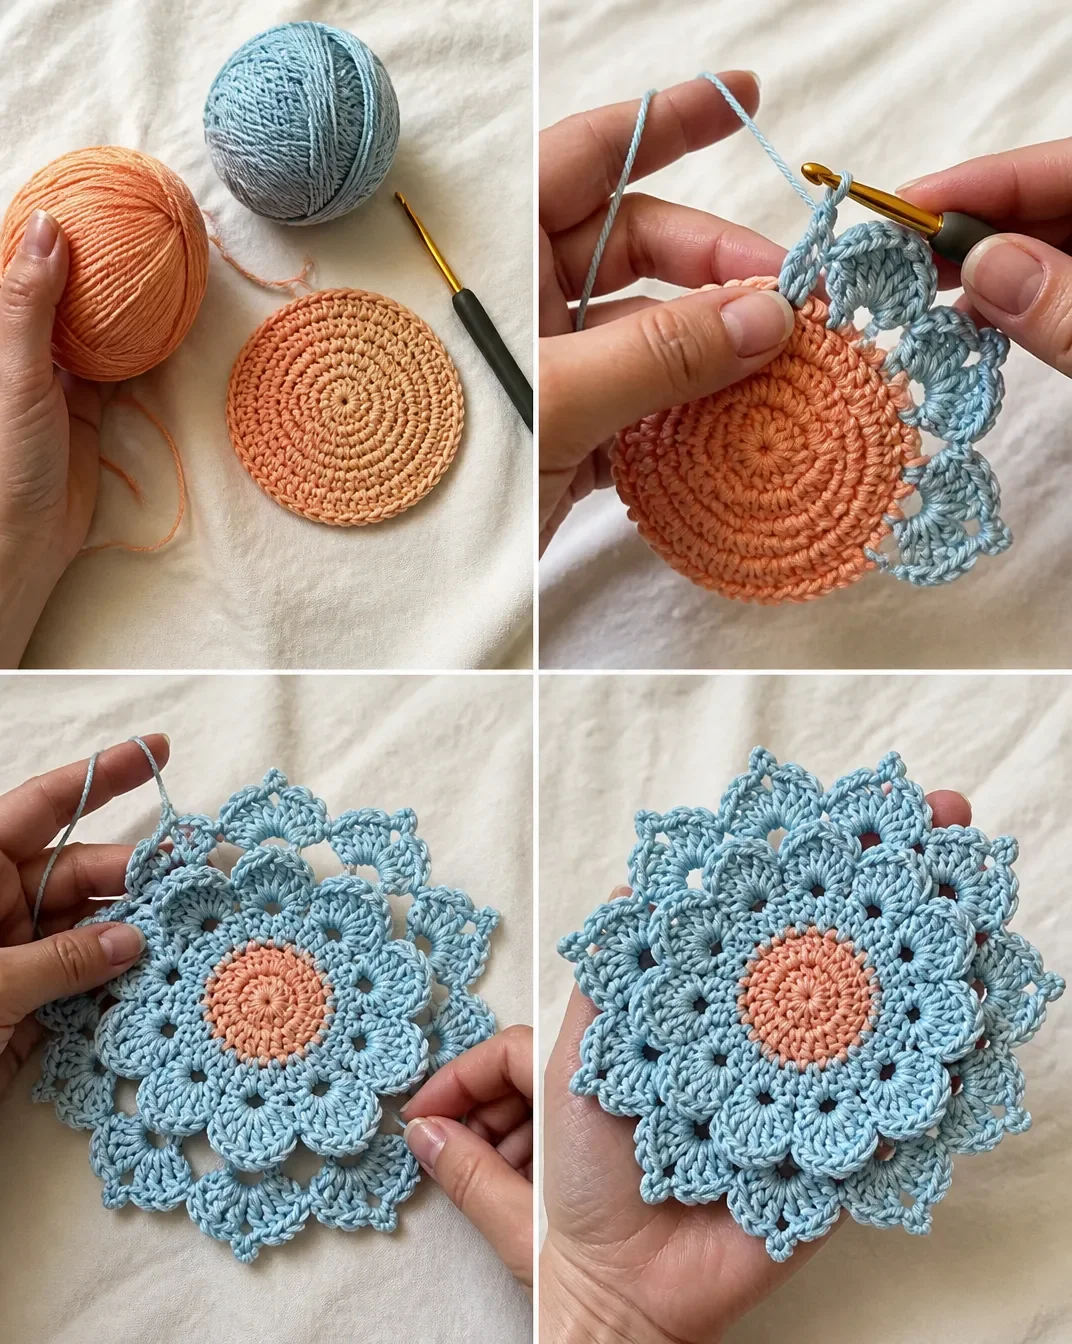
Work the pattern in joined rounds. The chain at the beginning of each round is included exactly as written in the supplied instructions.
Crochet the Expanding Center
1st rnd
- Ch 1.
- Work 8 sc in ring. Join.
2nd rnd
- Ch 1.
- 2 sc in each sc around.
- 16 sc. Join.
3rd rnd
- Ch 1.
- (1 sc in next sc. 2 sc in next sc) 8 times.
- 24 sc. Join.
4th rnd
- Ch 1.
- (1 sc in each of next 2 sc. 2 sc in next sc) 8 times.
- 32 sc. Join.
5th rnd
- Ch 1.
- (1 sc in each of next 3 sc. 2 sc in next sc) 8 times.
- 40 sc. Join.
6th rnd
- Ch 1.
- (1 sc in each of next 4 sc. 2 sc in next sc) 8 times.
- 48 sc. Join.
7th rnd
- Ch 1.
- (1 sc in each of next 5 sc. 2 sc in next sc) 8 times.
- 56 sc. Join.
8th rnd
- Ch 1.
- (1 sc in each of next 3 sc. 2 sc in next sc. 1 sc in each of next 3 sc) 8 times.
- 64 sc.
- Join B with sl st to first sc.
Keep the center flat as you work. If the fabric begins to cup, check that each increase has been made as written; if it ripples, review the stitch count before moving on.
Create the First Petal Layer
9th rnd with B
- With B, ch 1.
- 1 sc in same sp as sl st.
- *Ch 4. Skip next 3 sc. 1 sc in next sc. Rep from * to last 3 sc.
- Ch 4. Skip last 3 sc.
- Join with sl st to first sc.
Ch-4 spaces are created; stitch count per round is not explicitly stated beyond joins.
10th rnd
- *Ch 1. (1 hdc. 4 dc. 1 hdc) in next ch-4 sp. Ch 1. Sl st in next sc. Rep from * around.
- 16 petals.
The stitches worked into each chain-4 space form the first set of rounded petals. Keep the slip stitch between petal groups snug but not tight so the edge remains flexible.
Add the Second Petal Layer
11th rnd
- Ch 2.
- *Working behind petals, 1 sc in next ch-4 sp between group of 4 dc. Ch 5. Rep from * around. Skip first ch-2 sp.
- Join with sl st to first sc.
- 16 ch-5 sps.
Work behind the completed petals to reach the spaces between the groups of 4 dc. This placement is what allows the next layer to sit behind the first.
12th rnd
- *Ch 1. (1 hdc. 6 dc. 1 hdc) in next ch-5 sp. Ch 1. Sl st in next sc. Rep from * around.
- Stitch count not explicitly stated.
The six double crochets make this petal layer fuller than the previous one. Spread the stitches gently as you work so the petal shapes remain visible.
Finish the Outer Petals
13th rnd
- Ch 4.
- *Working behind petals, 1 sc in next ch-5 sp between group of 6 dc. Ch 7. Rep from * around. Skip first ch-4 sp.
- Join with sl st to first sc.
- 16 ch-7 sps.
Again, work behind the petals and place the single crochet in the chain-5 space between groups of 6 dc. The larger chain spaces provide room for the final pointed petals.
14th rnd
- *Ch 2. (5 dc. Ch 3. Sl st to top of last dc – picot made. 4 dc) in next ch-7 sp. Ch 2. Sl st in next sc. Rep from * around.
- Fasten off.
The chain-3 slip stitch creates a picot at the top of each outer petal. After fastening off, secure the yarn end neatly.
Assembly and Finishing
No additional assembly instructions are provided beyond joining rounds and color changes as specified in the technical notes.
Fasten off.
Ways to Display Your Finished Crochet
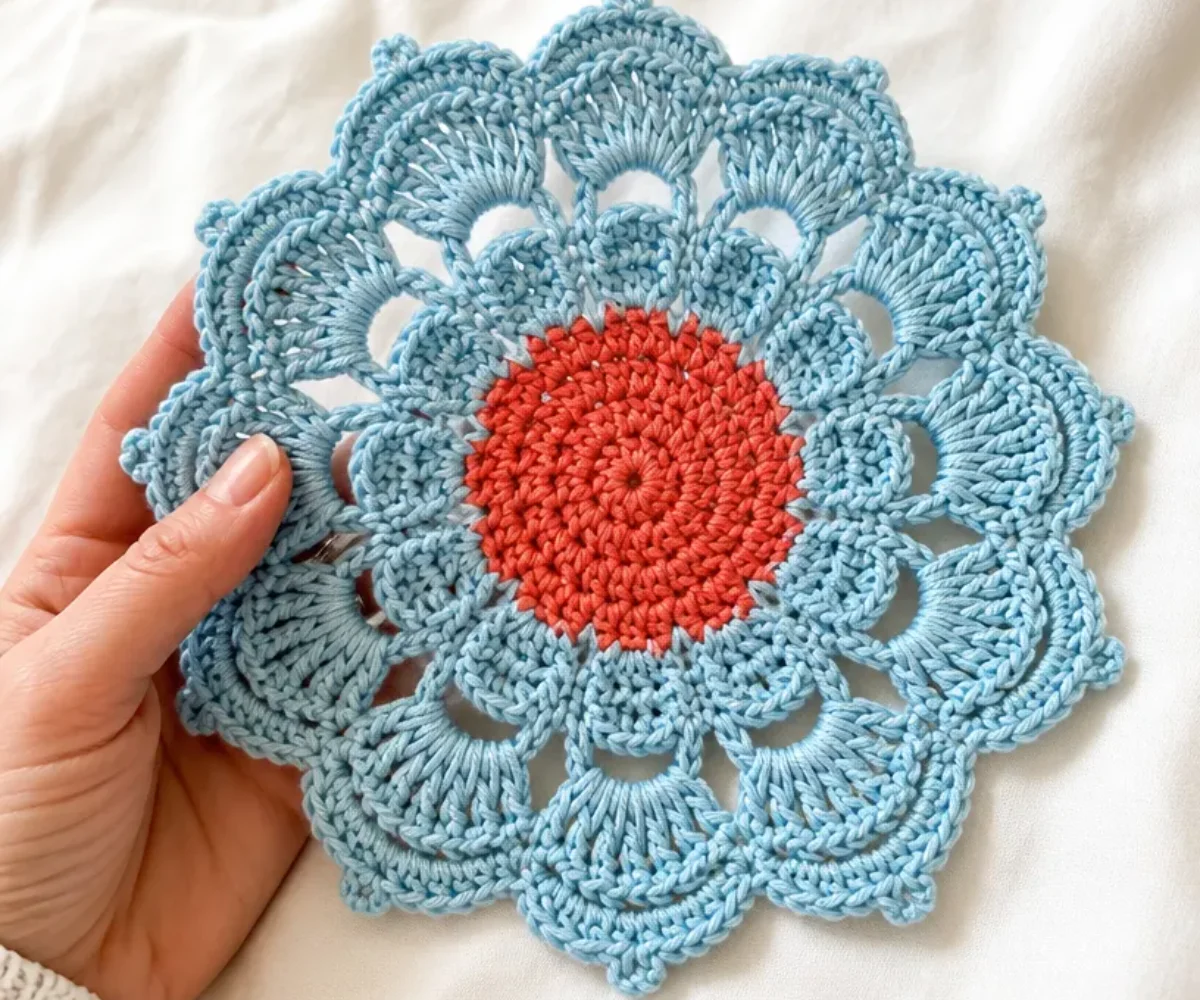
- Use it beneath a mug or glass. The floral shape makes an everyday table setting feel more seasonal.
- Create a matching set. Make several coasters in the same colors for a coordinated coffee table or dining area.
- Build a spring centerpiece. Arrange the coasters beneath a vase, bowl, or small candle holder, keeping hot items away from the crochet.
- Give a floral gift. Pair one or more coasters with a wrapped mug, tea, or a small handmade bouquet.
- Coordinate it with other crochet flowers. A daffodil-inspired project, such as this crochet daffodil bouquet pattern, can help create a broader spring-themed display.
Caring for Your Crochet Project
- Dust the coaster gently with a soft brush, lint-free cloth, or a careful pass from a low-suction vacuum attachment.
- For small marks, spot-clean cautiously with a slightly damp cloth rather than saturating the layered petals.
- Allow the coaster to dry completely and naturally on a flat surface.
- Reshape the petals with your fingers while the piece is slightly damp, taking care not to stretch the center.
- Store it flat or loosely stacked so the picots and outer petals do not become crushed.
- Keep the cotton crochet away from excessive heat and rough surfaces that could snag the decorative edges.
- Follow the yarn manufacturer’s care instructions when laundering is necessary.
Tips for Better Results
- Count after every center round. The stitch counts progress to 16, 24, 32, 40, 48, 56, and 64 stitches, so checking each increase round can prevent errors from carrying forward.
- Mark the first stitch. Joined rounds can make the beginning difficult to identify, especially when working into spaces in the petal rounds.
- Join Contrast B carefully. Round 8 ends with “Join B with sl st to first sc.” Make the color change at this point so the center and petal section remain clearly defined.
- Do not skip the behind-the-petal placement. In Rounds 11 and 13, the single crochet is worked behind the previous petals and into the specified chain space.
- Keep chain tension even. Chain-4, chain-5, and chain-7 spaces determine the size and spread of each petal layer.
- Shape the picots as you go. After making the chain 3 in Round 14, slip stitch to the top of the last double crochet firmly enough to form a point without pulling the petal inward.
- Secure the ends neatly. Fasten off at the end of Round 14 and weave in the yarn ends on the back so they do not show through the open petal spaces.
Creative Ways to Customize Your Project
The following ideas are optional styling variations and do not change the approved pattern instructions.
- Try another two-color combination. Keep the same color-placement structure while choosing a different shade for Contrast A and Contrast B. A soft yellow center with green-blue petals can suggest early spring, while coral and cream can suit a warmer palette.
- Make a coordinated floral set. Combine these coasters with a small crochet rose display, such as the beginner-friendly crochet red rose pattern, for a mixed-flower arrangement.
- Use seasonal colors. Tangerine and Robin’s Egg feel bright and springlike, but lavender and white can create a delicate look, while red and green can suit holiday decorating.
- Coordinate the tabletop. Place the flower coaster beside a crochet doily, such as this beginner-friendly mandala crochet doily, to layer circular textures.
- Change yarn only with care. A different yarn or hook size may alter gauge, dimensions, texture, drape, and yarn requirements. Make a small test before substituting, and do not assume the same quantities will be sufficient.
Frequently Asked Questions
Is this crochet coaster suitable for a beginner?
The pattern uses basic stitches single crochet, half double crochet, double crochet, chain, and slip stitch but the layered petal construction requires careful placement. Beginners familiar with joined rounds may enjoy it with close attention to the written instructions.
What yarn is recommended?
Use Bernat® Handicrafter® Cotton in the specified quantities: Contrast A Tangerine, 33 yds/30 m or 1 ball, and Contrast B Robin’s Egg, 66 yds/60 m or 1 ball.
What hook size should I use?
Use a U.S. H/8 (5 mm) crochet hook, or the size needed to obtain gauge.
How many petals does the coaster have?
Round 10 creates 16 petals. Round 11 creates 16 chain-5 spaces for the next petal layer, and Round 13 creates 16 chain-7 spaces for the final outer layer.
Can I change the colors?
Yes. Color changes are an optional customization. The approved pattern joins Contrast B at the end of Round 8, so preserve that color-change position if you want the same construction and visual division.
Does the project require separate assembly?
No additional assembly instructions are provided beyond joining rounds and color changes as specified. The flower is worked as one piece and is finished by fastening off.
How can I keep the petals looking defined?
Use consistent tension, avoid making the chain spaces too tight, and gently arrange the petals after finishing. Store the coaster flat to help protect the outer picots.
Can I use the coaster with hot dishes?
It is best treated as a decorative or everyday drink coaster rather than a trivet. Keep it away from direct heat, hot cookware, and open flames.
Conclusion
This crochet spring flower coaster combines a neatly expanding center with three decorative petal layers and a charming picot edge. Make one for a colorful tabletop accent, several for a handmade gift, or a coordinated set for seasonal decorating. For another version of the project, compare the Bernat spring flower coaster pattern with this spring flowers coaster pattern for additional inspiration.