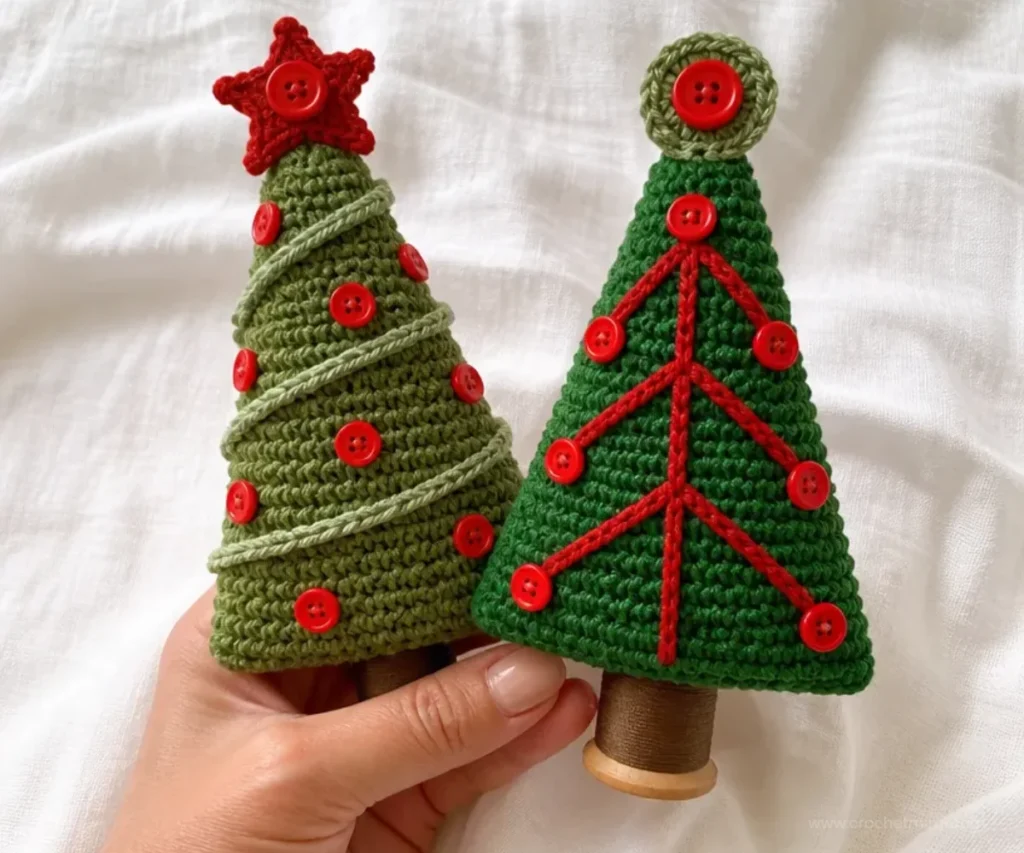
A pair of handmade crochet trees makes a cheerful seasonal display without requiring complicated colorwork. This Crochet Christmas Tree Duo Pattern creates two dimensional, stuffed trees: one decorated with a five-point star and garland, and the other finished with a round topper and branch-like embellishments. The project is useful for mantels, shelves, holiday tables, or handmade gifts. Crocheters who enjoy seasonal decorations can also pair the trees with a crochet bear ornament for a coordinated Christmas display.
Why You’ll Love This Crochet Project
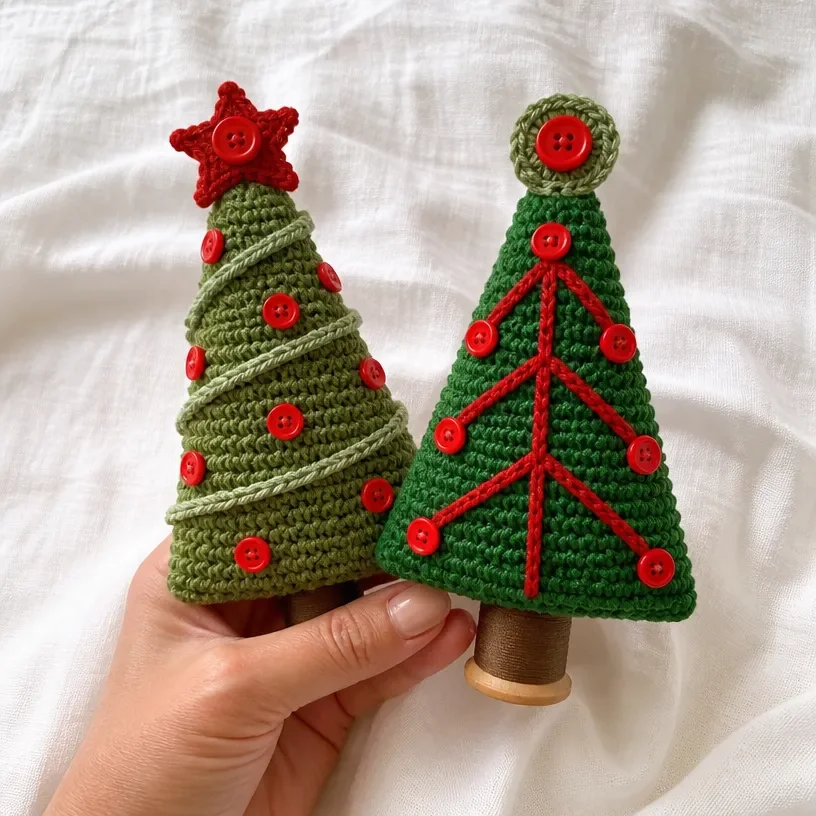
- Make a coordinated pair. Both trees use the same basic construction, while their different toppers and decorations give each one its own personality.
- Practice simple shaping. The tree sides grow through evenly spaced increases, creating the triangular silhouette.
- Create dimensional decor. Stuffing and a sewn bottom transform flat crochet pieces into freestanding three-dimensional trees.
- Learn decorative finishing. Buttons, chain garlands, stars, circles, stems, and branches add texture and seasonal color.
- Give a handmade gift. The finished trees can be displayed together or gifted separately as small holiday decorations.
Crochet Mimi Tip: Keep the three tree sides together as a set while you work so their rows and shapes remain consistent. You may also find Beginner Friendly Crochet Pattern Red Roses useful.
How This Crochet Project Comes Together
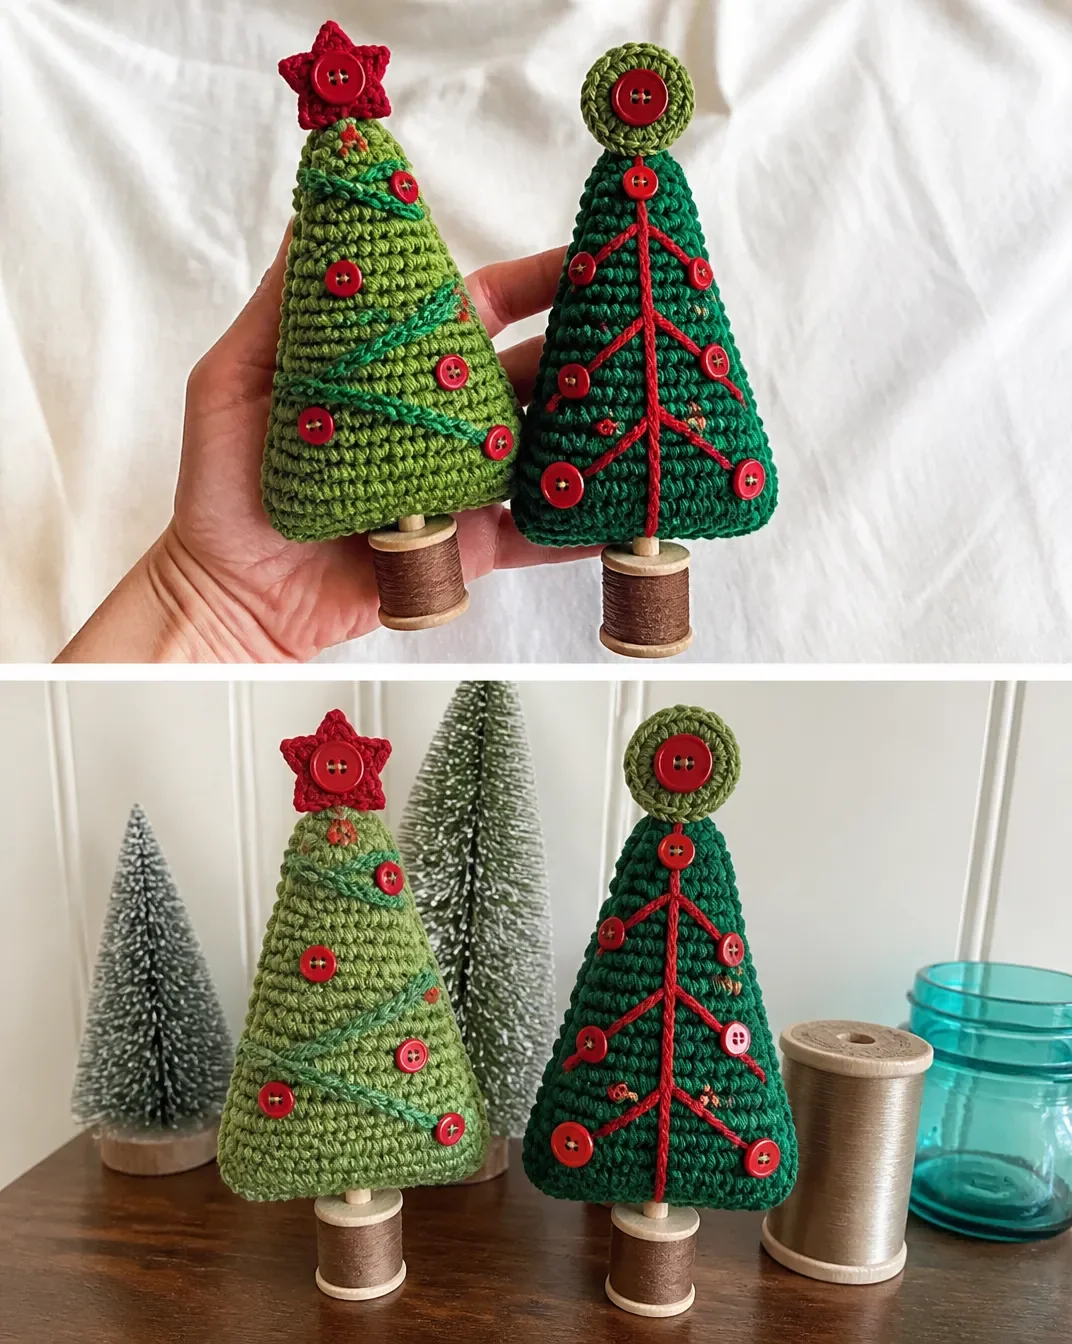
The pattern makes two trees, and each tree is built from three crocheted sides plus one crocheted bottom. After the panels are sewn together, the tree is stuffed and closed. Both trees are mounted on wooden dowels inserted into thread spools, creating a simple trunk and base.
Tree 1 receives two crocheted stars, red button centers, four chain garlands, and small red buttons. Tree 2 receives two crocheted circles, three center stems, and three branches in each of three lengths. The branches form triangular arrangements and are finished with buttons.
The pattern uses single crochet, half double crochet, double crochet, chains, slip stitches, sewing, stuffing, and gluing. Useful abbreviations include ch for chain, sc for single crochet, hdc for half double crochet, dc for double crochet, and sl st for slip stitch.
Materials You’ll Need
- RED HEART® Super Saver®: 1 skein each of:
- 629 Green Tones A
- 979 Mistletoe B
- 0319 Cherry Red C
- 5.0 mm [US H-8] crochet hook
- Yarn needle
- Buttons:
- Tree 1: 21 to 24 red 7/16-inch buttons and 2 red 3/4-inch buttons
- Tree 2: 18 red 9/16-inch buttons and 2 red 3/4-inch buttons
- Two spools of Coats Cotton Machine Quilting Thread, color #8975, for the tree trunks
- Two 1/8-inch × 7 1/2-inch wood dowels or 1 set of wood chopsticks
- Sewing needle
- Red sewing thread
- Tacky glue
- Stuffing for the tree forms
For a different seasonal direction, you can also explore a crochet Halloween tree design and adapt your display around multiple holidays.
Step-by-Step Crochet Instructions
Tree
Make 2.
Tree Sides
Make 3 for each tree. Starting at the bottom, with A, ch 2.
- Row 1: 3 sc in 2nd ch from hook; turn – 3 sc
- Row 2: ch 1, sc in each st across, turn
- Row 3: ch 1, 2 sc in first st, sc in next sc, 2 sc in last st; turn – 5 sc
- Rows 4–6: ch 1, sc in each st across; turn.
- Row 7: ch 1, 2 sc in first st, sc in each st across to last st, 2 sc in last st; turn – 7 sc
- Rows 8–27: Repeat rows 4–7 (5 times).
- Rows 28–32: Repeat Row 4.
Fasten off.
Tree Bottom
With A, ch 2.
- Row 1: 3 sc in 2nd ch from hook; turn – 3 sc
- Row 2: ch 1, sc in each st across, turn.
- Row 3: ch 1, 2 sc in first st, sc in each st across to last st, 2 sc in last st; turn – 5 sc
- Row 4: ch 1, sc in each st across; turn.
- Rows 5–16: Repeat rows 3 and 4 (6 times) – 17 sc at end of last row.
Fasten off, leaving a sewing length.
Finishing the Tree Form
With wrong sides facing, sew the bottom edge of 3 tree sides to the edges of the tree bottom.
With right side facing, sc 2 tree sides together.
Add stuffing and sc the last 2 tree sides together, adding additional stuffing as needed.
Weave in ends.
Tree 1 Embellishments
Star
Make 2.
With C, ch 4, slip st in first ch to form a ring.
Round 1: Ch 1, work 10 sc in ring; join with a slip st in first sc – 10 sc.
Round 2: Ch 1, sc in first sc, ch 5, sc in 2nd ch from hook, hdc in next ch, dc in next 2 ch, skip next sc in round 1*, sc in next sc, repeat from * around ending last repeat at **, join with a slip st in first sc – 5 points.
Fasten off, leaving a sewing length.
Star Assembly
With right sides facing, sew two stars together, matching sts.
Sew the star to the top of the tree.
With sewing needle and thread, sew one 3/4-inch button to the center of each side of the star.
Weave in ends.
Garland
With B, make 4 chains in different lengths for the garland to wrap around the tree.
Fasten off, leaving a sewing length.
Start at the bottom or top, placing the garland chains 1 1/2 inches apart.
Sew garlands in place.
With sewing needle and thread, sew 7/16-inch buttons between the garland, on each side of the tree.
Tree 2 Embellishments
Circle
Make 2.
With B, ch 2.
Round 1: 6 sc in 2nd ch from hook; join with a slip st in first sc – 6 sc.
Round 2: Ch 3, which counts as dc, dc in first sc, 2 dc in each sc around; join with a slip st in top of beginning ch-3 – 12 dc.
Fasten off, leaving a sewing length.
Circle Assembly
With right sides facing, sew circles together, matching sts.
Sew the assembled circle to the top of the tree.
With sewing needle and thread, sew one 3/4-inch button to the center of each side of the circle.
Weave in ends.
Center Tree Stem
Make 3.
With C, ch 33.
Fasten off, leaving a sewing length.
Tree Branches
Make 3 in each length.
Branch 1: With C, ch 15. Fasten off, leaving a sewing length.
Branch 2: With C, ch 19. Fasten off, leaving a sewing length.
Branch 3: With C, ch 23. Fasten off, leaving a sewing length.
Branch, Stem, and Button Placement
Sew one stem to the center of each side of the tree.
Sew the tree branches to the stem in a triangular shape as pictured.
Sew one 9/16-inch button at the ends of each branch.
Tree Trunk
Make one for both trees.
Insert the wood dowel into the thread spool.
Add glue to the top of the spool.
Insert the remaining wood dowel into the center bottom of the tree and glue the spool to the tree.
Finished Project Inspiration
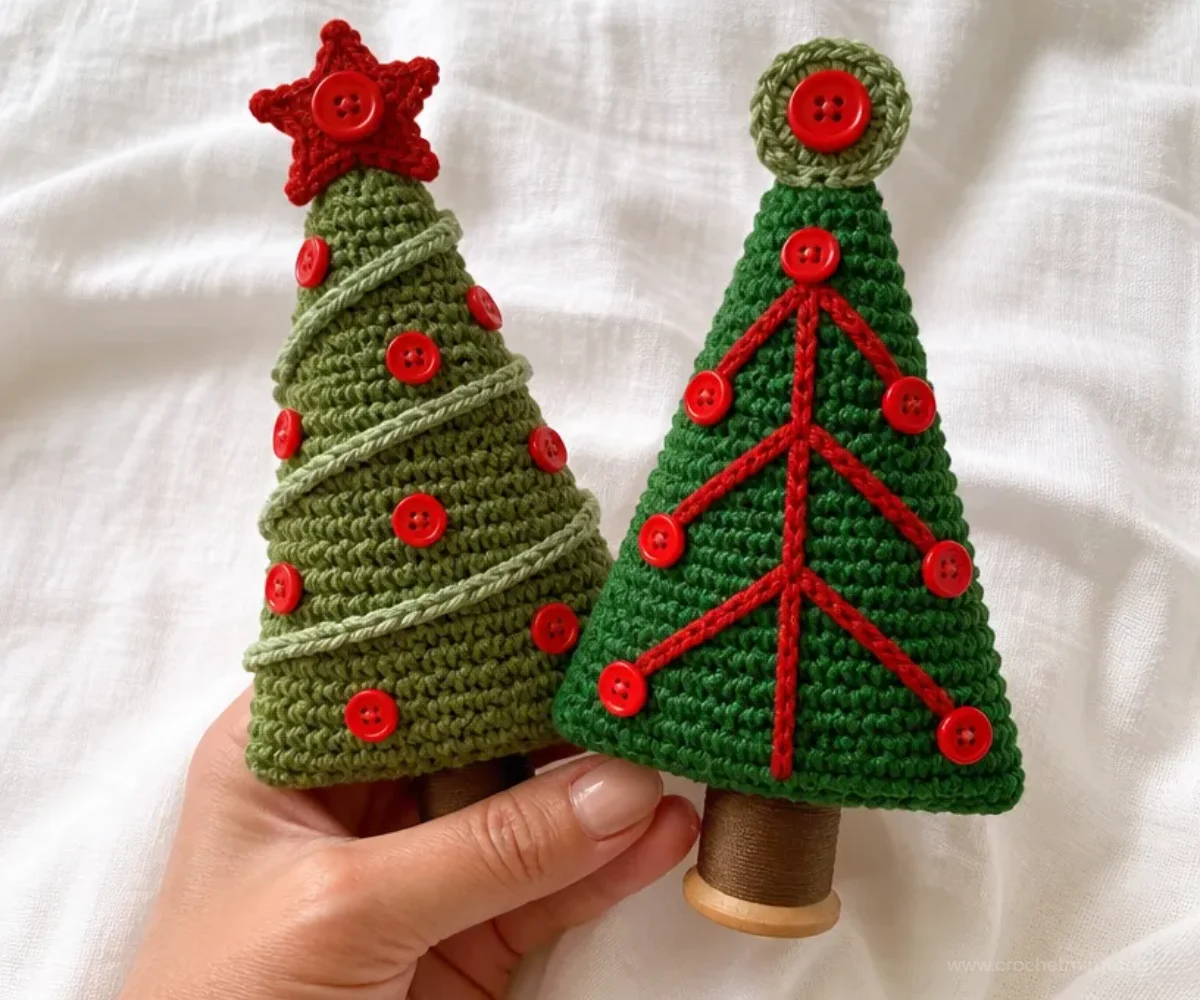
- Create a mantel grouping: Place both trees together with varying heights of candles, greenery, or neutral holiday accents.
- Style a dining table: Use the duo as a compact centerpiece, keeping the button details visible from all sides.
- Make a handmade gift set: Package the two trees together in a shallow gift box with tissue paper.
- Build a woodland display: Combine the trees with pinecones, wooden ornaments, and natural-toned textiles.
- Coordinate a seasonal shelf: Add other handmade decorations, such as a crochet floral wreath when transitioning from winter decor to spring styling.
Caring for Your Crochet Project
Dust the trees gently with a soft brush or use a handheld vacuum on a low setting without pressing against the crochet. Pay particular attention to the button decorations and the chain garlands.
Because the trees contain stuffing, wooden dowels, thread spools, and glued joins, avoid soaking or machine washing them. For small marks, use a barely damp cloth and spot-clean carefully, keeping moisture away from the trunk and glued areas.
Store the trees upright or in a roomy box so the triangular sides do not become compressed. Wrap delicate ornaments separately with tissue paper, and keep the project away from excessive heat that could affect the glue or distort the yarn.
Helpful Crochet Tips
- Count the increases carefully. The first increase section establishes 5 stitches, and Row 7 establishes 7 stitches. These counts help confirm that the triangular side is developing correctly.
- Keep the three sides consistent. Complete each side through Row 32 before assembling so the edges match more easily.
- Leave the specified sewing lengths. The bottom, stars, circles, stems, and branches all require sewing lengths for assembly.
- Use the stated facing directions. Sew the bottom edge of the three sides to the tree bottom with wrong sides facing, then use the right-side-facing instruction when joining the tree sides.
- Stuff gradually. Add stuffing before closing the final seam, then add additional stuffing as needed so the tree keeps its shape without forcing the stitches apart.
- Match embellishments before sewing. Align the two stars or two circles with their right sides facing and match the stitches before joining.
- Plan button placement first. Arrange buttons evenly between the garlands on Tree 1 and at the ends of Tree 2’s branches before sewing them permanently.
- Allow glue to set securely. Confirm that the dowel is centered in the tree bottom and that the spool is firmly attached before displaying the finished tree.
For another small, structured crochet project that rewards careful stitch counting, consider this beginner-friendly mandala crochet pattern.
Color and Styling Variations
The approved pattern uses green tones for the tree body, a contrasting green for the garland or circles, and cherry red for the stars, branches, and buttons. Optional changes can personalize the display without changing the construction:
- Use a white, cream, or pale blue accent color for a snowy winter palette.
- Replace the red button look with gold or silver buttons, while keeping the specified button sizes for the intended proportions.
- Use one consistent accent shade across both trees for a more coordinated arrangement.
- Pair one traditional green tree with a lighter neutral version if using the same yarn type in another color.
- Display the trees on a small wood tray with coordinated ornaments for a rustic holiday centerpiece.
Changing yarn or hook size is optional, but it can affect stitch tension, finished dimensions, fabric thickness, stuffing needs, and the amount of yarn required. If you change those elements, make a small test piece before beginning the full tree sides.
Frequently Asked Questions
Is this pattern suitable for a beginner?
It uses basic stitches and straightforward increases, but the project also involves sewing, stuffing, button attachment, and trunk assembly. Beginners should work slowly and check stitch counts at the end of the specified rows.
How many trees does the pattern make?
The instructions make two trees. Each tree has three crocheted sides and one crocheted bottom, followed by its own decorative treatment.
What yarn and hook should I use?
The supplied pattern specifies RED HEART® Super Saver® in colors 629 Green Tones A, 979 Mistletoe B, and 0319 Cherry Red C, with a 5.0 mm [US H-8] crochet hook.
Can I change the colors?
Yes, color changes are an optional styling choice. Keep track of which replacement color corresponds to A, B, or C so the tree bodies and embellishments remain organized.
How is the tree assembled?
Three tree sides are sewn to the tree bottom, then the sides are joined while stuffing is added. The finished form is mounted on a wood dowel and thread spool, which creates the trunk and base.
What is the purpose of the two stars and two circles?
The two stars are sewn together to create Tree 1’s dimensional topper. The two circles are sewn together and attached to Tree 2’s top.
Can I use wood chopsticks instead of dowels?
The materials specify two 1/8-inch × 7 1/2-inch wood dowels or one set of wood chopsticks, so the chopstick option may be used as stated.
How should I clean the finished trees?
Dust them gently and spot-clean only when needed. Avoid soaking or machine washing because the project includes stuffing, buttons, wood, thread spools, and glued construction.
Conclusion
This Crochet Christmas Tree Duo Pattern combines simple single-crochet shaping with festive sewn details to create two distinctive tabletop decorations. The star-topped tree and branch-decorated tree look charming together, while the color and button choices can be personalized for different holiday styles. For more seasonal inspiration, browse these Christmas craft patterns or a playful holiday dinosaur crochet pattern bundle.