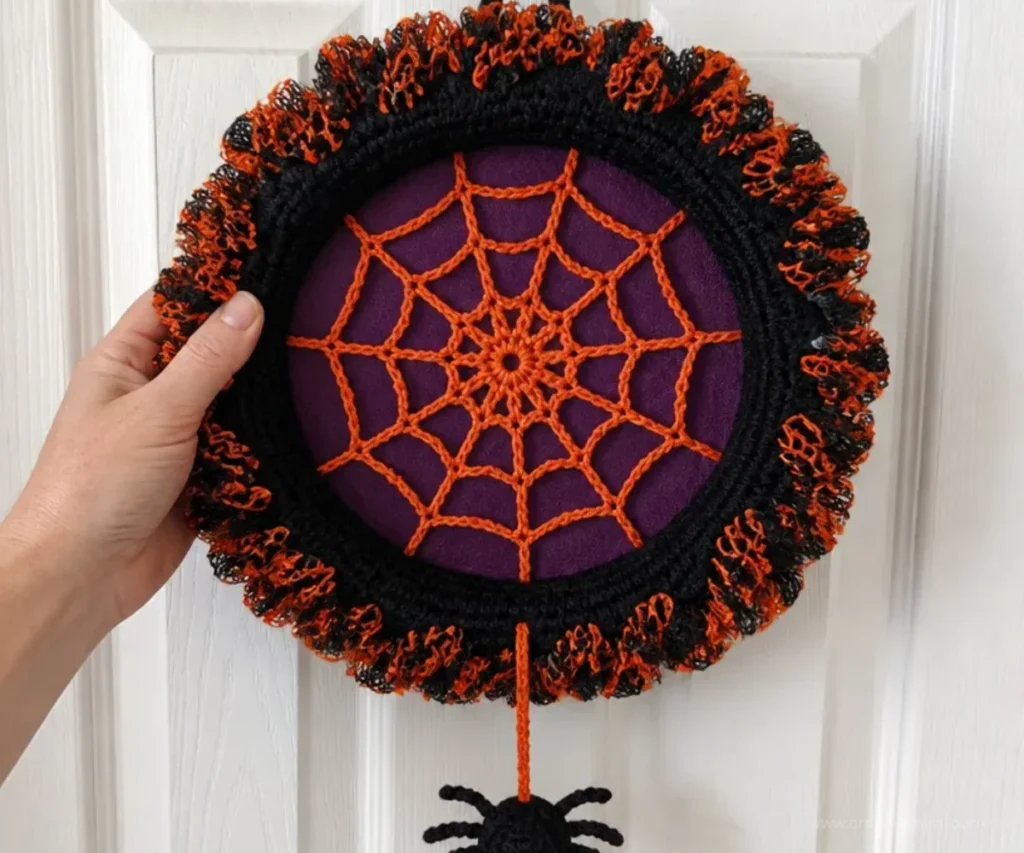
A black straw wreath wrapped in yarn becomes the foundation for an eye-catching seasonal decoration in this Crochet Spiderweb Halloween Wreath Pattern. The openwork web, orange-and-black ruffle, and small crocheted spider create a classic Halloween look without requiring a large amount of crochet. It is a fun project for practicing rounds, surface shaping, front- and back-loop work, and careful assembly. Display it on a front door, wall, or party table, or pair it with other handmade decorations such as a beginner-friendly crochet flower project for a playful seasonal arrangement.
Why You’ll Love This Crochet Project
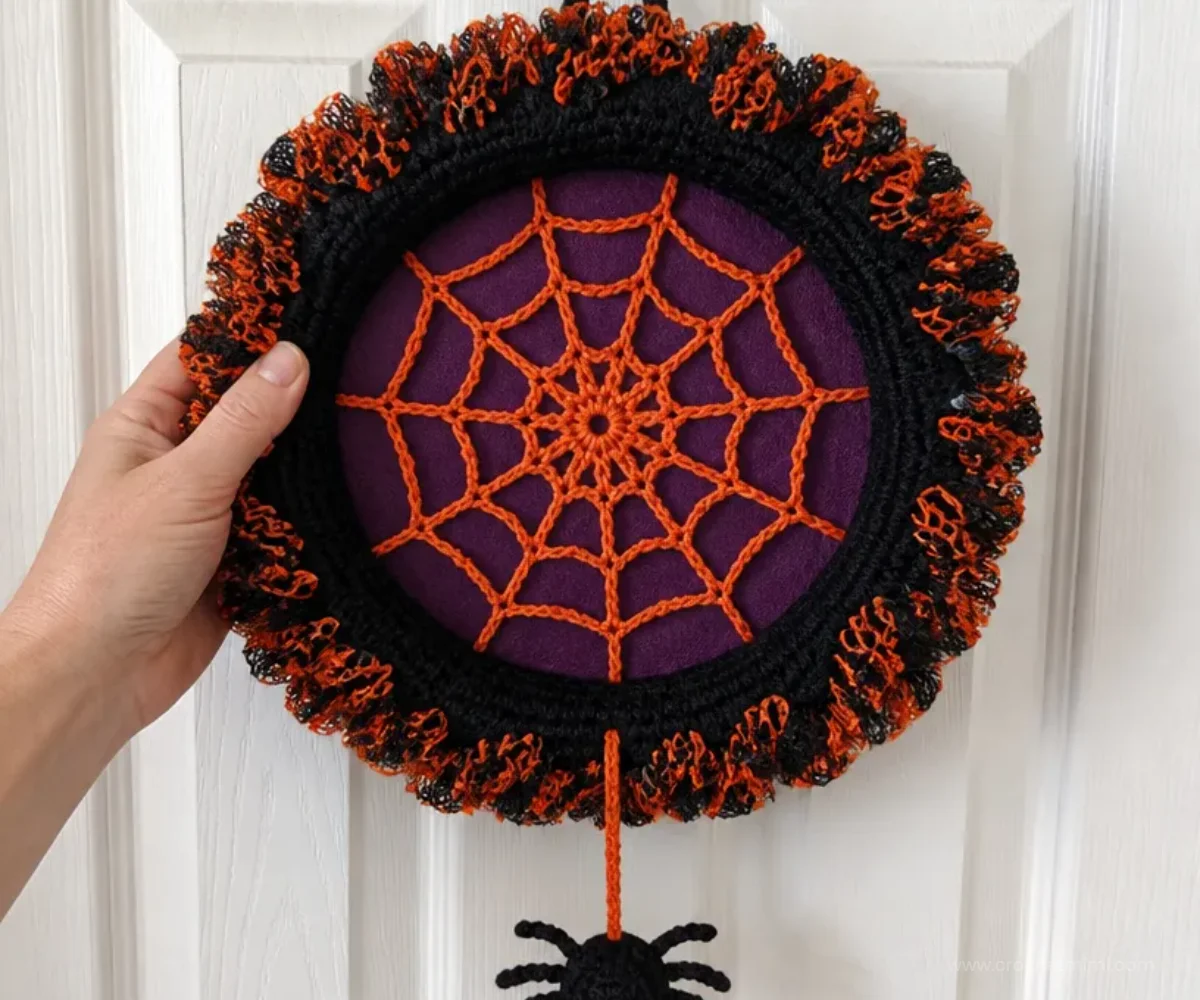
- It makes a strong seasonal statement. The black wreath, bright ruffle, white web, and spider provide immediate Halloween character.
- It combines several useful techniques. You will work chains, slip stitches, double crochet, treble crochet, increases, decreases, and stitches in specific loops.
- The web is decorative and dimensional. Its expanding rounds create open spaces, while the final chain loops form the web’s outer points.
- It offers satisfying assembly practice. The project includes wrapping a wreath form, preparing a fabric-covered center, attaching the web, and adding a hanging loop.
- It makes a practical handmade decoration. Once assembled, the wreath can be displayed year after year with careful storage.
Crochet Mimi Tip: Keep the web flat while joining each round. A firm, even foundation helps the openwork remain symmetrical when it is attached to the center.
How This Crochet Project Comes Together
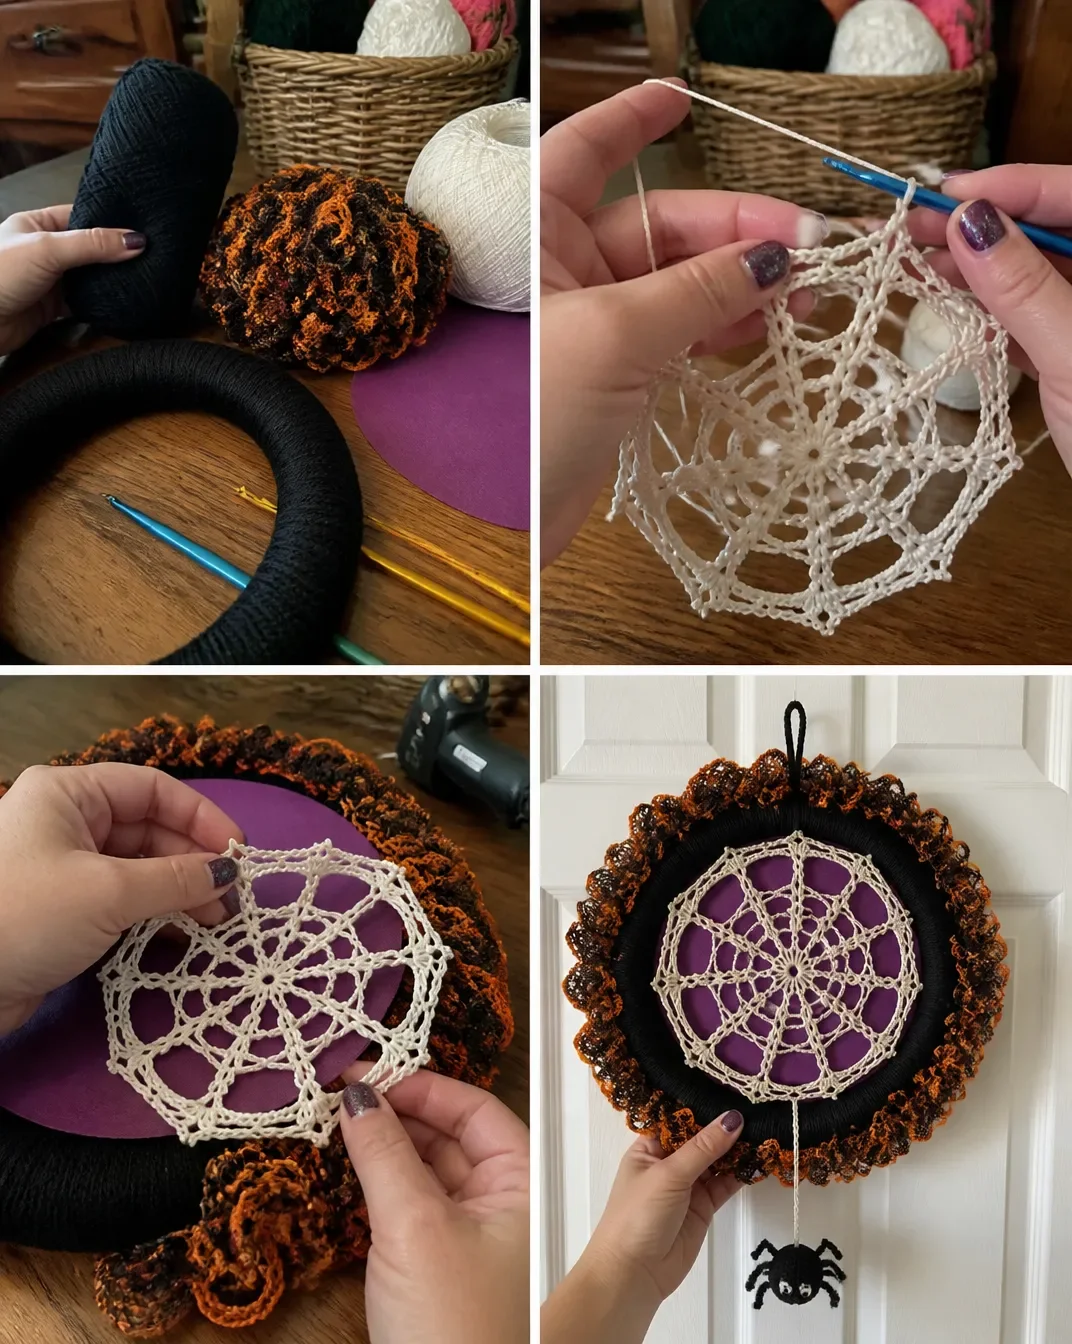
This project includes four main crocheted components: one ruffle, one circular web, one spider made from a body and head, and two finishing pieces the hanging web and wreath hanging loop. The crocheted elements are combined with a 12-inch straw wreath, a fabric-covered Phoomph center, and hot glue.
The construction sequence is:
- Crochet the orange-and-black ruffle.
- Wrap the straw wreath with black yarn.
- Crochet the circular web using two strands of thread held together.
- Crochet and assemble the spider.
- Create the purple fabric-covered wreath center.
- Attach the web and center to the back of the wreath.
- Glue the ruffle around the back edge.
- Add the hanging web and hanging loop.
The pattern uses US crochet terminology. The supplied instructions do not include a skill level, so work carefully through the stitch placement and assembly sequence, especially where the pattern specifies front loops, back loops, or particular joining chains.
Abbreviations and Symbols
- ch: chain
- sc: single crochet
- dc: double crochet
- tr: treble crochet
- slip st: slip stitch
- sc2tog: single crochet next two stitches together
- [ ]: work the directions in brackets the number of times specified
- * or **: repeat whatever follows the symbol as indicated
Materials and Tools
Yarn and Thread
- Red Heart® Super Saver®: 1 skein, 312 Black, color A
- RED HEART® Boutique Sashay Team Spirit™: 1 ball, 1941 Orange/Black, color B
- AUNT LYDIA’S® Classic Crochet Thread: color C, Size 10, 3 ply, 100% Mercerized Cotton, Art. 144, White & Natural; 350 yd (320 m) skeins, solids
Hooks and Construction Supplies
- Susan Bates® crochet hook, 2.75 mm [US C-2]
- Susan Bates® crochet hook, 3.75 mm [US F-5]
- Susan Bates® crochet hook, 6 mm [US J-10]
- 12-inch (30 cm) straw wreath
- Phoomph™ fabric bonding sheets
- 2 stiff sheets in any color
- 11-inch (28 cm) diameter circle of purple cotton fabric
- Glue gun
- Yarn needle
Cutting
- Cut one 9-inch (22 cm) diameter circle from each sheet of Phoomph.
Step-by-Step Crochet Instructions
Follow the component order below. The original stitch counts, loop placement, joins, and finishing directions are retained.
Wreath
Ruffle
Row 1: Using 6 mm hook and B, leaving 5 inches (13 cm) length, working in every other yarn loop, ch 148, turn.
Row 2: Slip st in 2nd ch from hook and in each remaining ch across. Fasten off.
Wreath Preparation
Using A, wrap wreath tightly and evenly. Secure ends on back of Wreath.
Web
Note: “With 2.75 mm hook and 2 strands C held together …”
With 2.75 mm hook and 2 strands C held together: ch 4, join with slip st in first ch to form ring.
Round 1
Ch 3 (counts as first dc), work 11 dc in ring, join with slip st in top of beginning ch-3 12 dc.
Round 2
Ch 5, dc in next dc, ch 2, * dc in next dc, ch 2, repeat from * around, join with slip st in 3rd ch of beginning ch-5.
Round 3
Ch 6, dc in next dc, ch 3, * dc in next dc, ch 3, repeat from * around, join with slip st in 3rd ch of beginning ch-6.
Round 4
Ch 9, tr in next dc, ch 5, * tr in next dc, ch 5, repeat from * around, join with slip st in 4th ch of beginning ch-9.
Round 5
Ch 11, tr in next tr, ch 7, * tr in next tr, ch 7, repeat from * around, join with slip st in 4th ch of beginning ch-7.
Round 6
Ch 20, slip st in 2nd ch from hook and each remaining ch, slip st in next 7 chs on previous round, slip st in next tr, repeat from * around, join with slip st in first slip st. Fasten off.
Spider
The spider is used later for assembly.
Spider Body
With A and 3.75 mm hook: ch 2.
Round 1: 6 sc in 2nd ch from hook 6 sc.
Round 2: 2 sc in each sc around 12 sc.
Round 3: Working in front loops only, sc in next 2 sc, * [ch 5, slip st in 2nd ch from hook and next 3 chs, slip st in last sc made], sc in next sc,* repeat between * 4 times, sc in next 2 sc, repeat between * 4 times.
Round 4: Working in back loops of round 2, [sc2tog in next 2 sc] around 6 sc. Fasten off.
Spider Head
With A, ch 2.
Round 1: 6 sc in 2nd ch from hook 6 sc.
Round 2: [Sc in next 2 sc, 2 sc in next sc] around 8 sc.
Round 3: Sc in each sc around. Leaving long end, fasten off. Using long end, gather sts and sew Head to Body as shown in photo.
With C: Embroider eyes using french knots. See illustration.
Wreath Center
Cut one 9-inch (22 cm) diameter circle from each sheet of Phoomph.
Place fabric right side down on a hard surface.
Remove paper from one side of one circle of Phoomph.
Center Phoomph circle exposed side down over fabric and apply pressure to adhere Phoomph to fabric.
Remove paper from opposite side of Phoomph circle.
Fold remaining material around Phoomph circle and apply pressure to adhere.
Place Web on hard surface and center covered circle over Web.
Pull long ends of Web to back of circle and apply pressure to adhere to unused area of Phoomph.
Remove paper from one side of remaining circle of Phoomph.
With exposed side down, center over fabric-covered circle and apply pressure to adhere circles together.
Do not remove the paper from the remaining side.
Wreath Assembly
Place circles at back of Wreath and adhere to Wreath using glue gun.
Placing slip st side of ruffle against Wreath, glue ruffle around back of Wreath close to edge of Phoomph.
Finishing
Hanging Web
With 2.75 mm hook and 2 strands of C held together:
ch 38. Fasten off.
Join ch to spider and secure to back of Wreath.
Wreath Hanging Loop
With 3.75 mm hook and A:
ch 20, join with slip st in first ch, slip st in each remaining ch around. Leaving long end, fasten off.
Using long end, sew Hanging Loop securely to top of Wreath.
Ways to Display Your Finished Crochet
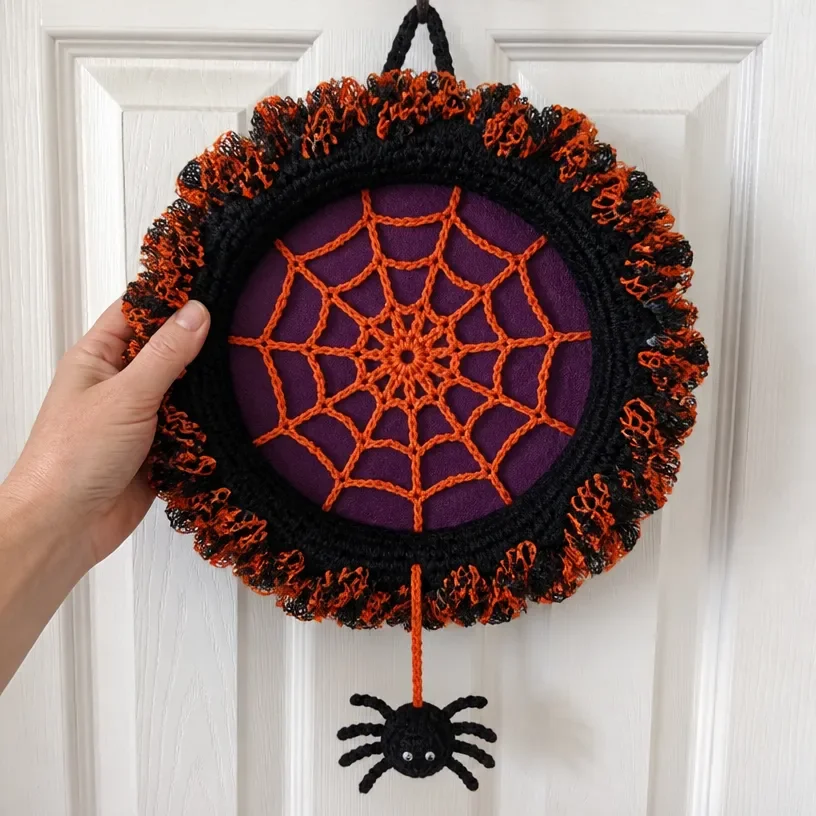
- Hang the wreath on an interior door, entryway wall, or covered porch where the ruffle and web can be seen clearly.
- Use it as a Halloween party backdrop by placing it above a dessert table or beverage station.
- Display it with black, purple, orange, and white decorations for a coordinated seasonal arrangement.
- Give it as a handmade Halloween gift once the hanging loop and spider are securely attached.
- Place it on a wall alongside other handmade decorations, such as crochet florals; a bell flower crochet design can provide an unexpected contrast to the wreath’s bold spiderweb motif.
Caring for Your Crochet Project
Dust the wreath gently with a soft brush, microfiber cloth, or a low-suction vacuum attachment. Avoid pulling across the web’s long chain loops, since they can catch or stretch.
Do not machine wash or soak this wreath. The project includes a straw form, Phoomph bonding sheets, cotton fabric, hot glue, and attached structural elements, so moisture could weaken the assembly or distort the center.
For spot cleaning, use a barely damp cloth on the affected area and avoid saturating the yarn, fabric, or bonded center. Let the wreath dry completely away from direct heat before storing.
Store it flat or hang it in a protected closet. Covering it with breathable tissue or a clean fabric bag can help prevent dust while avoiding pressure on the web and ruffle. Keep it away from heaters, strong sunlight, and high heat, which may affect the adhesives and fabric bonding.
Tips for Better Results
- Use two strands of thread together for the web exactly as instructed. This gives the web more visual weight and helps its openwork show against the purple center.
- Pay attention to the joining chain. Rounds 2 through 5 join into different chains of the beginning chain, so count carefully before making the slip stitch.
- Keep the web relaxed. Do not pull the chains tightly while working Round 6; the extended chain loops need enough length to form the web’s outer points.
- Observe loop placement in the spider body. Round 3 is worked in front loops only, while Round 4 is worked in back loops of Round 2. These placements create the spider’s legs and body shape.
- Secure the wrapped wreath ends on the back. Even tension and concealed joins keep the front smooth and prevent black yarn from shifting during assembly.
- Test the center placement before applying adhesive. Center the covered circle over the web first, then pull the web’s long ends to the back and press them into the unused Phoomph area.
- Use care with the glue gun. Apply glue to the back of the wreath and keep fingers away from hot adhesive while attaching the Phoomph circles and ruffle.
- Make the hanging loop secure. Sew it firmly to the top of the wreath using the long end so the finished decoration can hang without stressing the yarn.
Creative Ways to Customize Your Project
The approved instructions create the stated black, orange-and-black, white, and purple design. The following are optional styling ideas and do not replace those instructions:
- Change the fabric color behind the web for a different background while keeping the black web and wreath.
- Coordinate the ruffle with your existing Halloween palette by choosing a different Sashay Team Spirit™ colorway, understanding that the texture and appearance may change.
- Use a contrasting spider color so the body stands out more clearly against the web.
- Add a second wreath in a different seasonal palette, such as black and silver or purple and green, while keeping each wreath’s construction separate.
- Display the wreath near handmade floral decorations; a crochet daffodil bouquet can be styled elsewhere in the room for a playful contrast between Halloween décor and bright botanical color.
- If substituting yarn or changing hook sizes, remember that the ruffle length, web size, spider proportions, and attachment points may change. Test the replacement materials before committing to the full project.
Frequently Asked Questions
Is this wreath suitable for a newer crocheter?
The pattern includes basic stitches but also requires careful work in front loops, back loops, repeated chain spaces, and multiple assembly steps. A newer crocheter can approach it by completing one component at a time and checking each round before joining.
What yarn is used for the wreath base?
The wreath is wrapped with Red Heart® Super Saver® in 312 Black, identified as color A. The ruffle uses RED HEART® Boutique Sashay Team Spirit™ in 1941 Orange/Black, identified as color B.
Why are two strands of thread held together for the web?
The web instructions specifically call for 2 strands of AUNT LYDIA’S® Classic Crochet Thread held together. Keep both strands together throughout the web and hanging-web instructions.
Which hook is used for each section?
Use the 6 mm [US J-10] hook for the ruffle, the 2.75 mm [US C-2] hook for the web and hanging web, and the 3.75 mm [US F-5] hook for the spider and wreath hanging loop.
How is the spider attached?
After crocheting the body and head, embroider the eyes with french knots. For the hanging web, chain 38, fasten off, join the chain to the spider, and secure it to the back of the wreath.
Can the colors be changed?
Yes, color changes are an optional styling choice. Keep the approved color assignments when following the supplied pattern exactly, or substitute colors with the understanding that the visual contrast may change.
How is the wreath center made?
Two 9-inch (22 cm) Phoomph circles are used with an 11-inch (28 cm) purple cotton fabric circle. One Phoomph circle is covered with the fabric, the web is centered over it, and the second Phoomph circle is applied from the back before the center is attached to the wreath.
Can the finished wreath be washed?
No soaking or machine washing is recommended for this assembled project. Dust gently and spot clean carefully because the wreath contains straw, fabric bonding sheets, cotton fabric, and hot-glued parts.
Conclusion
This crochet spiderweb Halloween wreath combines bold seasonal colors with satisfying openwork and a playful spider accent. Follow the component order carefully, secure the center and hanging loop firmly, and store the finished wreath gently between seasons. For additional Halloween inspiration, compare it with this Red Heart spiderweb wreath pattern and this crochet Halloween wreath design.