
A Crochet Day of the Dead Pillow is a colorful statement piece featuring a cheerful skull, floral eyes, a decorative nose, zig-zag accents, and a smiling row of teeth. The bold Aruba Sea background makes the bright pink, yellow, pumpkin, blue, green, and black details stand out beautifully. This project is ideal for confident beginners and intermediate crocheters who want to practice shaping, appliqué, color changes, and careful assembly. Display it during Día de los Muertos celebrations, use it as seasonal décor, or give it as a distinctive handmade gift. For another decorative pillow idea, compare it with this crochet floral petal pillow pattern.
Why You’ll Love This Crochet Project
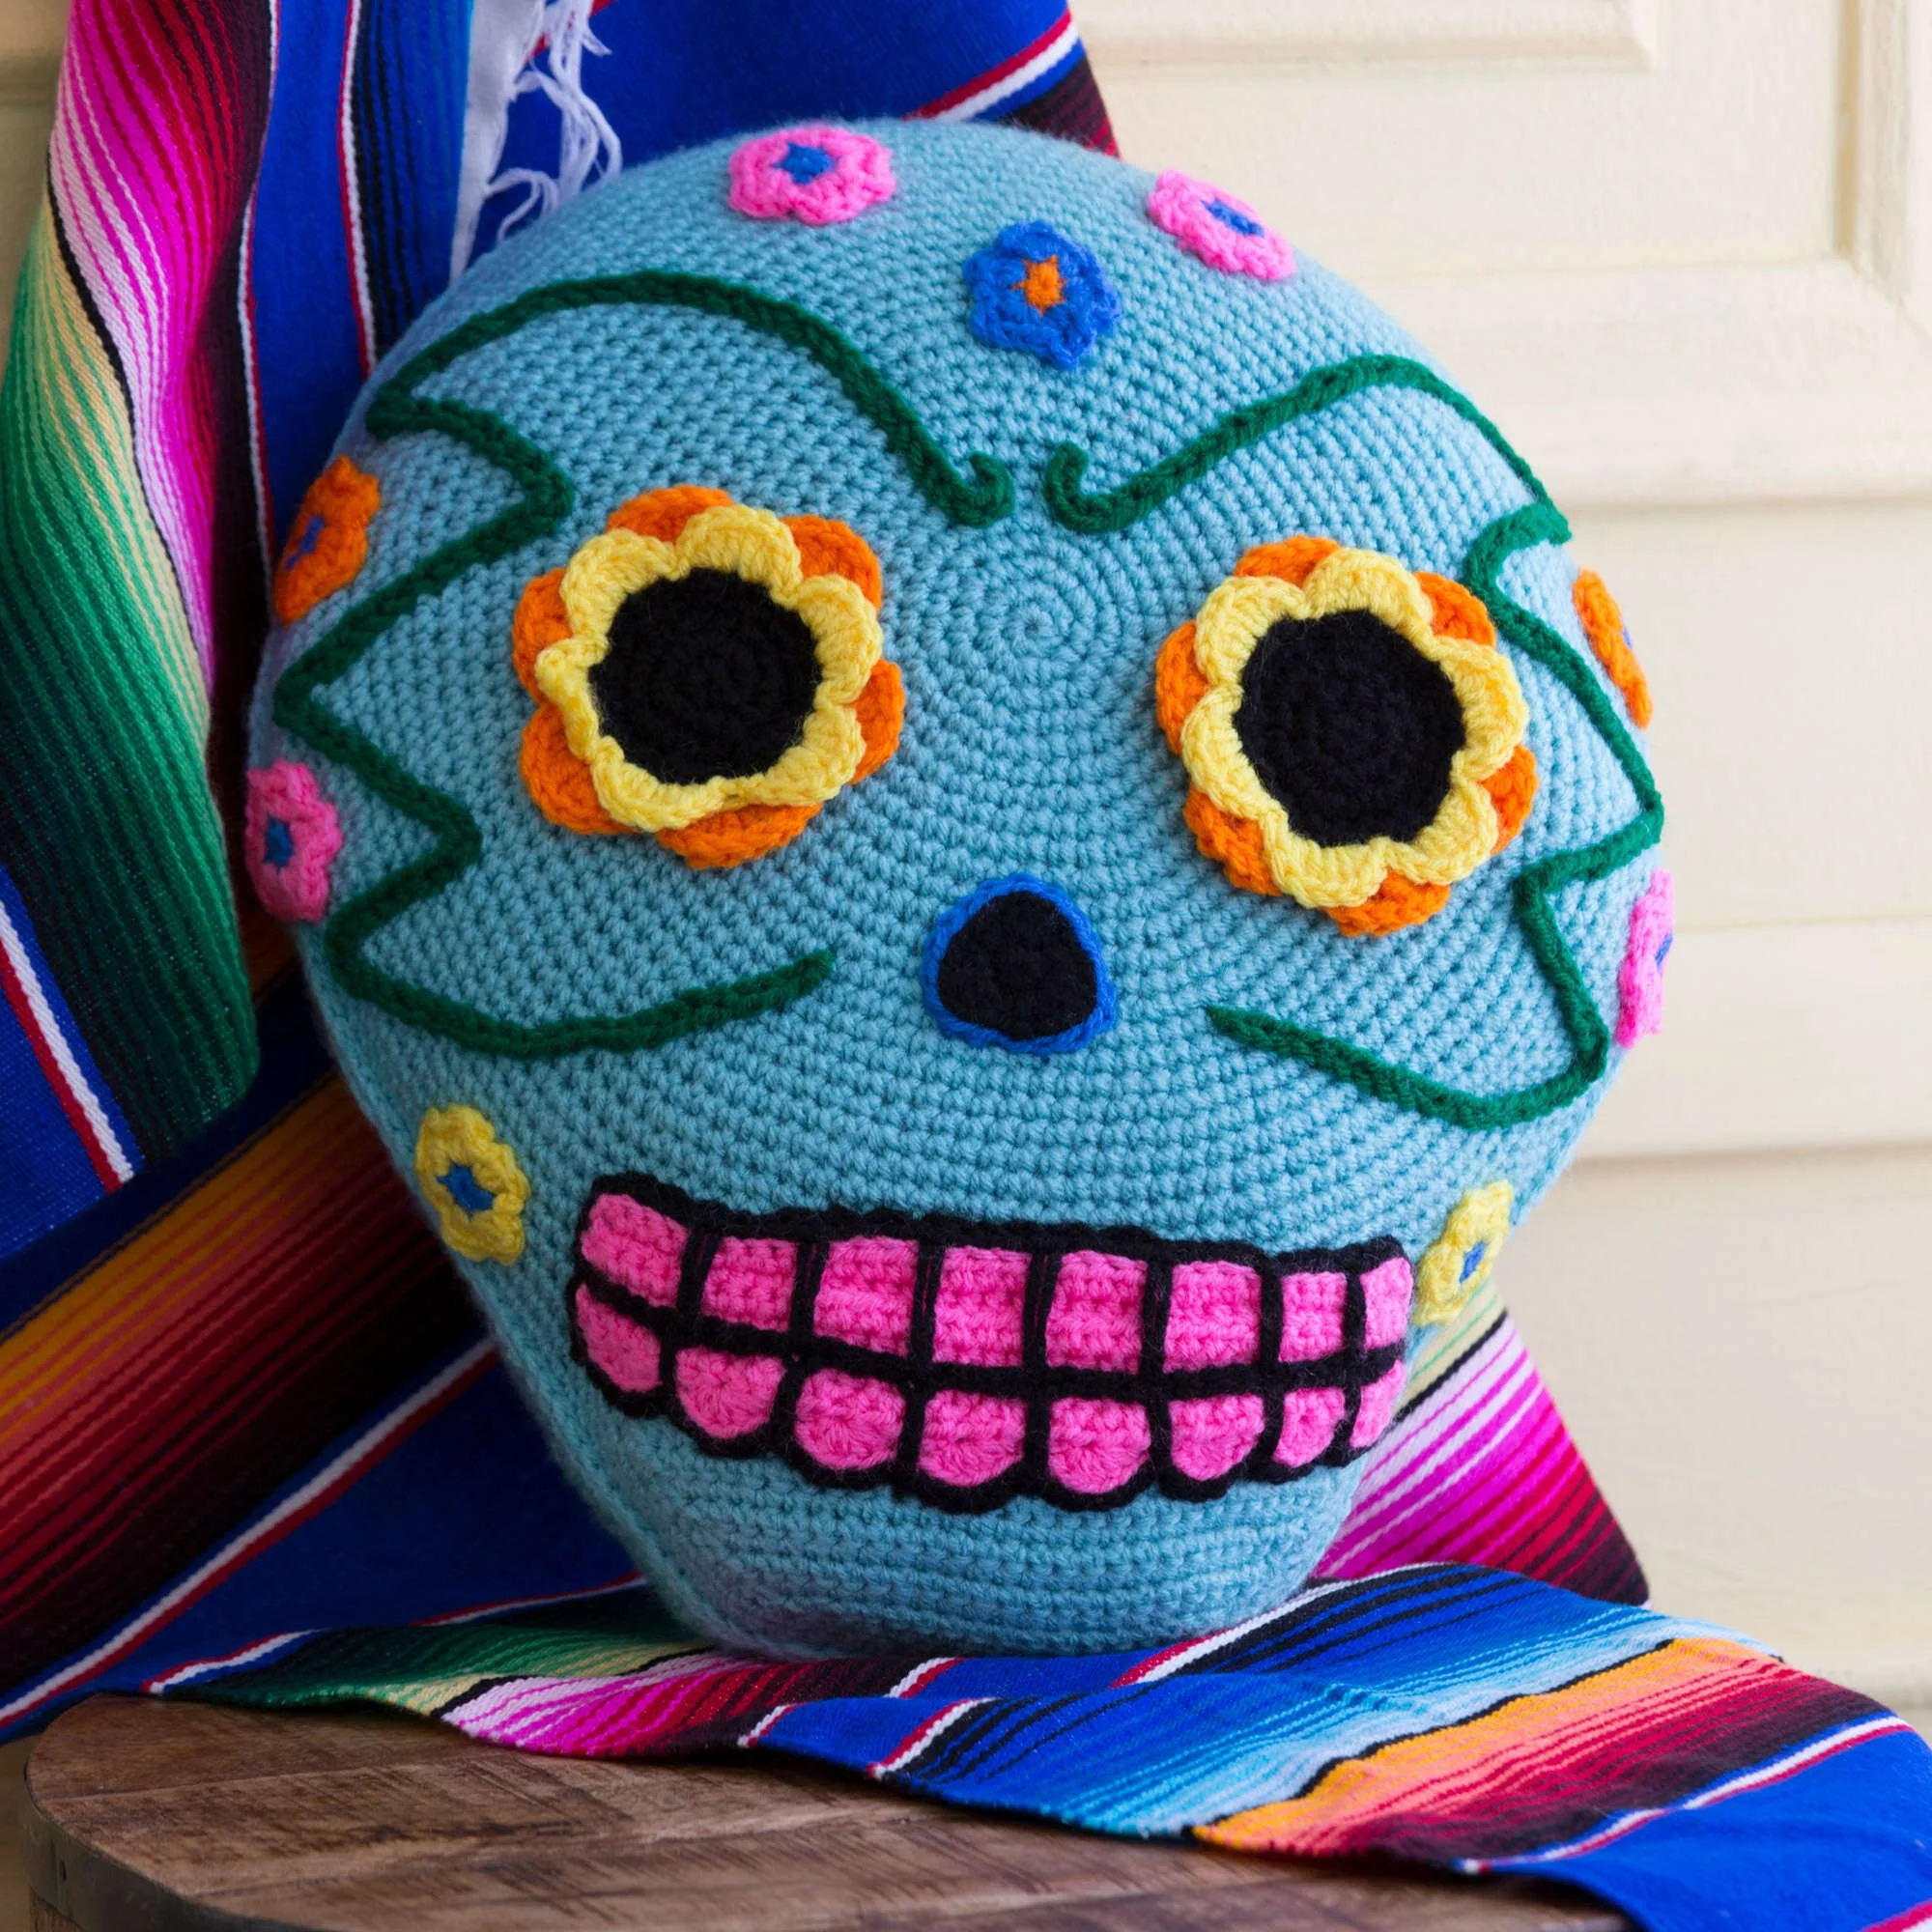
- It combines crochet and appliqué techniques. You will shape two skull panels, then add separate flowers, a nose, teeth, and zig-zag lines.
- The colorwork is bold and festive. The bright palette creates a traditional sugar-skull-inspired look without requiring complicated color changes within the main skull.
- It offers useful shaping practice. The skull uses continuous increases, while the jaw uses rows of decreases and varied stitch heights.
- It makes memorable seasonal décor. The finished pillow can become a focal point for a Día de los Muertos display or a colorful year-round accent.
- It encourages careful sewing skills. Pinning and attaching the facial details gives you practice with placement, neat outlines, and secure finishing.
Crochet Mimi Tip: Keep the six skull markers in place during Rounds 9–29. They divide the round into manageable sections and make the evenly distributed increases much easier to track. You may also find Beginner Friendly Crochet Pattern Red Roses useful.
Before You Start Crocheting
This pattern creates two matching Aruba Sea skull pieces that are shaped with a rounded head and a narrower jaw. The pieces are joined and firmly stuffed to form the pillow body. Optional quilt batting is placed between the crocheted layers to give the pillow additional structure.
You will also make two large eye flowers, nine small flowers, one nose, two zig-zag lines, and one set of teeth. The facial components are sewn onto the stuffed skull after the pillow is closed.
The main construction sequence is:
- Crochet two skulls, including the jaw and edging.
- Optionally cut two batting pieces using a traced skull shape.
- Slip-stitch the skulls together and stuff them firmly.
- Crochet the eye flowers, small flowers, nose, zig-zag lines, and teeth.
- Pin and sew each decorative component in place.
- Weave in the remaining ends.
The key techniques are adjustable rings, continuous spiral rounds, single-crochet increases, decreases, half double crochet, double crochet, treble crochet, front-loop and back-loop work, spike stitches, and appliqué-style sewing.
Abbreviations
- ch: chain
- sc: single crochet
- hdc: half double crochet
- dc: double crochet
- tr: treble crochet
- sl st: slip stitch
- sc-inc: single-crochet increase
- sc2tog: single-crochet two together
- hdc2tog: half-double-crochet two together
- dc2tog: double-crochet two together
Materials You’ll Need
Yarn
Use RED HEART® Super Saver® (Art. E300):
- 2 skeins 505 Aruba Sea A
Only a small amount of the second skein of A is needed. - 1 skein 722 Pretty in Pink B
- 1 skein 312 Black C
- 1 skein 324 Bright Yellow D
- 1 skein 254 Pumpkin E
- 1 skein 886 Blue F
- 1 skein 368 Paddy Green G
Hook
- Susan Bates® Crochet Hook: 4.5 mm [US 7]
Notions and Tools
- Yarn needle
- 6 removable stitch markers: 5 of one color and 1 of a different color
- Sewing pins
- Polyester fiberfill
- 2 pieces of quilt backing, each about 15 x 20” (38 x 51 cm)
- Paper and pencil
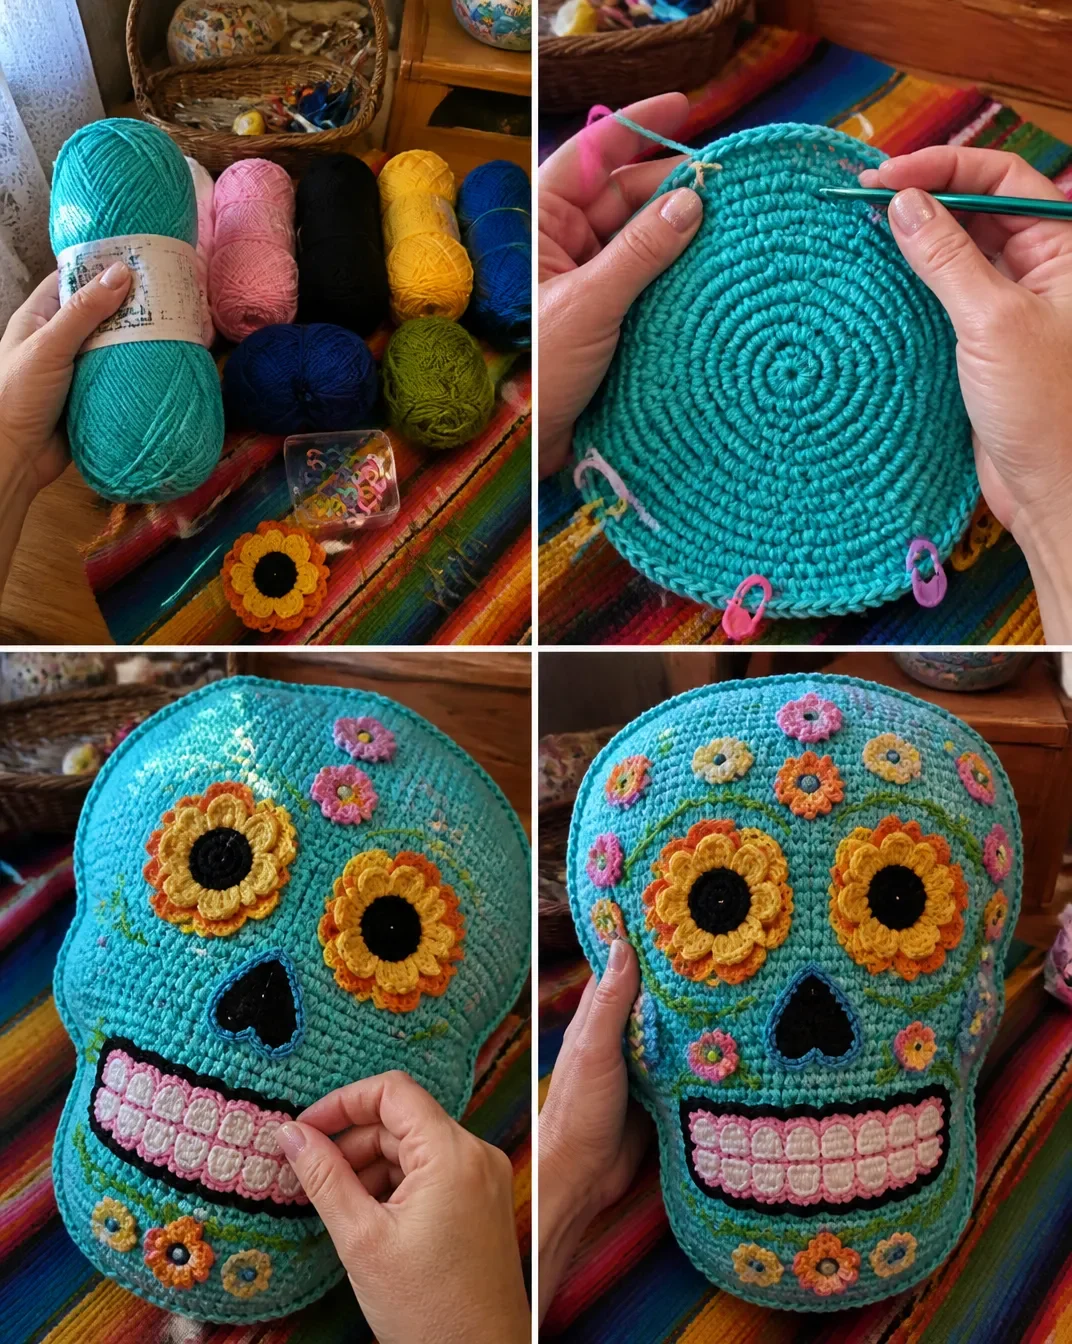
Step-by-Step Crochet Instructions
Special Technique: Adjustable Ring
Wrap yarn into a ring, ensuring that the tail falls behind the working yarn. Pinch the ring and tail between your middle finger and thumb. Insert the hook through the center of the ring, yarn over with the working yarn, and draw up a loop. Work the stitches of the first round in the ring. After the first round is worked, pull gently on the tail to tighten the ring.
Skull Make 2
With A, make an adjustable ring.
Skull Rounds
Round 1 (right side; continuous rounds/spiral): Ch 1, 6 sc in ring; do not join with slip st, work in continuous round (spiral) 6 sc. Place the different colored stitch marker in the last sc made for the end of the round and move the marker up as each round is completed. Pull gently on the tail to tighten the ring.
Round 2: Work 2 sc in each st around 12 sc.
Round 3: [Sc in next st, 2 sc in next st] 6 times 18 sc.
Round 4: [Sc in next 2 sts, 2 sc in next st] 6 times 24 sc.
Round 5: [Sc in next st, 2 sc in next st, sc in next 2 sts] 6 times 30 sc.
Round 6: [Sc in next 3 sts, 2 sc in next st, sc in next st] 6 times 36 sc.
Round 7: [Sc in next 3 sts, 2 sc in next st, sc in next 2 sts] 6 times 42 sc.
Round 8: [Sc in next 6 sts, 2 sc in next st] 6 times 48 sc. Place five more stitch markers, for a total of six markers including the end-of-round marker, to divide the round into six equal sections.
Rounds 9–29: Sc in each st around and work one sc-inc in each of the six sections between markers. Place the sc-inc into a different stitch in each round so that you are never working a sc-inc into another sc-inc 174 sc in Round 29. Do not fasten off. Remove all of the markers.
Jaw
Use the remaining skull stitches and continue with the jaw.
Row 1 (wrong side): Ch 2, which does not count as a st here and throughout, turn, skip first st, dc2tog, dc in next st, hdc in next 3 sts, sc in next 28 sts, hdc in next 3 sts, dc in next st, dc2tog; leave remaining sts unworked 38 sts.
Row 2: Ch 2, turn, dc2tog, dc in next st, hdc in next 3 sts, sc in next 26 sts, hdc in next 3 sts, dc in next st, dc2tog 36 sts.
Row 3: Ch 2, turn, dc2tog, dc in next st, hdc in next 3 sts, sc in next 24 sts, hdc in next 3 sts, dc in next st, dc2tog 34 sts.
Row 4: Ch 1, turn, hdc2tog, hdc in next st, sc in next 28 sts, hdc in next st, hdc2tog 32 sts.
Rows 5–10: Ch 1, turn, sc2tog, sc in each st across to last 2 sts, sc2tog 20 sc in Row 10.
Rows 11 and 12: Ch 1, turn, [sc2tog] twice, sc in each st across to last 4 sts, [sc2tog] 12 sc in Row 12.
Do not fasten off.
Optional Quilt Batting
Place the skull onto a piece of paper and trace around the edge. Add a ½” (13 mm) border all the way around the traced outline. Cut out the paper pattern.
Place the paper pattern onto quilt batting and cut around it. Repeat to cut two pieces of batting. Set them aside.
Skull Edging
Round 1 (right side): Ch 1, do not turn, work 16 sc evenly spaced across the side edge of the jaw, sc into each of the 133 unworked sts of the skull, work 16 sc evenly spaced across the other side edge of the jaw, and sc in each st of Row 12 of the jaw. Place a marker in the last sc made for the end of the round. Move the marker up as each round is completed.
Rounds 2–4: Sc in each st around.
Fasten off and remove the marker. Work the second skull the same as the first, but do not fasten off.
Assemble the Pillow
Hold both skulls with wrong sides together and stitches matching. Working through both thicknesses, slip stitch about ¾ of the way around the skulls.
Place both pieces of batting between the skulls. Place polyester fiberfill between the pieces of batting, stuffing very firmly. Then slip stitch the remainder of the skulls closed, adding additional fiberfill as needed. Fasten off.
Eye Flowers Make 2
Center
With C, make an adjustable ring.
Rounds 1–3: Work the same as Rounds 1–3 of the skull 18 sc.
Round 4: [Sc in next st, 2 sc in next st, sc in next st] 6 times 24 sc.
Round 5: Slip st in each st around.
Fasten off, leaving a long tail for sewing.
Front Petals
Working behind the Round 5 slip sts and into the front loops only of the sc sts of Round 4, join D with slip st in the first st.
[(Hdc, 2 dc) in next st, (2 dc, hdc) in next st, slip st in next 2 sts] 5 times, (hdc, 2 dc) in next st, (2 dc, hdc) in next st, slip st in last st; join with slip st in first slip st 6 petals.
Fasten off.
Back Petals
Working behind the Round 5 slip sts and into the back loops only of the sc sts of Round 4, join E with slip st in the 3rd st, behind the first (2 dc, hdc) of the front petals.
[(Hdc, 2 tr) in next st, (2 tr, hdc) in next st, slip st in next 2 sts] 5 times, (hdc, 2 tr) in next st, (2 tr, hdc) in next st, slip st in next st; join with slip st in first slip st 6 petals.
Fasten off.
Small Flowers Make 9
Make:
- 4 with F for Round 1 and B for Round 2
- 2 with F for Round 1 and D for Round 2
- 2 with F for Round 1 and E for Round 2
- 1 with E for Round 1 and F for Round 2
With the first color, make an adjustable ring.
Round 1 (flower center): Ch 1, 6 sc in ring; join with slip st in first sc 6 sc. Pull gently on the tail to tighten the ring. Fasten off.
Round 2 (petals): Insert the hook in the same st as the join, yarn over with the second color, and draw up a loop. Ch 1, (sc, 2 dc, sc) in each st around; join with slip st in first sc 6 petals.
Fasten off, leaving a long tail for sewing.
Nose
With C, make an adjustable ring.
Round 1: Ch 1, 6 sc in ring; join with slip st in first sc 6 sc. Pull gently on the tail to tighten the ring. Fasten off.
Round 2: Ch 1, beginning in the same st as the join, [(sc, hdc, dc) in next st, (dc, hdc, sc) in next st] 3 times; join with slip st in first sc 18 sc. Fasten off.
Round 3: Insert the hook in the back loop of the same st as the join, yarn over with F, and draw up a loop. Slip st in the back loop of each st around.
Fasten off, leaving a long tail for sewing.
Zig-Zag Lines Make 2
With G, leaving a long beginning tail, make a chain that measures about 25” (63.5 cm) long.
Fasten off, leaving a long tail for sewing.
Teeth
Lower Teeth
With B, ch 34.
Row 1 (right side): Working in the back bumps of the foundation ch, sc in 2nd ch from hook, sc in next 7 ch, hdc in next 16 ch, sc in last 9 ch 33 sts. Place a marker in the last ch worked into.
Row 2: Ch 1, turn, sc in first 8 sts, hdc in next 16 sts, sc in last 9 sts.
Row 3: Ch 1, turn, sc in next st, [skip next st, 5 hdc in next st (shell made), skip next st, sc in next st] 8 times 8 shells.
Fasten off.
Line Between Lower and Top Teeth
With right side facing and working across the opposite side of the foundation ch, join C with slip st in the marked ch; do not remove the marker. Slip st in next 32 ch 33 slip sts.
Fasten off.
Top Teeth
Row 1 (right side): With right side facing, working behind the slip sts of the line between lower and top teeth and into the opposite side of the foundation ch, draw up a loop in the marked ch, ch 1, sc in same ch, sc in next 7 ch, hdc in next 16 ch, sc in last 9 ch 33 sts.
Rows 2–4: Ch 1, turn, sc in next 8 sts, hdc in next 16 sts, sc in last 9 sts. This instruction is given for Rows 2–4.
Fasten off.
Teeth Edging
With right side facing and working into the back loops only of sts in the last row of the lower teeth, draw up a loop of C in the first sc.
[Slip st in next 5 hdc, slip st in next sc, spike into the top loop of the slip st in the line between lower and top teeth that is directly below; do not work the spike too tightly] 7 times.
Slip st in next 5 hdc. Work 7 slip sts evenly spaced across the next side edge of the teeth.
Working into the back loops only of sts in the last row of the top teeth, [slip st in next 4 sts, spike into the free loop of the same slip st as the next spike of the lower teeth] 7 times.
Slip st in next 5 sts. Work 7 slip sts evenly spaced across the side edge of the teeth.
Fasten off, leaving a long tail for sewing.
Finishing
Block pieces if needed.
Assembly
When possible, use the long yarn tails to sew pieces in place. When a long yarn tail is not available, use a separate length of yarn.
Attach Teeth: Pin the teeth to the pillow so that the line between lower and top teeth runs along the first row of the jaw. With C, sew the teeth to the pillow, sewing all the way around the outer edge.
Attach Eye Flowers: Pin the eye flowers to the pillow using the photograph as a guide. The center of each eye should be about 3” (7.5 cm) to each side and ½” (13 mm) below the center ring of the skull. With C, sew the eye to the pillow, sewing around the edge of the center of the eye and leaving the petal edges free.
Attach Nose: Pin the nose to the pillow so that the center of the nose is about 3¼” (8.5 cm) below the center ring of the skull. With F, sew the nose to the pillow, sewing all the way around the outer edge.
Attach Flowers and Zig-Zag Lines: Pin the zig-zag lines and flowers to the pillow, using the photograph as a guide. Sew the pieces in place.
Weave in any remaining ends.
Creative Ways to Use Your Project
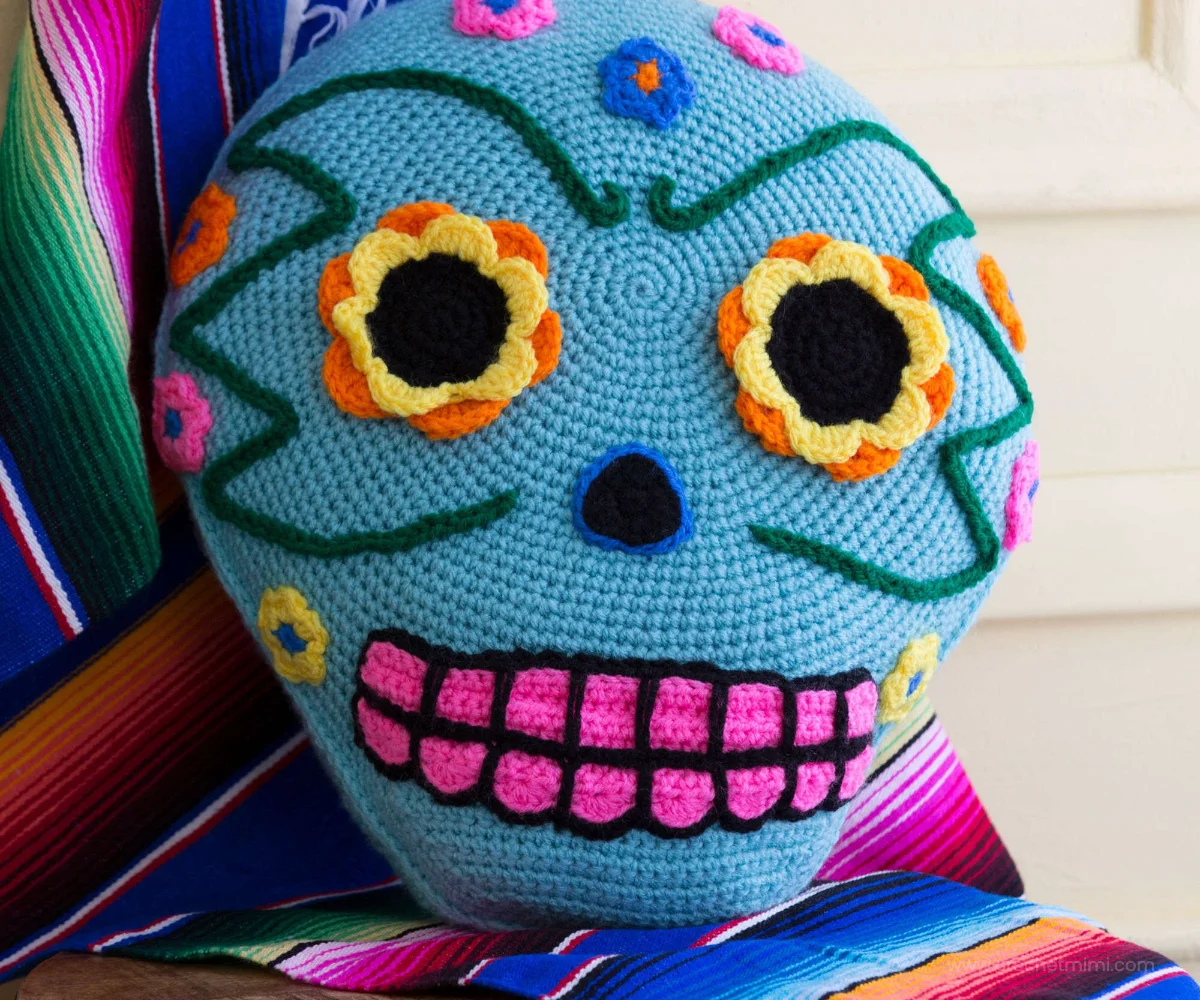
- Display the pillow as the centerpiece of a Día de los Muertos altar or seasonal arrangement.
- Place it on a sofa, reading chair, or entryway bench as a colorful decorative accent.
- Give it as a handmade gift to someone who enjoys skull motifs, bright colorwork, or crochet décor.
- Pair it with other handmade seasonal decorations, such as a crochet Halloween banner, for a festive display.
- Arrange it with coordinated flowers or floral-inspired accents; a crochet bell flower design can provide additional color inspiration.
- Use the pillow as a photography prop for a themed celebration or handmade décor collection.
Caring for Your Crochet Project
Dust the pillow gently with a soft brush or use a vacuum cleaner on a low setting with a fabric attachment. Avoid pressing heavily against the eye flowers, nose, teeth, and zig-zag lines.
For small marks, spot-clean carefully with a lightly damp cloth and mild detergent, testing an inconspicuous area first. Avoid soaking the pillow, especially because it contains polyester fiberfill, quilt batting, and many sewn-on components.
Allow any cleaned area to dry completely away from direct heat. Do not place the pillow in a hot dryer or near a radiator, as excessive heat may affect the shape and appearance of the crocheted fabric.
Store the pillow in a clean, dry location. If it will be packed away after the holiday season, use a breathable storage bag and avoid placing heavy items on top of it. Before displaying it again, gently reshape the skull and check that the appliqués remain securely attached.
Tips for Better Results
- Use the different-colored marker for the spiral round. The other five markers divide Round 8 into six sections, while the different marker identifies the end of each continuous round.
- Move the increase location every round. During Rounds 9–29, each section receives one sc-inc, but the increase must move to a different stitch so that increases do not stack directly on top of one another.
- Count the skull carefully at Round 29. The round should contain 174 sc before you begin the jaw.
- Watch the loop placement on the eye flowers. The front petals are worked into front loops only, and the back petals are worked into back loops only.
- Keep long sewing tails intact. They are especially useful for attaching the eye flowers, small flowers, nose, and teeth.
- Pin before sewing. Secure the teeth, eye flowers, nose, zig-zag lines, and small flowers temporarily so you can adjust the facial balance before making permanent stitches.
- Stuff firmly but evenly. Add fiberfill gradually and check the silhouette from the front before closing the final section.
- Do not pull spike stitches too tightly. The teeth edging specifically instructs you not to work the spikes too tightly, which helps preserve the decorative shape.
Color and Styling Variations
The approved pattern uses a vivid, high-contrast palette, but the decorative components can be recolored optionally.
- Exchange the pink, yellow, and pumpkin eye-petal colors for a coordinated palette while keeping Black C for the eye centers and outlining details.
- Use different combinations for the nine small flowers to create a more symmetrical or more varied arrangement.
- Replace the bright blue nose color with another accent color if you want the facial details to blend more closely with the flowers.
- Choose seasonal colors for the appliqués while retaining Aruba Sea A for the skull background.
- Arrange the small flowers differently around the face after pinning, while keeping the approved components and construction method unchanged.
If substituting yarn, choose a comparable yarn carefully. A different yarn weight, fiber, or hook size may change the fabric density, component dimensions, stuffing requirements, and final proportions. Make a test swatch or component before committing to a full color substitution.
For additional floral color inspiration, browse this crochet daffodil bouquet project and compare its bright yellow-centered palette with the colors used here.
Frequently Asked Questions
Is this project suitable for a beginner?
It is suitable for a confident beginner who understands basic crochet stitches and can follow increases, decreases, continuous rounds, and sewing instructions. The skull shaping and appliqué placement require careful counting.
What yarn and hook does the pattern use?
The pattern uses RED HEART® Super Saver® in the listed colors and a Susan Bates® Crochet Hook measuring 4.5 mm [US 7]. The exact color codes and quantities are provided in the materials section.
How many decorative components are included?
You will make two skulls, two eye flowers, nine small flowers, one nose, two zig-zag lines, and one teeth piece made from lower teeth, a center line, top teeth, and edging.
Can I change the colors?
Yes. Color changes are an optional styling choice. Keep track of the color roles background, outlines, petals, flowers, nose, and zig-zag lines so the finished face remains visually clear.
How are the skull pieces joined?
Hold the two skulls with wrong sides together and matching stitches. Slip stitch through both thicknesses about ¾ of the way around, insert the optional batting and polyester fiberfill, then close the remaining section with slip stitches.
How should the eye flowers be attached?
Pin them first using the stated placement: the center of each eye should be about 3” (7.5 cm) to each side and ½” (13 mm) below the skull’s center ring. Sew around the center edge with C, leaving the petal edges free.
Can I use another yarn?
You can use another yarn as an optional substitution, but the yarn weight and fiber may affect stitch density, dimensions, texture, stuffing, and the amount of yarn required. A different hook size may also change the final proportions.
How do I keep the pillow looking full?
Stuff the pillow very firmly with polyester fiberfill, adding it gradually between the batting pieces. Check the front frequently while closing the pillow so the stuffing is distributed evenly.
Conclusion
This Crochet Day of the Dead Pillow Pattern combines a bold skull shape with colorful flowers, expressive teeth, and decorative accents. It is a satisfying project for practicing shaping and sewn appliqué while creating distinctive seasonal décor. For another reference, compare the Red Heart Day of the Dead pillow pattern or browse a Day of the Dead pillow collection for display inspiration.