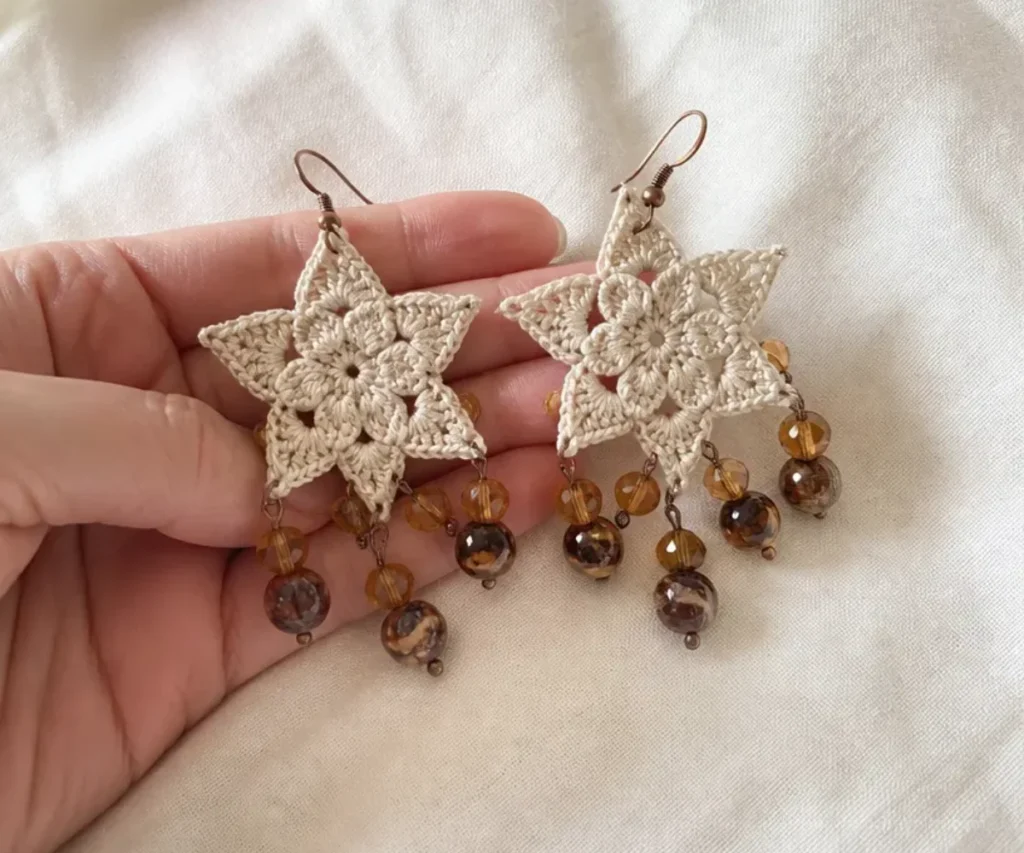
A pair of lightweight crochet flowers becomes a delicate accessory in this Crochet Dangling Flower Earrings Pattern. Natural cotton thread, bronze findings, and warm brown, tan, and topaz beads create a botanical look that is easy to dress up or give as a handmade gift. The small flower motifs also pair beautifully with other floral crochet projects, such as these crochet bell flower designs. Make the earrings for a special occasion, a thoughtful present, or an everyday handmade accessory.
Why You’ll Love This Crochet Project
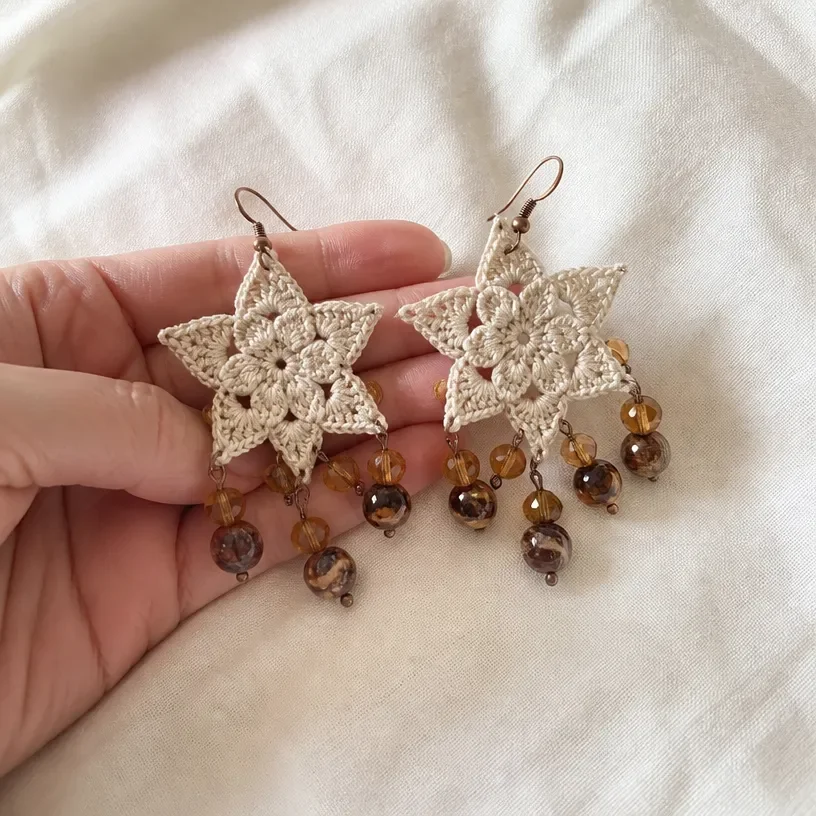
- It uses a small amount of thread. One ball of Size 10 crochet thread is enough for the two flower motifs and leaves plenty for practice.
- The flower shape is distinctive. Popcorn stitches form the centers, while the second round creates six pointed petals.
- The beaded dangles add movement. Each flower receives one large beaded dangle and two smaller side dangles.
- It builds useful skills. You will practice an adjustable ring, popcorn stitches, pointed shaping, joining, and simple jewelry assembly.
- It makes a thoughtful handmade gift. The earrings are compact, lightweight-looking, and easy to coordinate with a recipient’s favorite colors.
Crochet Mimi Tip: Keep the two flowers together as you work so your tension, petal size, and finishing are as consistent as possible.
What to Know Before You Begin
This project consists of two crocheted flowers, two large dangles, four small dangles, and two earwires. Crochet both flowers first, then prepare the beaded headpins before attaching the dangles and earwires.
The flower begins with an adjustable ring. In Round 1, six popcorn stitches are separated by chain-2 spaces. In Round 2, each chain-2 space becomes one pointed petal, creating six points around the flower.
The supplied construction includes:
- Earring Flower: make 2
- Large Dangle: make 2
- Small Dangle: make 4
A neat adjustable ring and even tension are especially helpful because the flower is small and the thread is fine. The beads are attached with headpins, so work carefully with the wire cutter and needle-nosed pliers.
For another floral color and arrangement idea, compare the warm bead palette with the cheerful colors used in this crochet daffodil bouquet pattern.
Materials and Tools
- AUNT LYDIA’S® Classic Crochet Thread, Size 10: 1 ball, 226 Natural
- Susan Bates® Steelite® Crochet Hook: 1.65mm [US 7 steel hook]
- Yarn needle
- 6 bronze headpins
- 2 bronze earwires
- Four 6mm brown and tan spectra glass beads (sample used Color Gallery by Bead Treasures model #987149)
- Two 8mm brown and tan spectra glass beads (sample used Color Gallery by Bead Treasures model #184911)
- Six 4mm lab topaz gem cut glass beads (sample used Color Gallery by Bead Treasures model #648915)
- Wire cutter
- Needle-nosed pliers
The 8mm and 4mm beads are used for the two large dangles, while the 6mm and 4mm beads are used for the four small dangles. The bronze findings coordinate with the warm bead colors and provide the hardware needed for assembly.
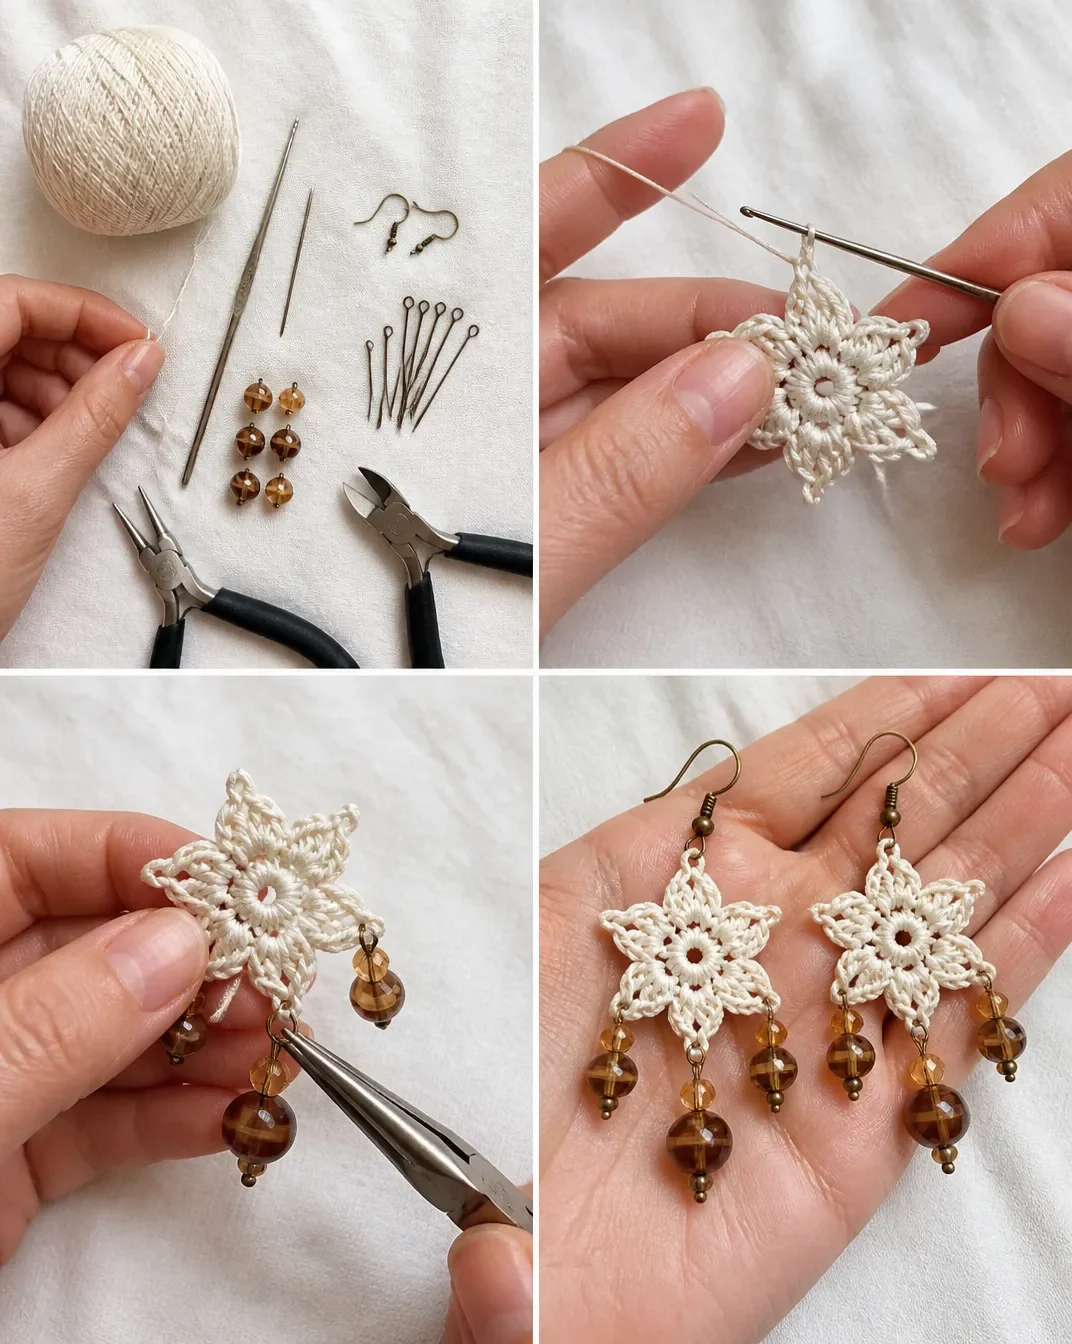
Step-by-Step Crochet Instructions
Special Technique: Adjustable-Ring Method
Wrap yarn into a ring, ensuring that the tail falls behind the working yarn. Grip ring and tail firmly between middle finger and thumb. Insert hook through center of ring, yarn over with the working yarn, and draw up a loop. Work stitches of the first round in the ring, working over both strands the tail and the ring. After the first round of stitches is worked, pull gently but firmly on the tail to tighten the ring.
Earring Flower Make 2
Make an adjustable ring.
Round 1 Right Side
Beg-pop in ring, [ch 2, popcorn in ring] 5 times, ch 2; join with slip st in first popcorn 6 popcorns and 6 ch-2 spaces.
Pull gently but firmly on the tail to tighten the ring.
Round 2
Ch 1, *(hdc, dc, ch 3, slip st in 2nd ch from hook [point made], ch 1, dc, hdc) in next ch-2 space, slip st in next popcorn; repeat from * around ending with last slip st in beginning ch 6 points.
Fasten off.
Make the second flower using the same instructions. Before moving to the jewelry assembly, check that each flower has six clearly formed points and that the thread tails are long enough to weave in securely.
Large Dangle Make 2
- Place an 8mm bead on a headpin, then place a 4mm bead on the headpin.
- Leaving ½ inch (1.5 cm) above the last bead, use the wire cutter to cut off the unused length of headpin.
- Insert the headpin through the point directly opposite the earwire and pinch the loop closed with pliers.
Prepare one large dangle for each flower. The headpin should be closed securely, while still allowing the bead assembly to hang freely.
Small Dangle Make 4
- Make the same as the large dangle, with 6mm beads in place of 8mm beads.
- Insert a headpin through the point on each side of the large dangle and pinch the loops closed.
Each flower receives two small dangles, one on either side of the large dangle. Check the placement before closing each loop completely.
Assembly
Earwires
With pliers, open the loop of each earwire, insert it through any point on each flower, then pinch the loop closed.
Choose a point that allows the flower to hang naturally. Since the flower has six points, rotate the earwire slightly if needed so both earrings face the same direction when worn.
Finishing
Weave in ends. Block and lightly starch as needed.
Blocking helps the six points settle into an even flower shape. Use only a light amount of starch and allow the thread to dry completely before handling the earrings.
Ways to Display Your Finished Crochet
- Wear them as an everyday accessory. The neutral flower and warm bead combination works with casual or dressier clothing.
- Give them as a handmade gift. Pair the earrings with a small jewelry box or a handmade card for a personal presentation.
- Create a coordinated floral set. Use the same natural thread and warm colors in a larger floral project, such as crochet red roses, for a gift collection.
- Make seasonal colorways. Use pale beads for spring, jewel tones for winter, or earthy shades for autumn while keeping the approved construction unchanged.
- Style them with handmade accessories. A small crochet pouch, doily, or floral gift wrap can make the earrings feel like part of a complete handmade ensemble.
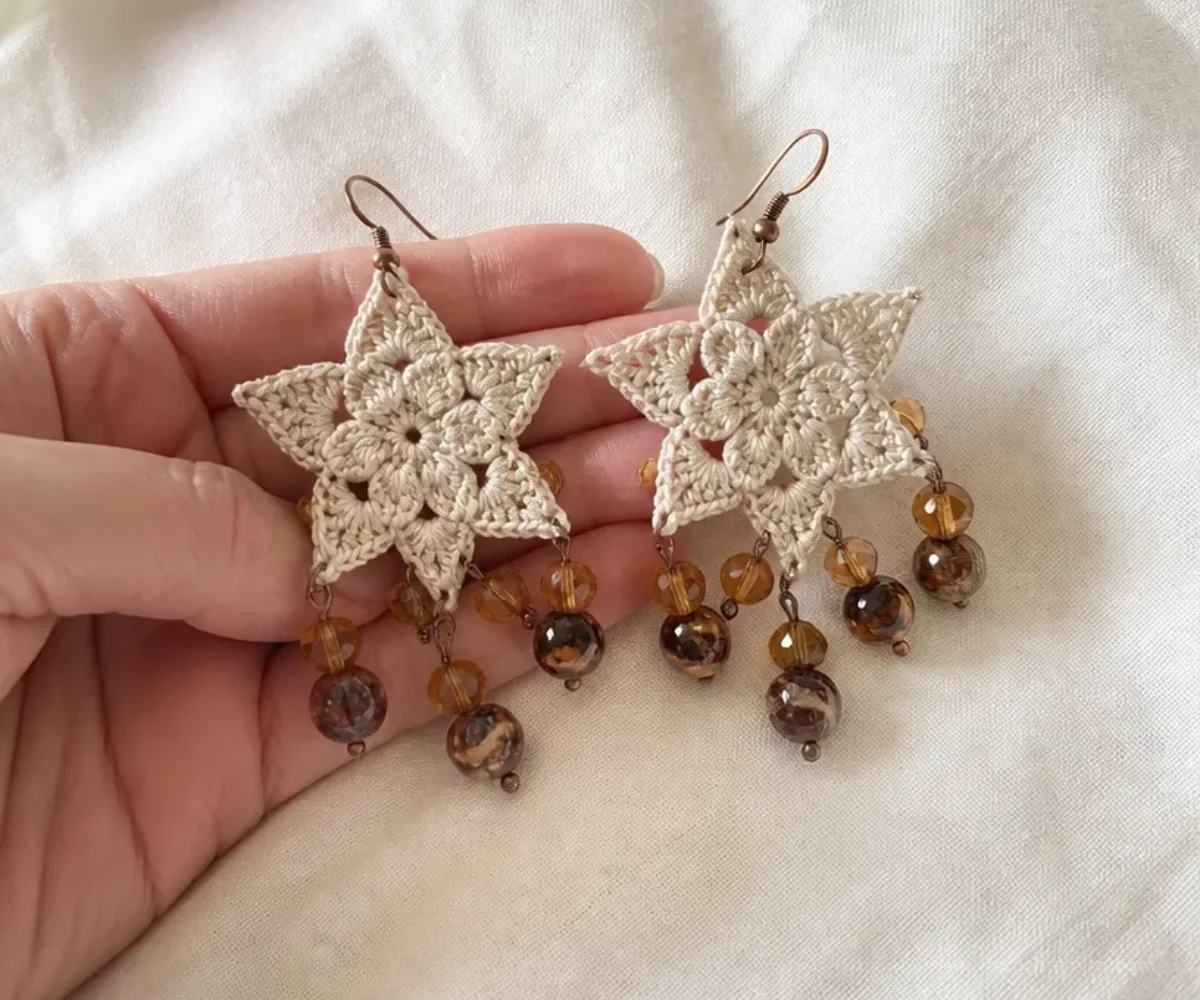
Caring for Your Crochet Project
Store the earrings flat or hanging in a dry jewelry box so the crocheted flowers do not become crushed. Keep them away from excessive heat, humidity, perfumes, and sprays, which may affect the thread, starch, or metal findings.
Dust the flowers gently with a soft, dry brush. If a spot needs attention, use minimal moisture on a cloth and dab carefully rather than soaking the earrings. Allow them to dry fully before storing.
The beaded headpins and earwires should be handled gently. Avoid pulling on the dangles or catching them on clothing. If a flower loses its shape, reshape the points carefully with your fingers and lightly restarch as needed.
Tips for Better Results
- Keep the adjustable ring secure. Hold both the working yarn and tail firmly while making the first round so the popcorn stitches stay inside the ring.
- Count the first round carefully. You should finish with six popcorns and six chain-2 spaces.
- Work each petal into a chain-2 space. The petal sequence in Round 2 is worked in the next ch-2 space, followed by a slip stitch in the next popcorn.
- Form the point consistently. The slip stitch in the second chain from the hook creates the point in each petal.
- Compare the two flowers before assembly. Similar tension and evenly tightened centers help the earrings look like a matching pair.
- Leave the headpin length specified. Cutting the wire after leaving ½ inch (1.5 cm) provides the length needed to form and close the loop.
- Close jewelry loops completely. Use needle-nosed pliers to pinch each loop closed so the dangles and earwires remain attached.
- Block after weaving in ends. Light blocking and starching can help the six points lie evenly without changing the approved stitch structure.
Creative Ways to Customize Your Project
The following are optional styling ideas and do not change the approved pattern instructions:
- Change the thread color. A soft cream, muted pink, pale yellow, or deep burgundy can give the same flower a different seasonal mood.
- Coordinate the beads. Keep the bead sizes and quantities the same, but choose colors that complement the thread.
- Use a cool-toned palette. Silver findings with blue, lavender, or gray beads can create a cooler version of the design. Changing the findings may alter the overall appearance but not the crochet instructions.
- Match a floral gift set. Coordinate the earrings with a beginner-friendly mandala crochet doily or another small handmade accessory.
- Try a larger display-inspired palette. For a coordinated collection, draw colors from a blooming bouquet crochet blanket.
- Avoid changing hook or thread size casually. A different thread weight or hook size can change the flower’s dimensions, petal definition, drape, and yarn requirements. Make a sample flower first if you decide to experiment.
Frequently Asked Questions
Is this project suitable for a beginner?
It is approachable for a beginner who is comfortable with basic crochet stitches and willing to work with fine thread. The project also includes bead and wire assembly, so careful handling is important.
What yarn and hook are recommended?
The approved pattern uses AUNT LYDIA’S® Classic Crochet Thread, Size 10, in 226 Natural, with a Susan Bates® Steelite® Crochet Hook measuring 1.65mm, or a US 7 steel hook.
How many crocheted flowers are needed?
Make two earring flowers, one for each earring. Each flower has six popcorns in Round 1 and six pointed petals in Round 2.
How many dangles does each earring receive?
Each earring receives one large dangle and two small dangles. Across the pair, make two large dangles and four small dangles.
Can the thread color be changed?
Yes. Changing the thread color is an optional styling choice. Keep in mind that the selected thread should still work comfortably with the 1.65mm hook and preserve the small, defined flower shape.
How are the beads attached?
The beads are placed on bronze headpins. The headpins are trimmed with a wire cutter, then inserted through the designated flower points and closed with needle-nosed pliers.
How should the earrings be stored?
Store them in a dry place where the flowers will not be crushed. Keep them away from moisture, excessive heat, perfumes, and heavy pressure on the beaded dangles.
Can the flower be lightly starched?
Yes. The finishing instructions say to block and lightly starch as needed. Use a light application and let the earrings dry completely before wearing or storing them.
Conclusion
This crochet dangling flower earrings pattern combines pointed thread flowers, warm beads, and simple jewelry findings into a delicate handmade accessory. Follow the component counts and assembly order carefully, then personalize the color palette to suit a gift or wardrobe. For additional inspiration, browse the free Aunt Lydia’s dangling flower earrings pattern and explore handmade styles in the crochet flower earrings marketplace.