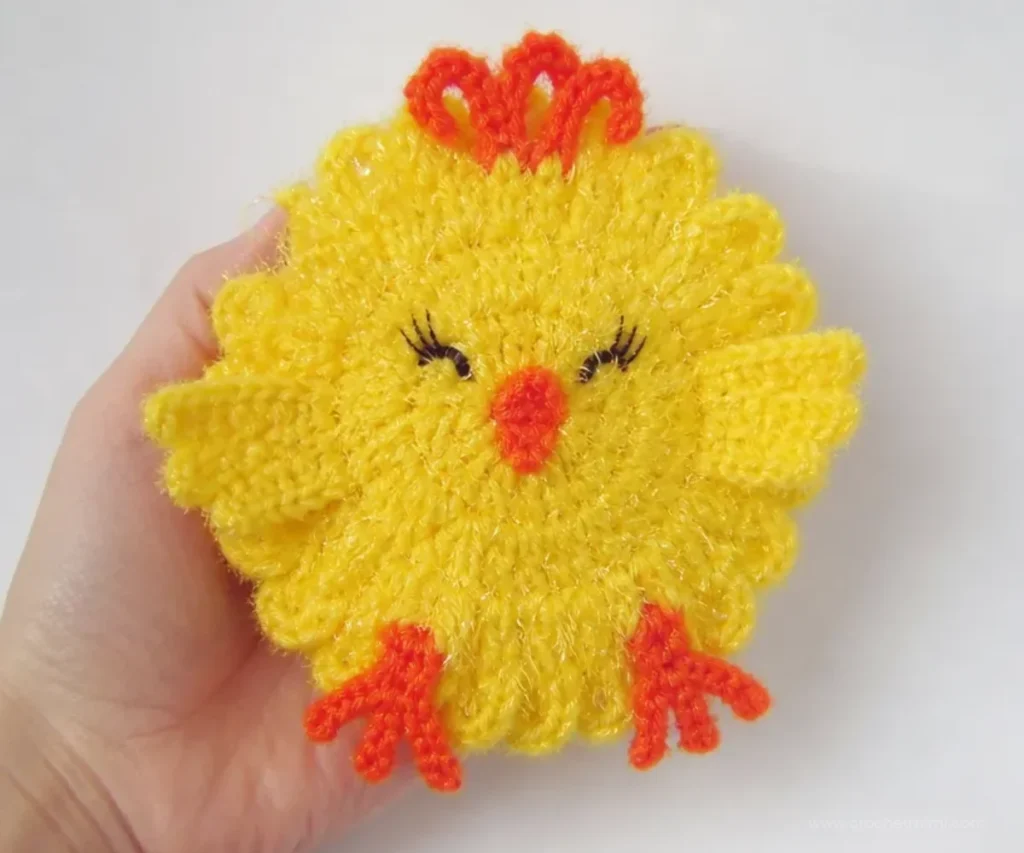
Crochet Cute Chickie Scrubby Pattern makes a cheerful, textured kitchen helper with a sweet chick face, tiny wings, feet, beak, comb, and eyelashes. Worked in sparkly scrubby yarn, this project is useful for dishwashing while also making a fun handmade gift or springtime accent. The pattern is especially appealing to crocheters who enjoy shaping details and colorful character designs. For another bright handmade idea, you may also enjoy these beginner-friendly crochet roses.
Why You’ll Love This Crochet Project
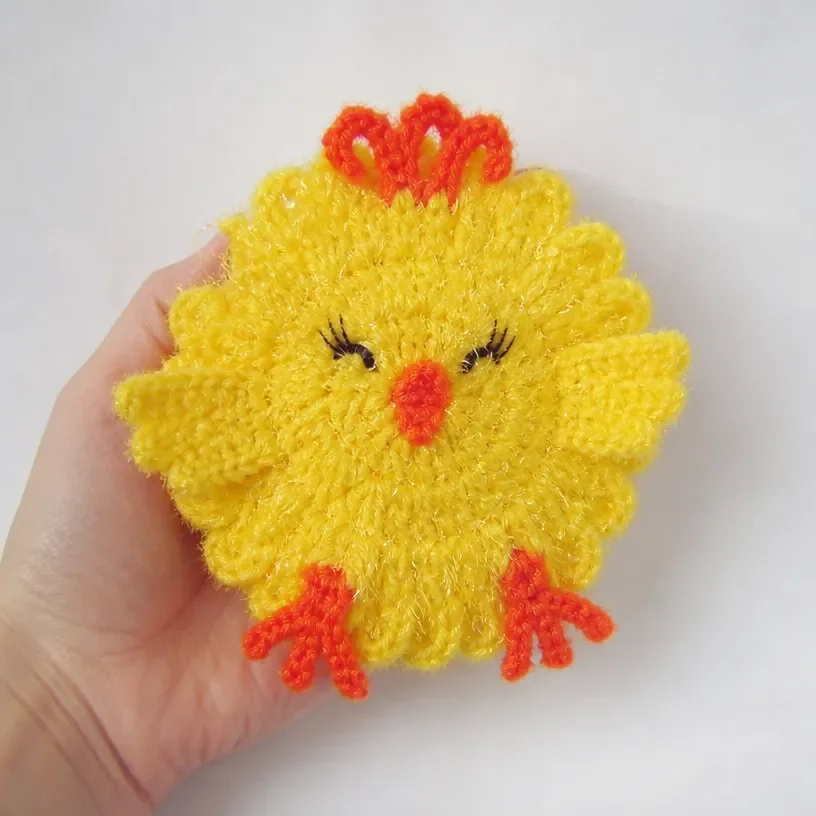
- It combines usefulness with personality. The finished chickie is a scrubby rather than a purely decorative item, so it can bring a little charm to everyday kitchen tasks.
- You practice several techniques. The pattern includes an adjustable ring, joined rounds, feather-like edging, small shaped wings, a raised head, and separate facial details.
- The texture is eye-catching. RED HEART® Scrubby Sparkle™ gives the body a dimensional surface and a subtle shine.
- It makes a cheerful gift. A completed chickie can be paired with kitchen accessories or given as a small handmade spring or Easter-inspired present.
- The colorwork stays manageable. Lemon forms the body, while small amounts of orange and licorice create the feet, beak, comb, and eyelashes.
Crochet Mimi Tip: Keep the three colors in separate project bags or bowls so the small orange and licorice pieces do not become tangled with the main body yarn. You may also find Crochet Halloween Banner Pattern Diy Party Decor useful.
Before You Start Crocheting
This project begins as a circular scrubby worked in Lemon, then develops a feathered edge and a shaped chick character. The body is made in rounds, while the wings are worked in short rows directly from the body. Orange details are added afterward for the feet, beak, and comb, followed by licorice eyelashes.
The construction sequence is:
- Crochet the circular scrubby through Round 7.
- Work the first wing, head, and second wing.
- Add the first foot, second foot, beak, and comb.
- Secure the beak and create the eyelashes.
- Weave in ends and seal the knots.
The pattern uses US crochet terminology. Useful abbreviations include:
- ch: chain
- sc: single crochet
- hdc: half double crochet
- dc: double crochet
- tr: treble crochet
- slip st: slip stitch
- sc2tog: single crochet two together
Materials You’ll Need
- RED HEART® Scrubby Sparkle™: 1 ball each
- 8215 Lemon, A
- 8260 Orange, B
- 8012 Licorice, C
- Susan Bates® Crochet Hook: 5mm [US H-8]
- Yarn needle
- Dritz Fray Check® liquid seam sealant
Only small quantities of B and C are needed for this project. The yarn needle is used for weaving in ends and handling the eyelashes, while the seam sealant helps keep knots and yarn ends from unraveling.
Crochet Pattern Instructions
Special Techniques
Adjustable ring: Wrap yarn into a ring, ensuring that the tail falls behind the working yarn. Grip ring and tail firmly between middle finger and thumb. Insert hook through center of ring, yarn over with the working yarn, and draw up a loop. Work stitches of the first round in the ring, working over both strands the tail and the ring. After the first round of stitches is worked, pull gently but firmly on the tail to tighten the ring.
Join with sc: Place a slip knot on the hook, insert the hook in the indicated stitch, yarn over, and pull up a loop. Yarn over and draw through both loops on the hook.
Join with slip st: Place a slip knot on the hook, insert the hook in the indicated stitch, yarn over, and draw through the stitch and loop on the hook.
Scrubby Body
With A, make an adjustable ring.
Round 1 Right Side
Ch 1, 8 sc in ring 8 sc.
Pull gently on the tail to tighten the ring and close the center.
Round 2
Ch 1, *2 sc in next sc, sc in next sc; repeat from * around 12 sc.
Round 3
Ch 1, 2 sc in each sc around; join with slip st in first sc 24 sc.
Round 4
Ch 4, which counts as the first dc and ch 1, then dc in the same st as join.
*Skip next sc, (dc, ch 1, dc) in next sc; repeat from * around, skip last dc; join with slip st in 3rd ch of beginning ch-4 24 dc and 12 ch-1 spaces.
Round 5
Ch 1, (sc, hdc, ch 2, slip st) in same st as join (Right Feather made), skip next ch, (slip st, ch 2, hdc, sc) in next dc (Left Feather made).
*(Sc, hdc, ch 2, slip st) in next dc, skip next ch, (slip st, ch 2, hdc, sc) in next dc; repeat from * around; join with slip st in first sc 12 Right Feathers and 12 Left Feathers.
Fasten off.
Round 6 Wrong Side
With Wrong Side facing and holding yarn between Feathers, join A with sc using the special joining technique in any ch-1 space of Round 3.
(Ch 3, sc) in each ch-1 space around; join with slip st in first sc; turn 24 sc, 12 ch-3 spaces.
Round 7 Right Side
Ch 1, slip st in first ch-3 space, ch 3, which counts as the first dc, then 4 dc in the same space.
Work 5 dc in each ch-3 space around; join with slip st in top of beginning ch 60 dc.
Round 8
See Notes above.
First Wing
Ch 7; turn.
Row 1: Sc in 2nd ch from hook and next 5 ch, slip st in next dc; turn 6 sc.
Row 2: Sc in first 4 sc, slip st in next sc, leave last sc unworked, ch 1; turn 4 sc.
Row 3: Skip slip st, sc in next 4 sc, slip st in next dc; turn 4 sc.
Row 4: Sc in first 2 sc, slip st in next sc, leave last sc unworked, ch 1; turn 2 sc.
Row 5: Skip slip st, sc in next 2 sc, slip st in next dc (first Wing made) 2 sc.
Sc in next 9 dc.
Head
Ch 4, which counts as the first tr. Working from left to right, skip 3 sc to the right of the current st, slip st in 4th sc. Working from right to left, 10 tr in the same dc as the last sc made (Head made) 11 tr.
Skip next 4 dc, sc in next 4 dc; slip st in next dc.
Second Wing
Ch 3; turn.
Row 1: Sc in 2nd ch from hook and next ch, slip st in next dc; turn 2 sc.
Row 2: Sc in first sc, 2 sc in next sc, ch 2; turn 3 sc.
Row 3: Sc in 2nd ch from hook and in each sc, slip st in next dc; turn 4 sc.
Row 4: Sc in next 3 sc, 2 sc in last sc, ch 2; turn 5 sc.
Row 5: Sc in 2nd ch from hook and in each sc, sc in next dc (second Wing made) 7 sc.
Sc in each remaining 35 dc around; join with slip st in space between last and first dc 43 sc, 2 Wings, one 11-tr Head.
Fasten off.
First Foot
With Right Side facing, join B with sc using the special joining technique in 13th sc from second Wing.
Ch 3, sc in same sc, (sc, ch 3, sc) in next 2 sc 6 sc, 3 ch-3 loops.
Fasten off.
Second Foot
With Right Side facing, skip next 5 sc, join B with sc in next sc.
Ch 3, sc in same sc, (sc, ch 3, sc) in next 2 sc 6 sc, 3 ch-3 loops.
Fasten off.
Beak
With Right Side facing, join B with sc around post of 6th tr of Head. Sc around post of same tr, ch 1, turn, sc2tog.
Fasten off.
Comb
Join B with slip st in 5th tr of Head.
(Ch 3, slip st in 2nd ch from hook and in last ch, slip st) in same tr as join.
(Sl st, ch 3, slip st in 2nd ch from hook and in last ch, slip st) in next 2 tr 3 sections.
Fasten off.
Finishing
Carefully slide the Beak down the tr as far as possible.
Draw the beginning tail to the Wrong Side between the 5th and 6th tr. Draw the end tail to the Wrong Side through the top of the same dc as the base of the tr.
Tie the tails together without pulling the Beak to the Wrong Side.
Eyelashes
Using the photo as a guide, cut two 8″ (20.5 cm) strands of C.
With “Eyelashes” pointing up, wrap 1 strand around the 4th tr of the Head 3 times.
Draw the tails to the Wrong Side and tie them together, taking care not to pull so tightly on the ends as to pull the Eyelashes to the Wrong Side.
Repeat around the 8th tr of the Head.
With the needle, carefully straighten the Eyelashes upward and bring out fullness.
Trim the ends of the tails close to the Head.
Final Steps
Weave in ends.
Apply sealant to all knots and ends to prevent unraveling.
Apply sealant to the Eyelashes also, if desired, to seal them in place.
Ways to Display Your Finished Crochet
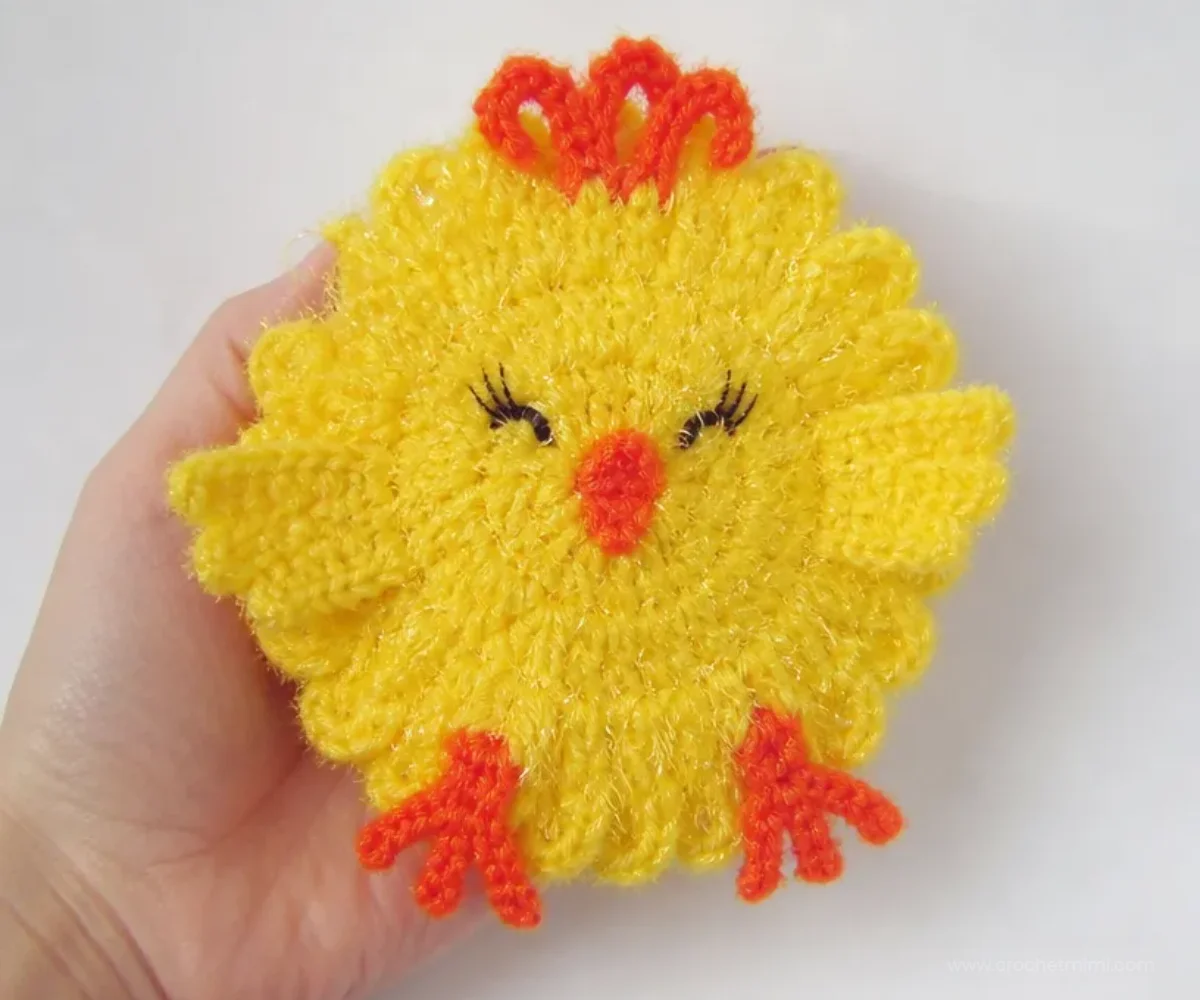
- Use it as a cheerful kitchen scrubby. Keep the chickie near the sink where its textured surface can be useful for suitable dish and household cleaning tasks.
- Make a spring kitchen display. Place the finished scrubby in a small basket with coordinated yellow, orange, or green accessories.
- Give it as a handmade gift. Pair it with a dish towel, wooden spoon, or kitchen-themed gift basket.
- Create a seasonal collection. Crochet several chickies with different facial details or color accents for a bright spring display.
- Add it to a practical care package. Its small size and useful purpose make it a fitting addition to a housewarming or hostess gift.
- Coordinate it with other crochet décor. Floral-themed pieces such as these crochet bell flower designs can complement a cheerful handmade display.
Caring for Your Crochet Project
The scrubby yarn has a textured surface, and the finished character includes small decorative details, so handle it gently.
- Shake or gently dust the scrubby to remove loose crumbs and surface dust.
- Spot-clean carefully rather than soaking the entire piece.
- Avoid excessive heat, which can affect the yarn texture and the shape of the small details.
- Allow the scrubby to dry completely before storing it.
- Store it in a dry, breathable place rather than pressing it beneath heavy items.
- Check the beak, comb, feet, and eyelashes periodically to ensure the knots remain secure.
- If the scrubby is used for cleaning, keep it separate from harsh chemicals and follow the yarn manufacturer’s care guidance when available.
Tips for Better Results
- Use a firm but comfortable tension. Scrubby yarn can be textured and less visually forgiving than smooth yarn, so consistent tension helps keep the circular body even.
- Count each round. The stitch counts 8, 12, 24, and 60 help confirm that increases and ch-3 spaces are developing correctly.
- Mark the beginning if needed. A removable stitch marker can make it easier to identify the first stitch when joining Round 3 and later rounds.
- Pay attention to the Wrong Side and Right Side. Round 6 is worked with the Wrong Side facing, and the project turns again for Round 7.
- Keep the feather sequence in order. Round 5 alternates Right Feathers and Left Feathers; maintaining the sequence helps the edge look balanced.
- Work slowly around the head. The head uses 11 treble stitches and a specific left-to-right, then right-to-left construction.
- Do not over-tighten the facial details. When securing the beak and eyelashes, tie the tails firmly enough to hold them but not so tightly that the pieces pull through.
- Seal knots only after positioning. Check the beak and eyelashes carefully before applying Fray Check® liquid seam sealant.
For another decorative crochet direction, the crochet floral petal pillow pattern offers a useful example of how texture can become the main visual feature of a handmade project.
Creative Ways to Customize Your Project
These options are separate from the approved instructions and are intended only as design inspiration.
- Change the accent palette. Keep Lemon for the body and try a different bright shade for the feet, beak, and comb if you have a compatible scrubby yarn.
- Use a coordinated kitchen color scheme. Orange accents can be matched with towels, potholders, or storage baskets in warm seasonal colors.
- Create a group of chickies. Make several using the same pattern but vary the accent colors or eyelash placement for individual expressions.
- Coordinate with floral décor. A chickie can sit beside a spring arrangement, including a handmade crochet daffodil bouquet.
- Try a different yarn cautiously. Changing yarn fiber, thickness, or hook size may affect the scrubby texture, stitch definition, finished dimensions, and yarn requirements. Any substitution should be treated as an adjustment rather than an exact reproduction.
Frequently Asked Questions
Is this crochet chickie scrubby suitable for a beginner?
It includes beginner-accessible stitches such as single crochet, half double crochet, double crochet, treble crochet, chains, and slip stitches. However, the shaped wings, head, and feathered edge require careful counting and attention to stitch placement.
What yarn and hook size does the pattern use?
The approved pattern uses RED HEART® Scrubby Sparkle™ with a Susan Bates® 5mm [US H-8] crochet hook. Color A is 8215 Lemon, B is 8260 Orange, and C is 8012 Licorice.
How many wings, feet, and eyelashes does the finished chickie have?
The pattern creates 2 Wings, one 11-tr Head, 2 feet, one beak, one comb with 3 sections, and two eyelash details made from Licorice.
Can I change the colors?
Yes, color changes are an optional design choice. The approved pattern uses Lemon for the scrubby and Orange for the feet, beak, and comb, with Licorice for the eyelashes. Substituting yarn may change the texture and appearance.
Why is Round 6 worked with the Wrong Side facing?
The pattern specifically instructs you to face the Wrong Side and hold the yarn between the Feathers before joining A. Follow that orientation carefully so the later textured round and character features form correctly.
How do I keep the beak in position?
After crocheting the beak, carefully slide it down the tr as far as possible. Draw the beginning tail to the Wrong Side between the 5th and 6th tr, draw the end tail through the top of the same dc as the base of the tr, and tie the tails without pulling the beak to the Wrong Side.
How should I secure the eyelashes?
Wrap one 8″ (20.5 cm) strand of C around the 4th tr three times, tie the tails on the Wrong Side, and repeat around the 8th tr. Straighten the eyelashes upward, trim the tails close to the head, and apply sealant if desired.
Can the finished scrubby be machine washed?
The supplied instructions do not specify machine washing. Because the scrubby has textured yarn and small attached details, gentle dusting or careful spot cleaning is the safer approach unless the yarn manufacturer’s care instructions state otherwise.
Conclusion
This Crochet Cute Chickie Scrubby Pattern turns textured yarn into a practical and charming kitchen helper. The feathered edge, shaped wings, raised head, orange details, and tiny eyelashes give it plenty of character. For additional inspiration, compare it with the Red Heart Cute Chickie Scrubby pattern or browse cute handmade dish scrubbers for gift ideas.