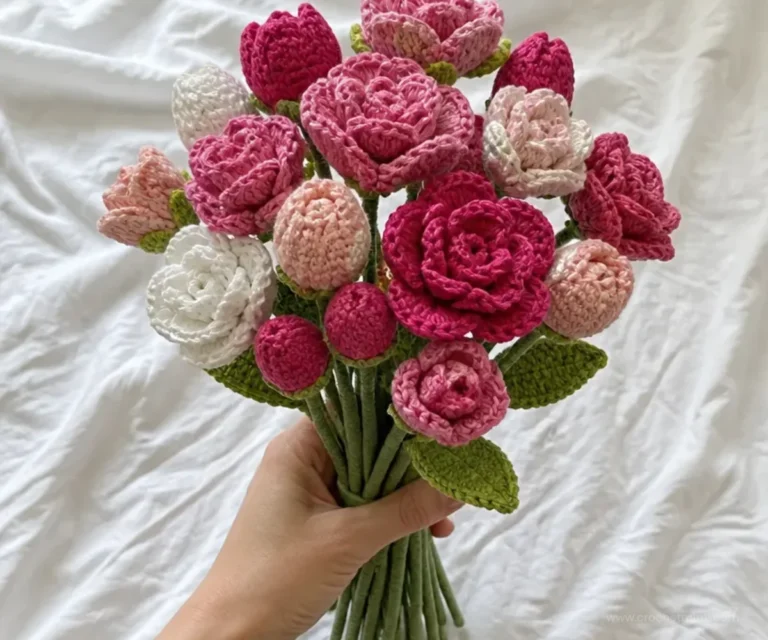

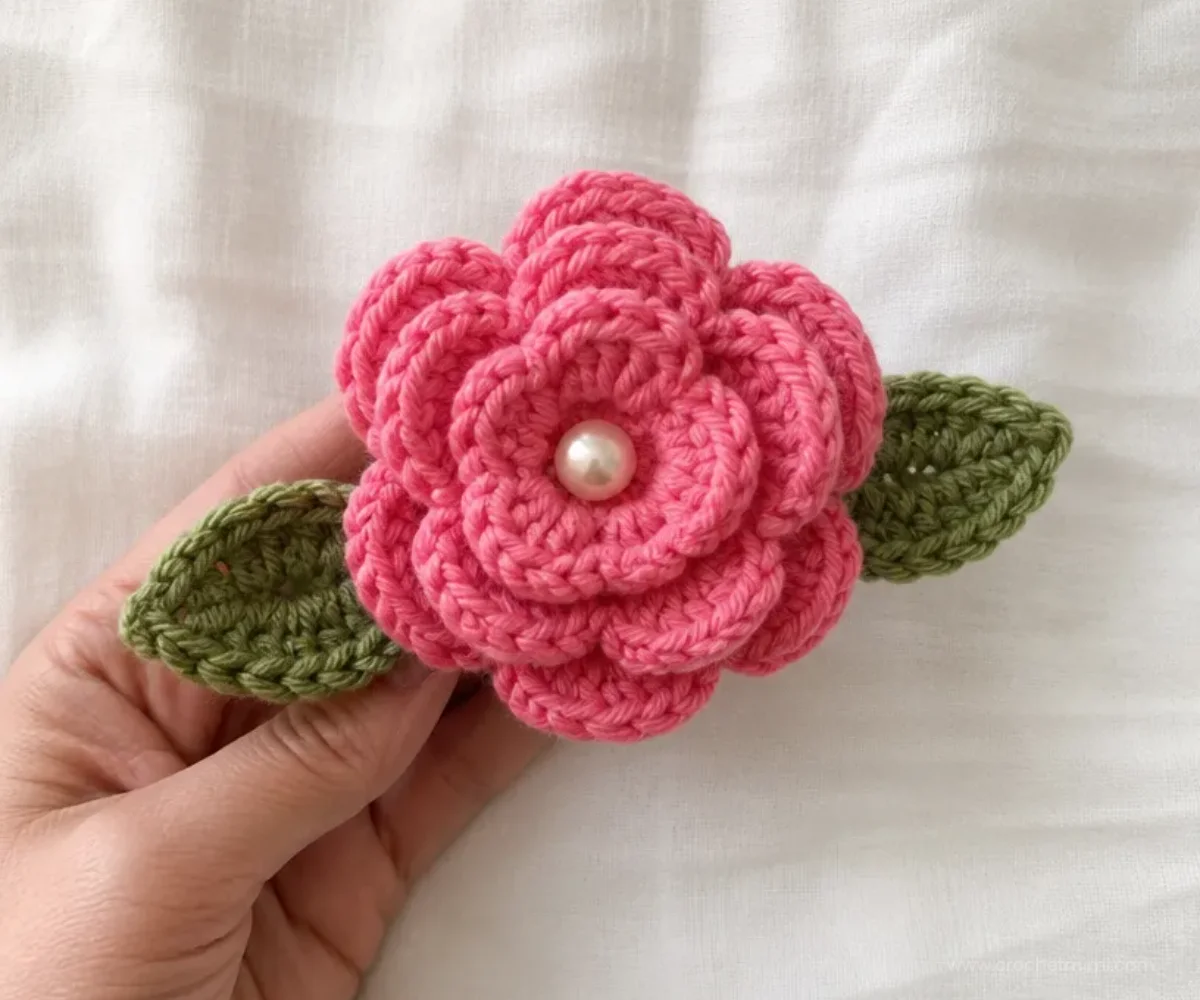
A felted rose pin brings together layered petals, a pair of leaves, and a neat fabric-style backing in a wearable floral accent. This Crochet Felted Rose Pin Pattern uses Peony-colored yarn for the flower and Thyme for the leaves, creating a rich botanical look. The project is a lovely way to practice crocheted shaping and felting, and it can become a gift, jacket accessory, bag embellishment, or decorative addition to a seasonal display. For another floral idea, compare its layered shape with these beginner-friendly crochet red roses.
Why You’ll Love This Crochet Project
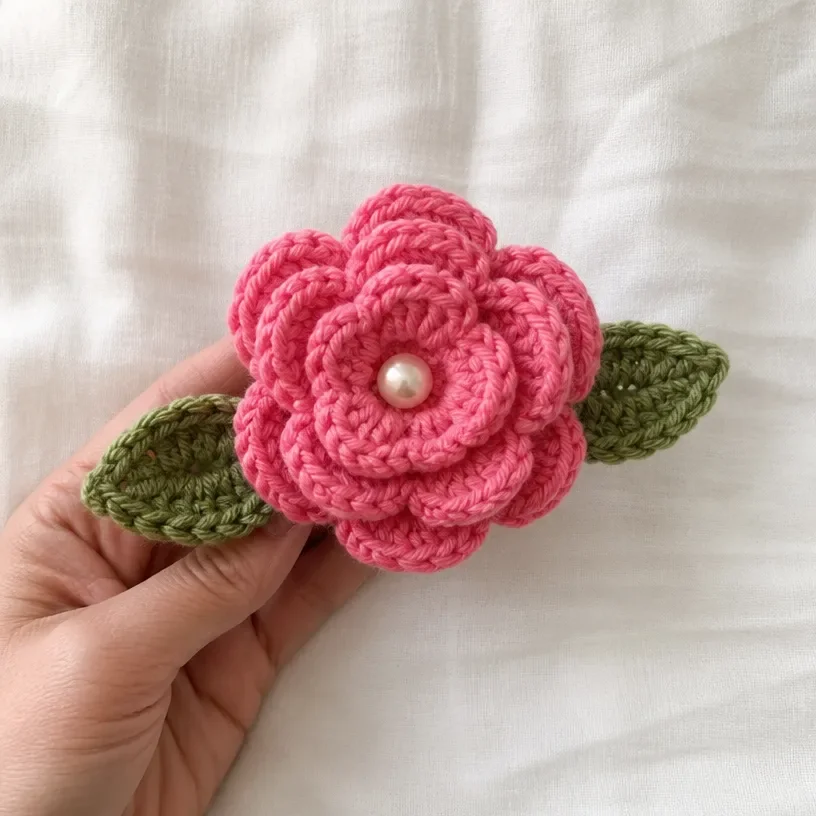
- It creates dimensional petals. The rose grows from five small first-round petals into five larger petals and then ten outer petals, giving the flower a full, layered appearance.
- Felting adds structure. Washing the wool pieces in hot water helps compact the stitches and gives the rose and leaves a denser, more fabric-like finish.
- It uses a small number of components. You will crochet one rose, two leaves, and one circular backing before assembling the pin.
- It makes a thoughtful handmade gift. The finished flower can be attached to clothing, a scarf, tote bag, or gift wrapping.
- It offers useful practice. The pattern reinforces working behind petals, locating specific loops, crocheting into chain spaces, and shaping with increases.
Crochet Mimi Tip: Keep the rose petals arranged with the center opening visible before felting. This makes it easier to identify the flower’s layers while you shape the finished piece. You may also find Crochet Bear Ornament Pattern Easy Diy Christmas Ornament useful.
Before You Start Crocheting
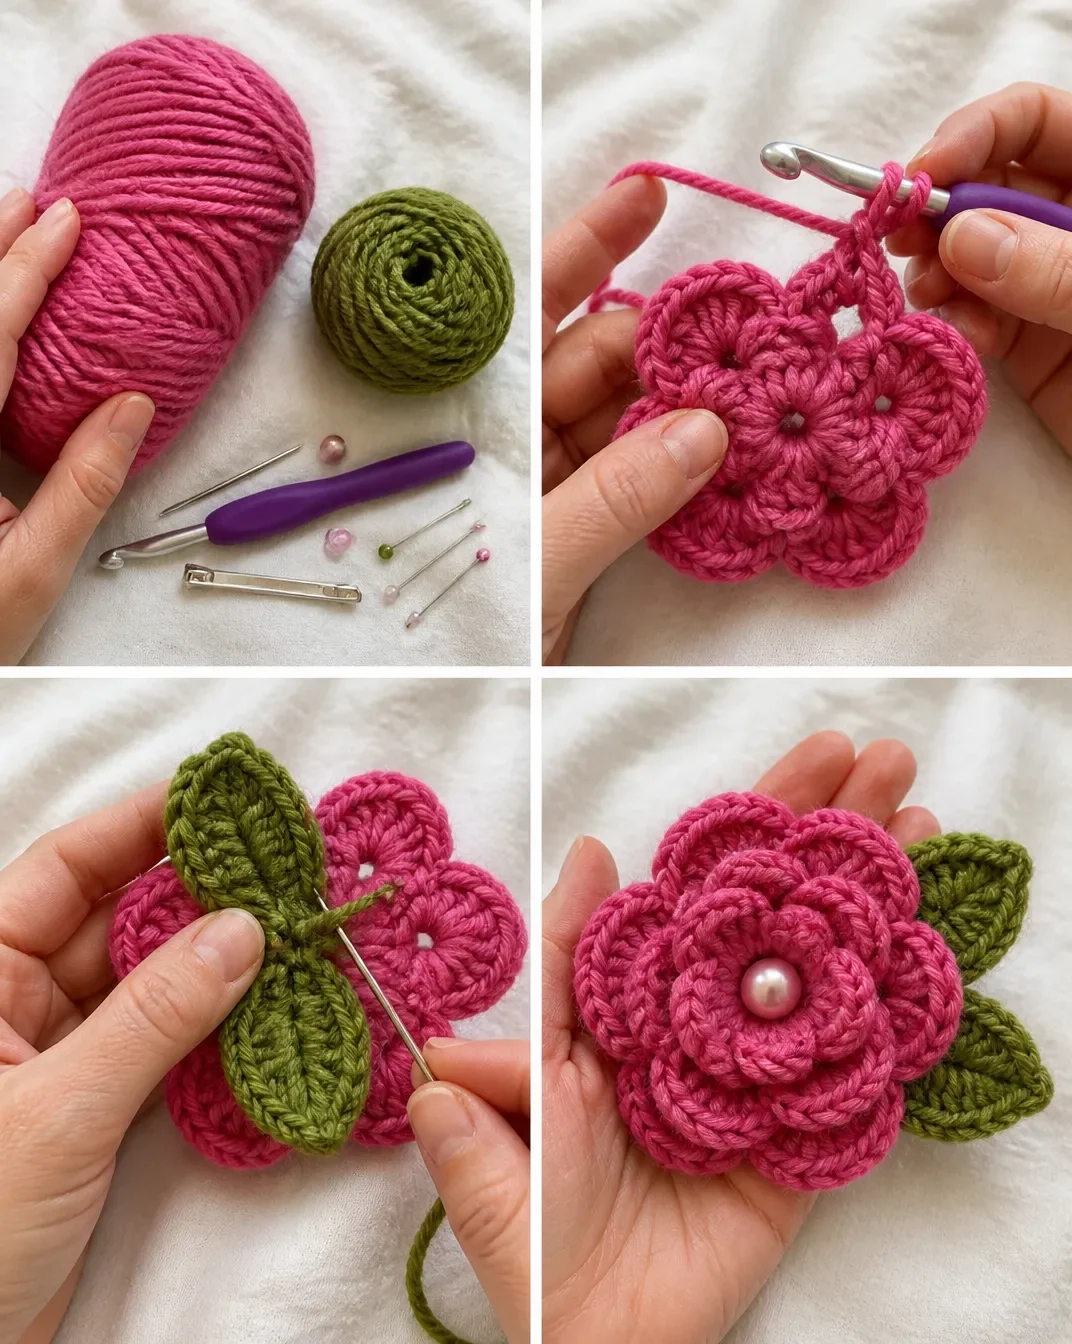
The project consists of one crocheted rose, two green leaves, a circular backing, a bead or button for the flower center, and a 1 ½-inch bar pin. The rose and leaves are felted before assembly, while the backing is crocheted separately and attached afterward.
The construction sequence is:
- Crochet the rose in Color A.
- Crochet two leaves in Color B.
- Felt the rose and leaves in pillowcases.
- Block the pieces and allow them to dry.
- Crochet the circular backing in Color A.
- Sew the center embellishment, leaves, backing, and bar pin into place.
Pay close attention to the instructions that specify working behind the petals, into the back loops, or into the upside-down “V.” These placements create the layered structure of the flower and the balanced shape of each leaf.
For a similarly decorative crochet project that emphasizes circular shaping, this beginner-friendly mandala doily pattern offers useful inspiration for careful round construction.
Helpful Abbreviations
- ch: chain
- sc: single crochet
- hdc: half double crochet
- dc: double crochet
- slip st: slip stitch
Materials You’ll Need
- Stitch Nation by Debbie Stoller™ Full o’ Sheep™ yarn, 1 ball each
- 2705 Peony A (Color A)
- 2640 Thyme B (Color B)
- Crochet hook: 8 mm [US L-11]
- Sharp yarn needle
- 1 bead or button
- 1 ½” bar pin
- Straight pins
The Peony yarn forms the rose and backing, while Thyme creates the two leaves. The straight pins are used while shaping and assembling the pieces. The bead or button becomes the flower’s center, and the bar pin turns the completed crochet into a wearable accessory.
Step-by-Step Crochet Instructions
Rose (Flower)
Round 1
With A, ch 3; join with slip st to first ch forming a ring.
Ch 1, [(sc, ch 2, 2 dc, ch 2) in ring] 5 times; join to first sc – 5 petals.
Round 2
Working behind the petals, ch 1, slip st into back of first sc, ch 2;
[slip st into the back of the next sc, ch 2] 4 times; join to first slip st – 5 ch-2 spaces.
Round 3
Ch 1; [(sc, ch 2, 3 dc, ch 2, sc) in next ch-2 space] 5 times; join to first sc – 5 petals.
Round 4
Working behind the petals, ch 1, slip st into back of first sc;
[ch 2, skip 1 dc, slip st into the 2 strands at the base of the next dc, ch 2, slip st into the upside down “V” formed by the last sc of one petal and the first sc of the next petal] 4 times;
ch 2, skip 1 dc, slip st into back of next dc, ch 2, join to first slip st – 10 ch-2 spaces.
Round 5
Ch 1, [(sc, ch 2, 3 dc, ch 2, sc), in next ch-2 space] 10 times; join to first sc – 10 petals.
Fasten off and weave in ends.
Leaves (Make 2)
Each leaf is worked in Color B. Complete the center vein first, then work the leaf body around it.
Center Vein
With B, ch 7; working into the back of the chains, slip st into the second ch from the hook, slip st in next 5 ch, ch 1 – 6 slip sts.
Leaf Body
Round 1: Starting on the opposite side and working into the back loops of the center vein;
(slip st, ch 1, hdc) into first ch, dc into next 3 ch, hdc in next ch, sc in next ch, (slip st, ch 2, slip st) into back loop of turning chain;
working down the slip st side, sc in next slip st, hdc in next slip st, dc in next 3 slip sts, (hdc, ch 1, slip st) into last slip st;
join to turning ch – 16 sts.
Fasten off and weave in ends.
Repeat the complete leaf instructions to make the second leaf.
Felting
Before assembling the flower, put the pieces into pillowcases and tie closed.
Place them in a washing machine with hot water and a small amount of detergent.
Check during the wash cycle regularly until desired amount of felting is achieved.
Rinse soap and squeeze out excess water.
Block into desired shapes and let dry.
Hint: Overlap the outer petals of the rose, pin into place and let dry.
Felting changes the texture and density of the crocheted wool, so check the pieces regularly rather than leaving them unattended for the entire cycle. Shape the rose while it is still damp, using the straight pins to hold the outer petals in their overlapping position.
Backing
Round 1
With A, ch 2, 6 sc in second ch from the hook; join to first sc – 6 sc.
Round 2
Ch 1, 2 sc in each sc; join to first sc – 12 sc.
Round 3
Ch 1, 2 sc in first sc, sc in next sc; [2 sc in next sc, sc in next sc] 5 times; join to first sc – 18 sc.
Round 4
Ch 1, 2 sc in first sc, sc in next 2 sc; [2 sc in next sc, sc in next 2 sc] 5 times; join to first sc – 24 sc.
Fasten off and weave in ends.
Assembly
- Sew bead or button into the middle of the rose.
- Arrange two leaves on the back of rose; pin into place and stitch to the rose with B.
- Place backing on the rose, over the leaves; pin and stitch into place with A.
- Sew bar pin onto back.
When positioning the leaves, place them so their tips extend naturally beyond the lower edge of the rose without covering too much of the flower. Pinning all layers before stitching helps maintain the intended arrangement.
Creative Ways to Use Your Project
- Wear it on a jacket or cardigan. The bar pin makes the finished rose suitable for clothing and adds a botanical accent to a plain outfit.
- Decorate a handbag or tote. Attach the pin to a sturdy fabric section, keeping it away from areas that receive frequent friction.
- Give it as a small handmade gift. A felted rose pin is compact, easy to wrap, and suitable for birthdays, spring celebrations, or handmade gift exchanges.
- Use it on a scarf or shawl. The rose can act as a decorative closure when positioned carefully through a stable portion of the fabric.
- Create a floral accessory collection. Pair the rose with other crochet flowers or use several finished pins in complementary colors. A larger floral-themed project such as this blooming bouquet crochet blanket can inspire coordinated color choices.
- Style it with seasonal décor. Display the pin on a fabric-covered board, decorative basket, or wrapped gift when it is not being worn.
Caring for Your Crochet Project
The rose and leaves are felted wool components, while the completed piece also includes a bead or button, sewn threads, and a metal bar pin. Handle it gently to protect the shaped petals and attached hardware.
- Dust the flower with a soft, dry brush or cloth.
- For a small mark, use careful spot cleaning rather than soaking the completed pin.
- Allow the piece to dry completely if it becomes damp, and reshape the petals gently while they are still flexible.
- Store the pin flat or in a small box so the petals are not crushed.
- Keep it away from excessive heat, which may distort the wool shaping or affect the backing.
- Check the bead, stitches, leaves, and bar pin periodically, especially if the accessory is worn often.
- Keep the piece away from rough surfaces that could catch the yarn or pull the petals out of shape.
Tips for Better Results
- Keep the rose rounds organized. Round 1 creates five petals, Round 3 creates five larger petals, and Round 5 creates ten outer petals. Counting the completed petals after each round helps confirm that the structure is developing correctly.
- Work carefully behind the petals. Rounds 2 and 4 establish the spaces for the next petal layers. If these slip stitches are placed incorrectly, the outer petals may not sit evenly.
- Watch the specified insertion points. The leaf instructions alternate between the back loops of the center vein and the slip-stitch side. Follow those placements exactly to maintain the leaf outline.
- Do not skip the stitch counts. The leaves finish with 16 stitches, while the backing increases from 6 to 12, 18, and 24 stitches. These counts provide useful checkpoints.
- Shape during drying. The felting hint specifically calls for overlapping the outer petals, pinning them, and letting them dry. This step helps the rose hold its layered form.
- Secure ends before assembly. Fasten off and weave in ends on the rose, leaves, and backing before joining the components, so loose tails do not interfere with the seams.
- Pin the layers before sewing. Temporarily pin the leaves and backing in place, then inspect the front and back before stitching.
- Use neat, firm stitches for the bar pin. Sew through the backing securely, but avoid pulling so tightly that the circular piece puckers.
For a non-floral accessory that also rewards careful shaping and finishing, this chic crochet aviator hat pattern provides another useful example of structured crochet construction.
Color and Styling Variations
The following ideas are optional styling variations and do not change the approved instructions:
- Try another flower shade. Replace Peony with a different wool color for a deeper red, soft pink, burgundy, cream, or autumn-toned rose. A yarn change can affect the finished color, texture, and amount required.
- Keep the greenery contrasting. Thyme creates a natural leaf color, but a deeper green or muted gray-green can produce a different botanical effect.
- Create a coordinated set. Make several pins using one leaf color and multiple flower colors for a small collection of interchangeable accessories.
- Use seasonal palettes. Warm reds and greens suit winter displays, while blush, coral, and fresh green can create a spring-inspired arrangement.
- Coordinate the button or bead. Choose a center embellishment that echoes the backing, contrasts with the petals, or complements the intended clothing.
- Experiment only with care when changing yarn. Using a different fiber or yarn thickness may change how well the pieces felt, alter the stitch definition, and affect the final size and structure. Changing the hook size can also affect the fabric, so treat substitutions as optional experiments rather than part of the approved pattern.
Frequently Asked Questions
Is this crochet felted rose pin pattern suitable for beginners?
It can be approachable for beginners who are comfortable with chain stitches, slip stitches, single crochet, half double crochet, double crochet, joining rounds, and basic sewing. The most important learning points are working behind petals and following specific loop placements.
How many leaves does the pattern include?
The pattern includes two leaves. Complete the center vein and leaf body once, then repeat the instructions to make the second leaf.
What yarn and hook are recommended?
The pattern specifies Stitch Nation by Debbie Stoller™ Full o’ Sheep™ yarn, one ball each of 2705 Peony A and 2640 Thyme B, with an 8 mm [US L-11] crochet hook.
Why are the rose and leaves felted before assembly?
Felting compacts the wool stitches and gives the flower and leaves a denser, more structured fabric-like texture. The source instructions also direct you to shape the rose petals during drying.
Can I change the flower color?
Yes. Changing Color A is an optional color variation. Keep in mind that a different yarn or fiber may respond differently during felting and may change the texture or final appearance.
When is the backing added?
The backing is crocheted after the rose and leaves have been felted, shaped, and dried. During assembly, it is placed over the leaves on the back of the rose and stitched into place with A.
How is the center finished?
Sew the bead or button into the middle of the rose after felting and drying, before attaching the leaves, backing, and bar pin.
How can I keep the petals in shape?
Overlap the outer petals, pin them into place, and let them dry as directed. Store the finished pin where the flower will not be compressed or caught on rough materials.
Can I use the rose without the bar pin?
The approved assembly includes a 1 ½-inch bar pin. If you choose another display method, treat that as an optional adaptation, because changing the backing or hardware may alter how the finished flower is supported.
Conclusion
This Crochet Felted Rose Pin Pattern combines layered petal shaping, leafy details, and wool felting into a charming handmade accessory. Make it in the specified Peony and Thyme colors or adapt the palette for a personal style. For additional felted-flower inspiration, see this felted rose pin pattern resource and this felted crochet heart project.